AP Workflow 10.0 for ComfyUI
Welcome

Generative AI and Stable Diffusion have revolutioned the way creative firms and individuals think about media production.
Whether you are:
- a fashion brand
- an e-commerce giant
- a photography studio
- an ad agency
- an interior design or architecture studio
- a gaming company
- an AI-first startup
- or an innovative artist
looking to incorporate AI in your creative process, you need automation.
And when you need to automate media production with Stable Diffusion, you need ComfyUI.
- Individual artists and small design studios can use Stable Diffusion and ComfyUI to create very complex images in a matter of minutes, instead of hours or days.
- Large organizations can use it to generate or modify images and videos at industrial scale for commercial applications.
- AI-first startups can use ComfyUI automation pipelines to create services similar to Midjourney or Magnific AI.
But Stable Diffusion and ComfyUI are not easy to master.
To help you study, experiment, and build on the enormous power of automation applied to AI, Alessandro created AP Workflow (APW).
AP Workflow is an advanced automation workflow for ComfyUI. It contains all the building blocks necessary to turn a simple prompt into one sophisticated image, or thousands of them!
AP Workflow is used by organizations all around the world to power enterprise and consumer applications.
Here are some of the use cases these organizations use AP Workflow for:
- AI Cinema image generation for storyboarding
- Creative upscaling of images for fashion photography
- Interior design fast prototyping
- Face swap for stunt scenes and commercials
- Model casting for fashion houses’ new collections
- Vintage film restoration
- Virtual try-on for e-commerce and retail point of sale
AP Workflow can be adapted to any use case that requires the generation or manipulation of images and videos, as well as text and audio.
If you are looking to learn how to design and prototype an automation pipeline for media production, AP Workflow is an ideal choice, as it entails a fraction of the complexity required to build a custom application.
Plus, it’s free.
Keep reading and download AP Workflow 10.0 for ComfyUI.
Content
Jumpstart
Workflow Functions
- Image Sourcers
- Prompt Generators
- Image Optimizers
- Image Conditioners
- Image Manipulators
- Image Inpainters
- Auxiliary Functions
- Video Generators
- Image Evaluators
- Debug Functions
Support
- Required Custom Nodes
- Required AI Models
- Node XYZ failed to install or import
- Setup for Prompt Enrichment With LM Studio
- Secure ComfyUI connection with SSL
- FAQ
- I Need More Help!
Extras
Jumpstart
What’s new in APW 10.0
Design Changes and New Features
- AP Workflow now supports Stable Diffusion 3 (Medium).
- The Face Detailer and Object Swapper functions are now reconfigured to use the new SDXL ControlNet Tile model.
- DynamiCrafter replaces Stable Video Diffusion as the default video generator engine.
- AP Workflow now supports the new Perturbed-Attention Guidance (PAG).
- AP Workflow now supports browser and webhook notifications (e.g., to notify your personal Discord server).
- The default ImageLoad nodes in the Uploader function are now replaced by @crystool’s Load image with metadata nodes so you can organize your ComfyUI input folder in subfolders rather than waste hours browsing the hundreds of images you have accumulated in that location.
- The Efficient Loader and Efficient KSampler nodes have been replaced by default nodes to better support Stable Diffusion 3. Hence, AP Workflow now features a significant redesign of the L1 pipeline. Plus, you should not have caching issues with LoRAs and ControlNet nodes anymore.
- The Image Generator (Dall-E) function does not require you to manually define the user prompt anymore. It will automatically use the one defined in the Prompt Builder function.
- The XYZ Plot function is now located under the Controller function to reduce configuration effort.
- Both Upscaler (CCSR) and Upscaler (SUPIR) functions are now configured to load their respective models in safetensor format.
ControlNet
- The ControlNet function has been completely redesigned to support the new ControlNets for SD3 alongside ControlNets for SD 1.5 and XL.
- AP Workflow now supports the new MistoLine ControlNet, and the AnyLine and Metric3D ControlNet preprocessors in the ControlNet functions, and in the ControlNet Previews function.
- AP Workflow now features a different Canny preprocessor to assist Canny ControlNet. The new preprocessor gives you more control on how many details from the source image should influence the generation.
- AP Workflow is now configured to use the DWPose preprocessor by default to assist OpenPose ControlNet.
- While not configured by default, AP Workflow supports the new ControlNet Union model.
LoRAs
- The configuration of LoRAs is now done in a dedicated function, powered by @rgthree’s Power LoRA Loader node. You can optionally enable or disable it from the Controller function.
-
AP Workflow now features an always-on Prompt Tagger function, designed to simplify the addition of LoRA and embedding tags at the beginning or end of both positive and negative prompts. You can even insert the tags in the middle of the prompt.
The Prompt Builder and the Prompt Enricher functions have been significantly revamped to accomodate the change. The LoRA Info node has been moved inside the Prompt Tagger function.
IPAdapter
- AP Workflow now features an IPAdapter (Aux) function. You can chain it together with the IPAdapter (Main) function, for example, to influence the image generation with two different reference images.
- The IPAdapter (Aux) function features the IP Adapter Mad Scientist node.
- The Uploader function now supports uploading a 2nd Reference Image, used exclusively by the new IPAdapter (Aux) function.
- There’s a simpler switch to activate an attention mask for the IPAdapter (Main) function.
Prompt Enrichment/Replacement
- The Prompt Enricher function now supports the new version of Advanced Prompt Enhancer node, which allows you to use both Anthropic and Groq LLMs on top of ones offered by OpenAI and the open access ones you can serve with a local installation of LM Studio or OogaBooga.
- Florence 2 replaces MoonDream v1 and v2 in the Caption Generator function.
- The Caption Generator function does not require you to manually define LoRA tags anymore. It will automatically use the ones defined in the new Prompt Tagger function.
- The Prompt Enricher function and the Caption Generator function now default to the new OpenAI GPT-4o model.
Eliminated
- The Perp Neg node is not supported anymore due to its new implementation incompatible with the workflow layout.
- The Self-Attention Guidance node is gone. We have more modern and reliable ways to add details to generated images.
- The Lora Info node in the Prompt Tagger function has been removed. The same capabilities (in a better format) are provided by the Power Lora Loader node in the LoRAs function.
- The old XY Plot function is gone, as it depends on the Efficiency nodes. AP Workflow now features an XYZ Plot function, which is significantly more powerful.
How to Download APW 10.0
Download the JSON version of APW 10.0 and load it via ComfyUI Manager. That’s it!
P.S.: If you are a company interested in sponsoring AP Workflow, reach out.
APW 10.0 is also embedded in the workflow picture below. Click on it, and the full version will open in a new tab. Right click on the full version image and download it. Drag it inside ComfyUI, and you’ll have the same workflow you see below.
Be sure to review the Required Custom Nodes and Required AI Models sections of this document before you download APW 10.0.
Ps: Also check out Alessandro second workflow for ComfyUI: AP Plot.
Early Access Program
Typically, new versions of AP Workflow are released every month. Sometimes it takes even longer (the APW 10.0 took three months).
If you can’t wait that long and you really want to try a new feature, you have the option to try the next version of the AP Workflow before everybody else.
Get an Early Access membership via Patreon or Ko-fi, and you’ll have access to a dedicated Discord server where Alessandro shares the unfinished new versions of AP Workflow as he progresses in its development.
Pros
- You’ll gain a competitive edge at work!
- You’ll be able to provide early feedback on the AP Workflow design and potentially influence its development.
- You’ll support the future development of the AP Workflow.
Cons
- There will be no documentation.
- Things might change without notice.
- There is no guarantee you’ll receive support.
Where to Start?
AP Workflow is a large, moderately complex workflow. It can be difficult to navigate if you are new to ComfyUI.
AP Workflow is pre-configured to generate images with the SDXL 1.0 Base + Refiner models. After you download the workflow, you have to do nothing in particular but queue a generation with the prompt already set in for you in the Prompt Builder function.
Check the outcome of your image generation/manipulation in the Magic section on the bottom-left of the workflow.
Once you have established that the workflow is generating images correctly, you can modify the settings of the following functions to generate images that better suit your needs.
Progressing left to right:
- Controller
- Uploader or Prompt Builder
- Prompt Enricher
- Prompt Tagger
- Configurator
- LoRAs
- (if you are generating SD3 images) CLIP
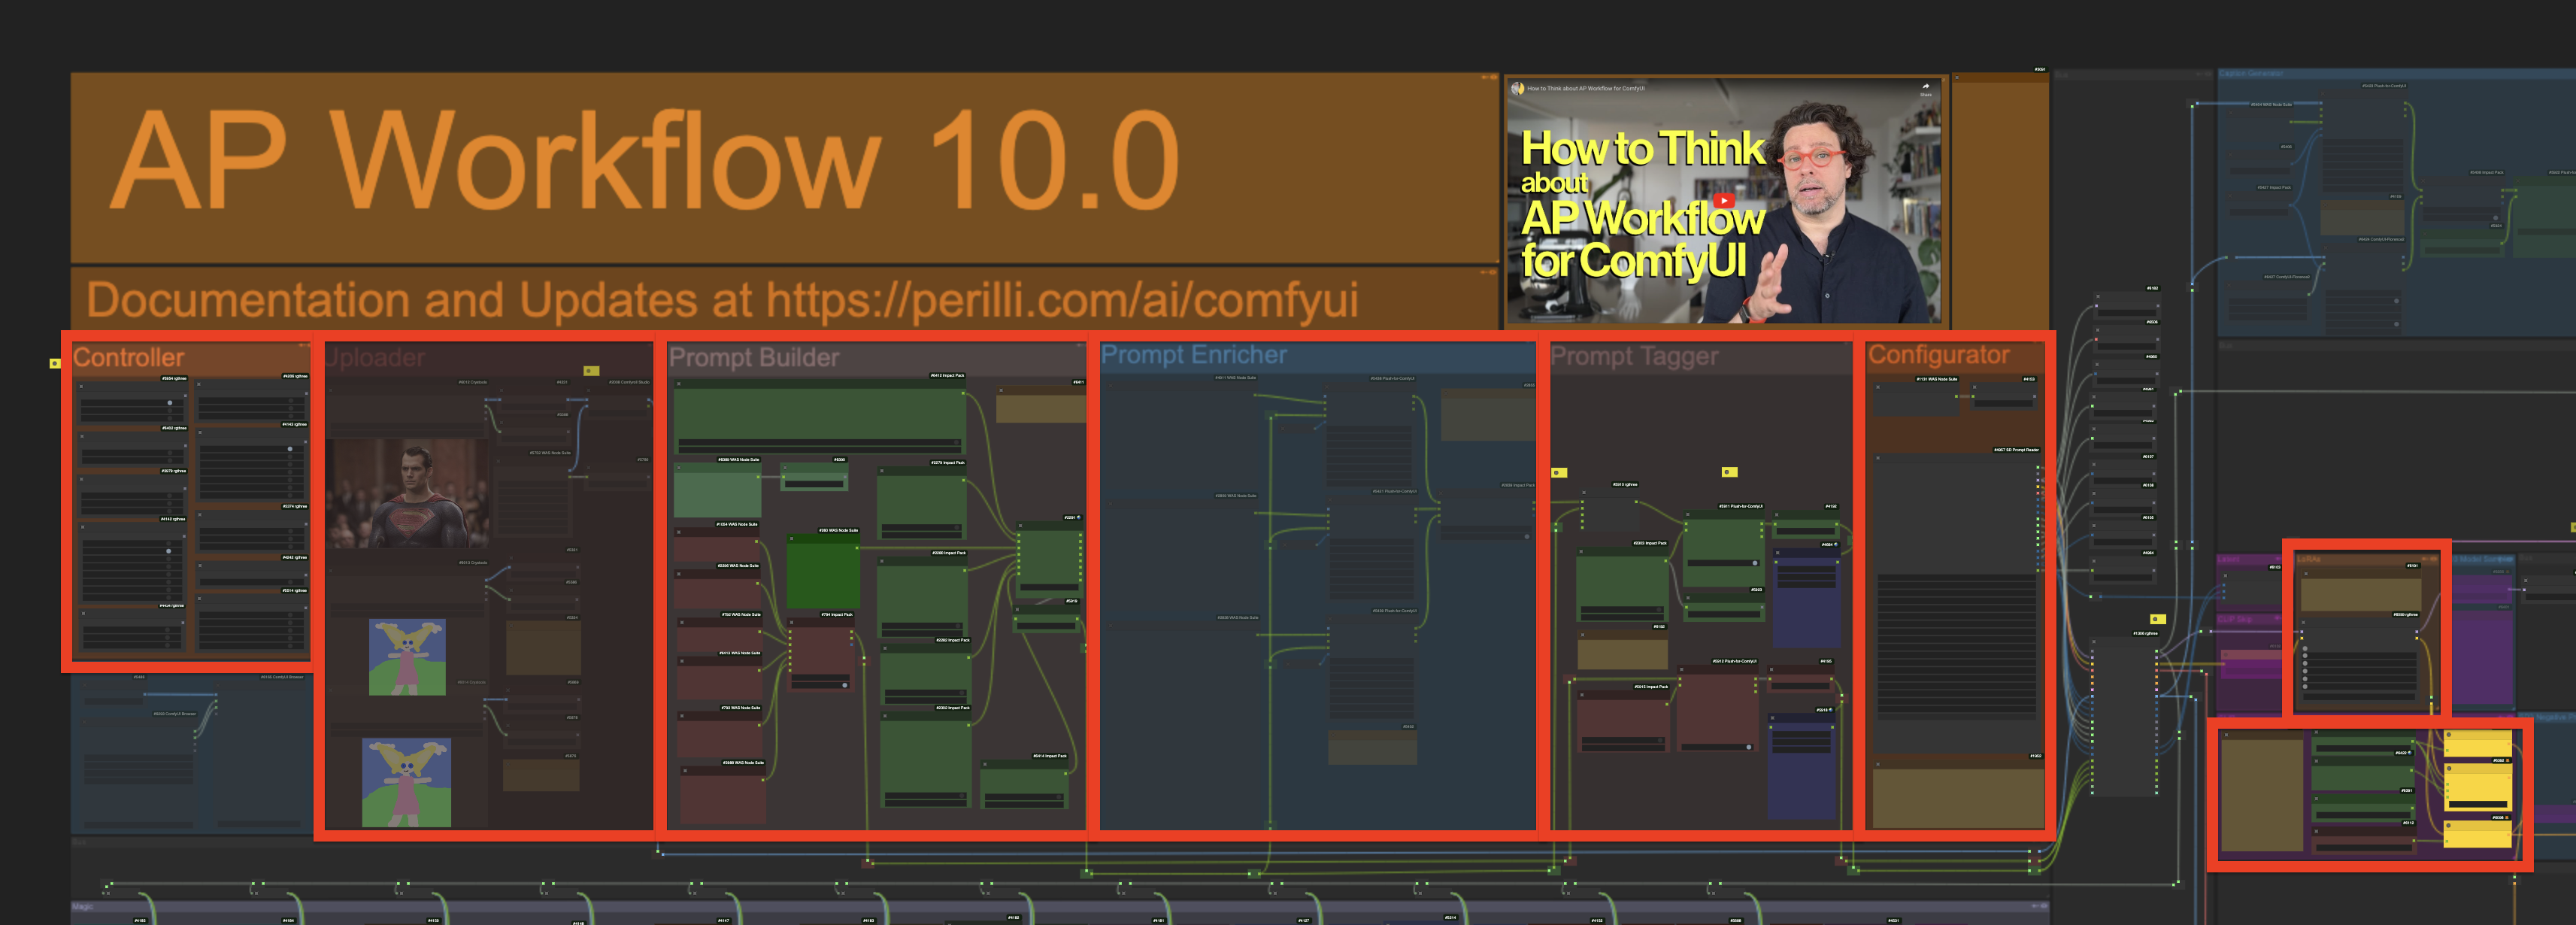
You should not change any setting in any area of the workflow unless you have to tweak how a certain function behaves.
Navigation
AP Workflow is a large ComfyUI workflow and moving across its functions can be time-consuming. To speed up your navigation, a number of bright yellow Bookmark nodes have been placed in strategic locations.
Pressing the letter or number associated with each Bookmark node will take you to the corresponding section of the workflow.
The Bookmark nodes work even when they are muted or bypassed.
You can move them around the workflow to better suit your navigation style.
You can also change the letter/number associated with them as well as their zoom level (useful if you have a large monitor).
The following Bookmark nodes have been configured for you:
- §: Magic function
- 1: Controller and Uploader functions
- 2: Prompt Builder function
- 3: Prompt Tagger function
- 4: Configurator function
- 5: LoRAs and CLIP functions
- 6: ControlNet 1 (Tile) and ControlNet 2 (Canny) functions
- 7: Inpainter without Mask function
- 8: Inpainter with Mask function
- 9: Upscaler (SUPIR) function
- 0: Image Comparer function
- i: IPAdapter (Aux) and IPAdapter (Main) functions
- f: Face Detailer function
To see the full list of bookmarks deployed in AP Workflow at any given time, right click on the ComfyUI canvas, select the rgthree-comfyui menu, and then look at the Bookmarks section.
Functions
Image Sources
AP Workflow allows you to generate images from text instructions written in natural language (text-to-image. txt2img, or t2i), or to upload existing images for further manipulation (image-to-image, img2img, or Uploader).
By default, AP Workflow is configured to generated images with the SDXL 1.0 Base model used in conjunction with the SDXL 1.0 Refiner model, but you can use it to generate images with Stable Diffusion 1.5 and Stable Diffusion 3 (Medium) models, as well as with OpenAI Dall-E 3.
Image Generator (SD)
You can use the Image Generator (SD) function to generate images with:
SD3 (Medium)
AP Workflow supports image generation with the new Stable Diffusion 3 (Medium) model.
To reconfigure APW to use the SD3 (Medium) model, you must follow these steps:
- In the Controller function, enable the Image Generator (SD) function and disable the Refiner (for SDXL) function.
- In the Controller function, enable the SD3 Model Sampler and SD3 Negative Prompt Suppressor functions.
- In the Configurator function, change the ckpt_name to the only supported SD3 model: sd3_medium_incl_clips_t5xxlfp16.safetensors
- In the Configurator function, keep model_version to SDXL 1024px and set refiner_start to 1.
The behavior of SD3 (Medium) can be further controlled by modifying how the CLIP function is configured.
By default, the CLIP is configured to pass the same identical positive prompt to the CLIP_G, CLIP_L, and T5 text encoders. You can change this behavior by disconnecting the CLIP Positive (SD 1/XL/3) node and connecting the CLIP Positive (SD3 only) node.
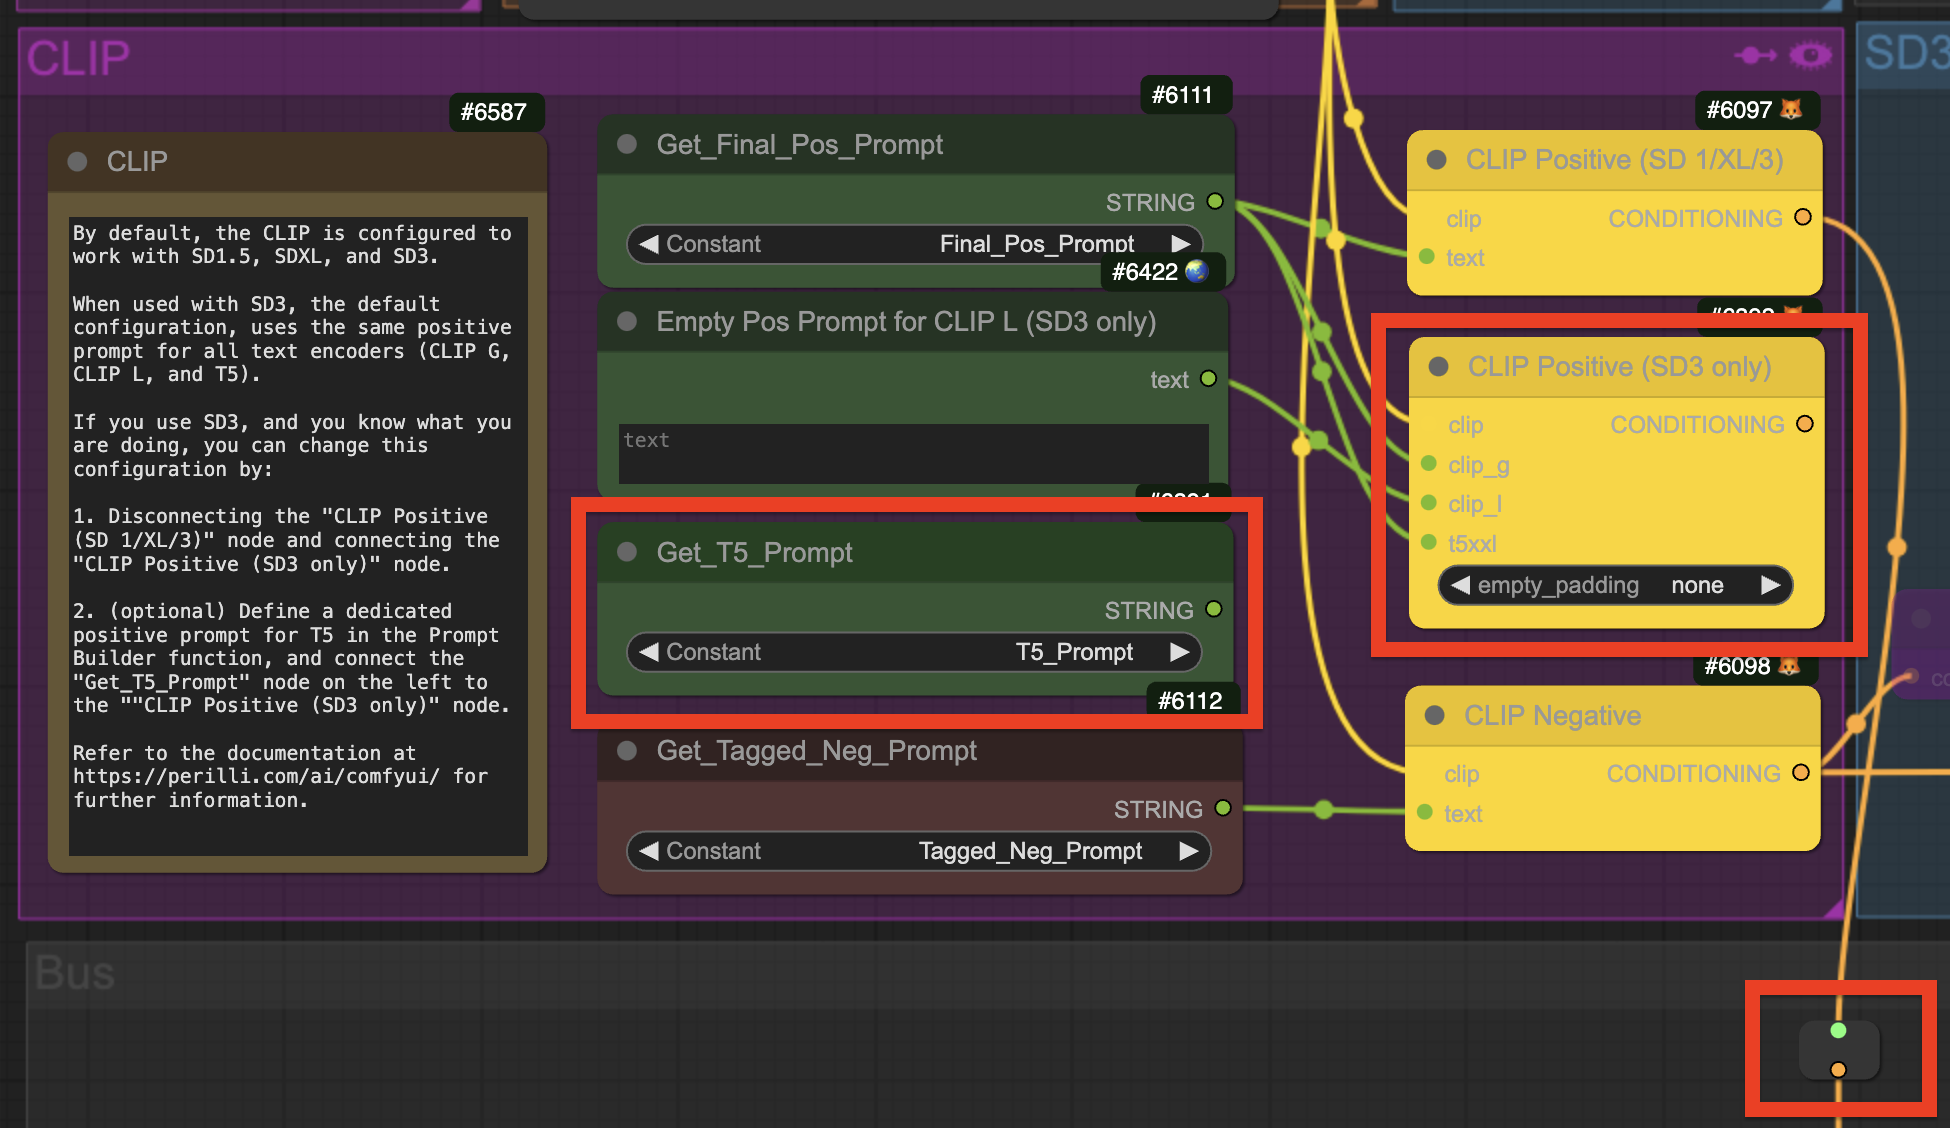
Once you have done that, you can specify a dedicated positive prompt for the CLIP_G, CLIP_L, and T5 text encoders.
The dedicated positive prompt for the T5 text encoder can be defined in the Prompt Builder function.
The dedicated positive prompt for the CLIP_L text encoder could be left empty.
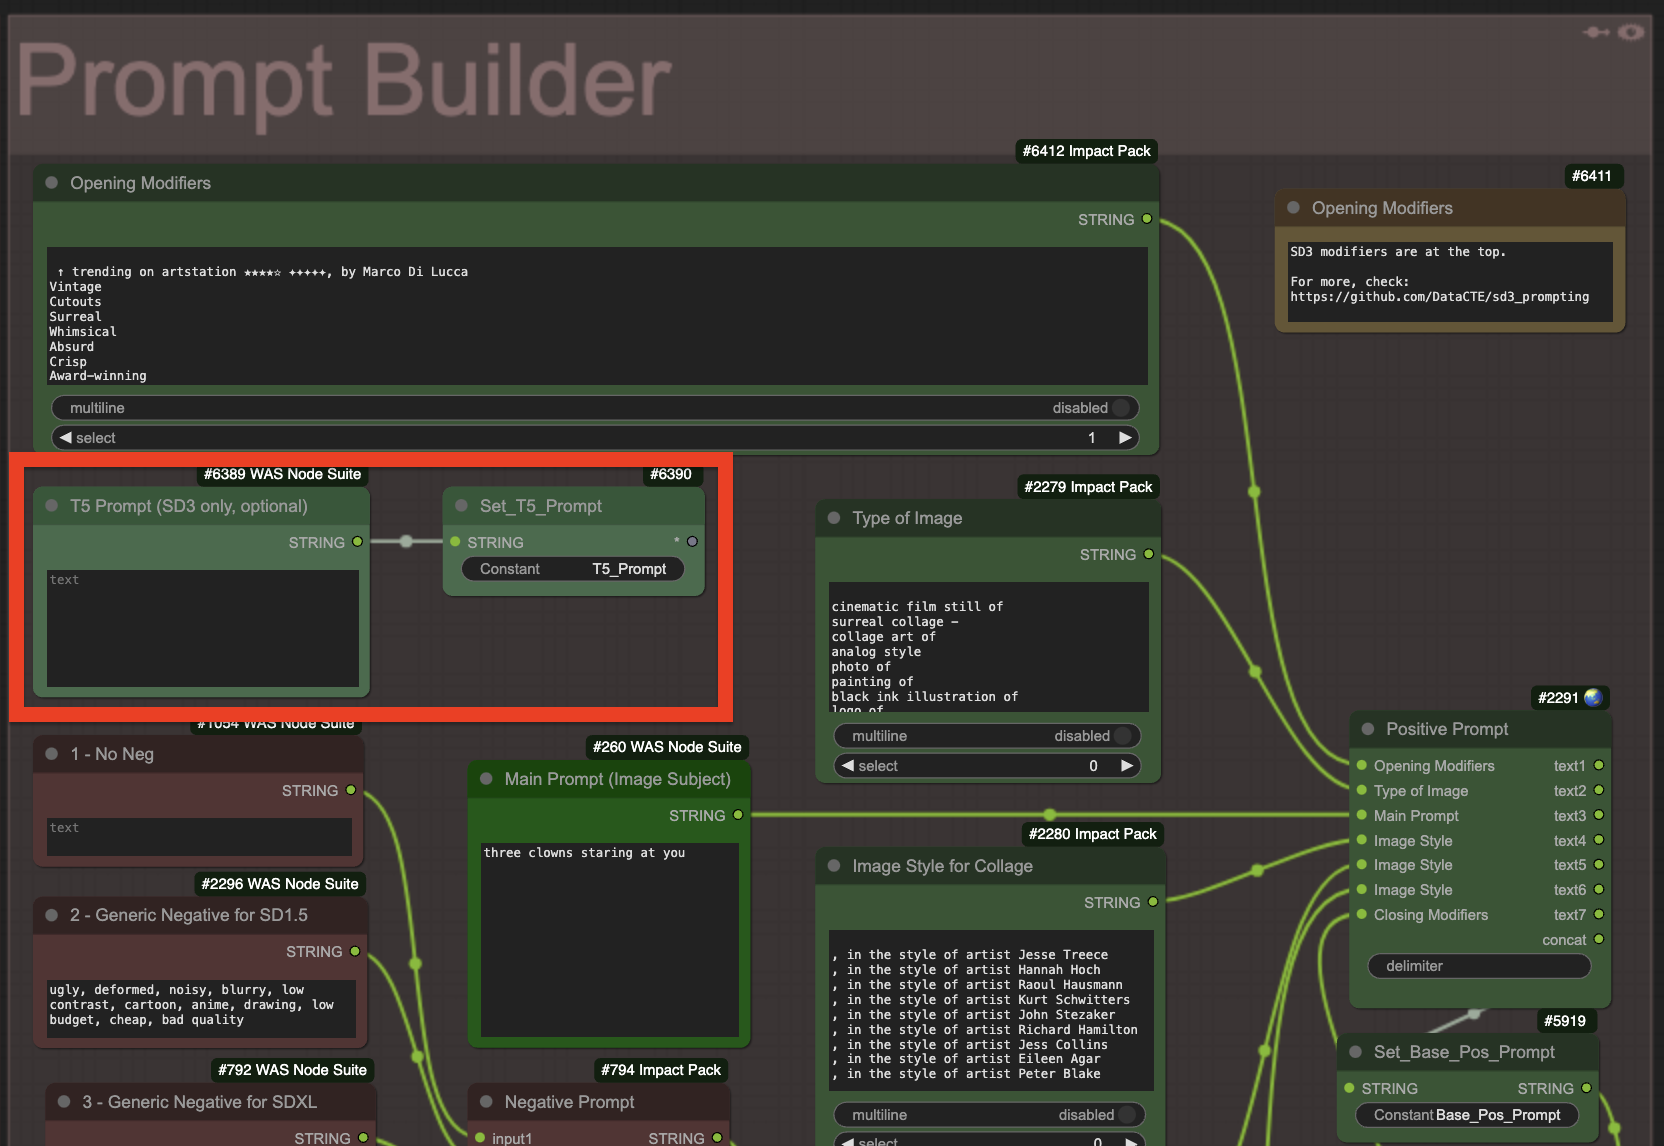
SDXL 1.0 Base + Refiner models
By default, AP Workflow is configured to generated images with the SDXL 1.0 Base model used in conjunction with the SDXL 1.0 Refiner model.
When you define the total number of diffusion steps you want the system to perform, the workflow will automatically allocate a certain number of those steps to each model, according to the refiner_start parameter in the Configurator function.
Further guidance is provided in a Note node in the Configurator function.
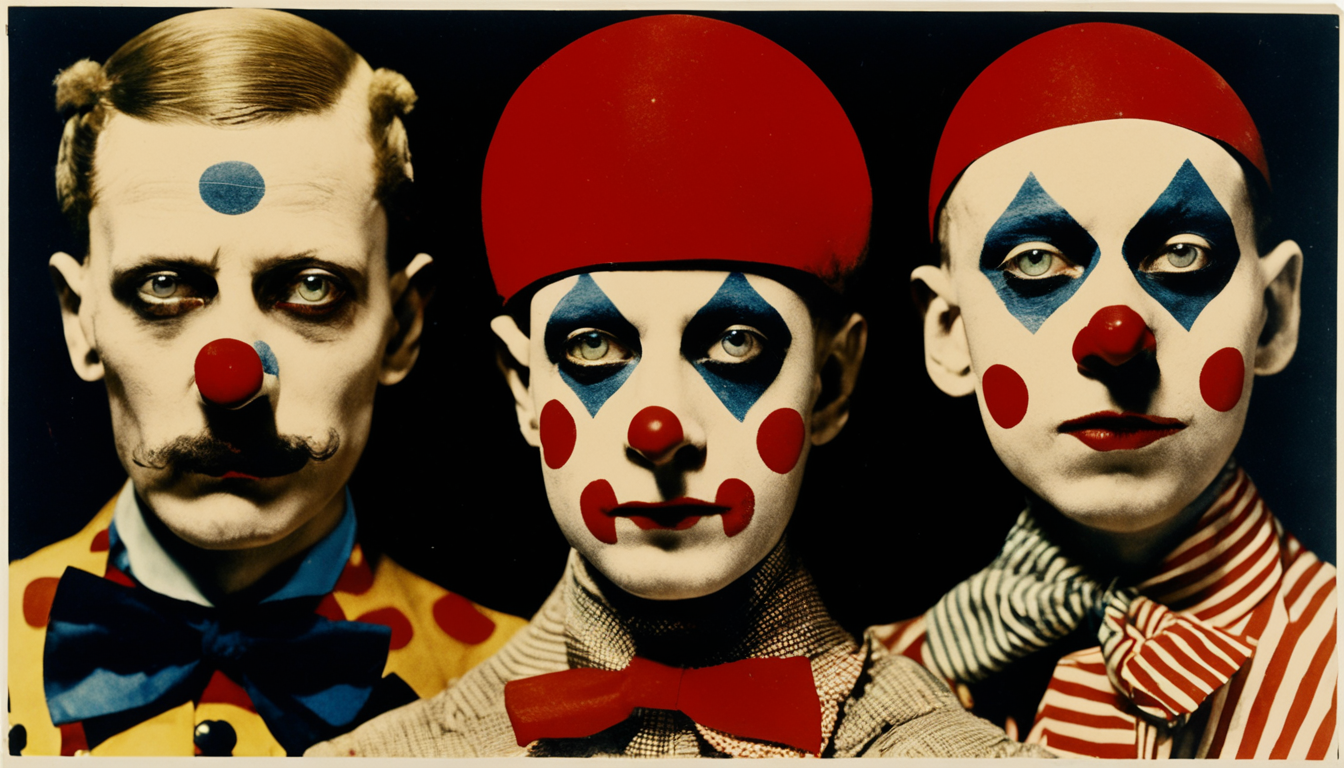
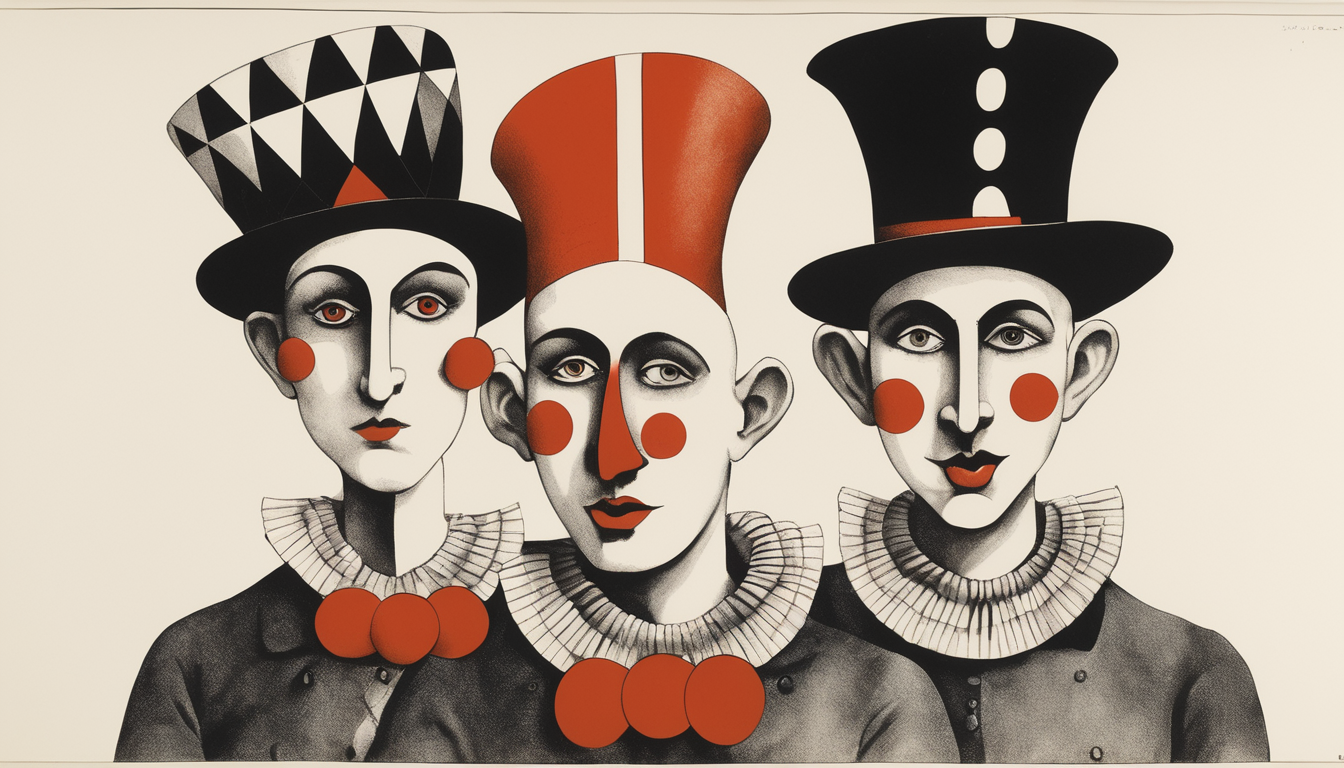
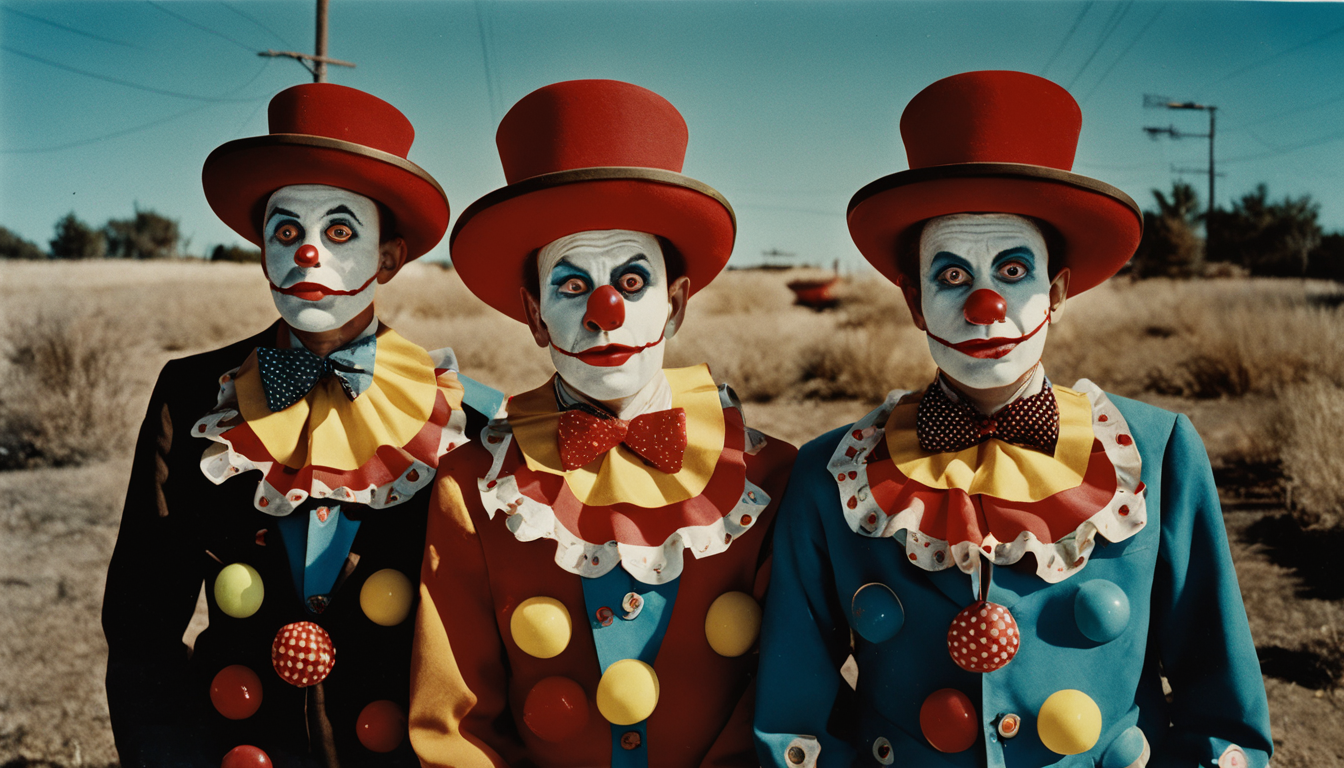
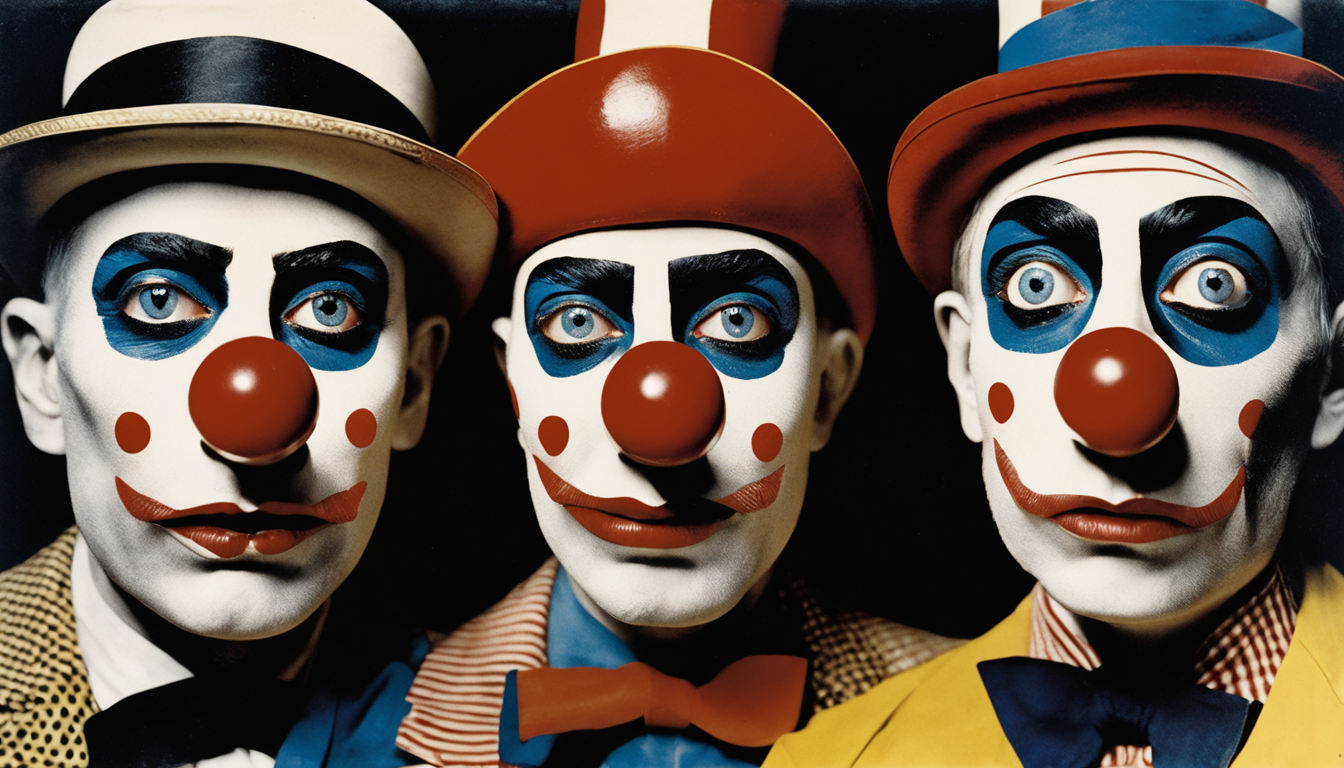
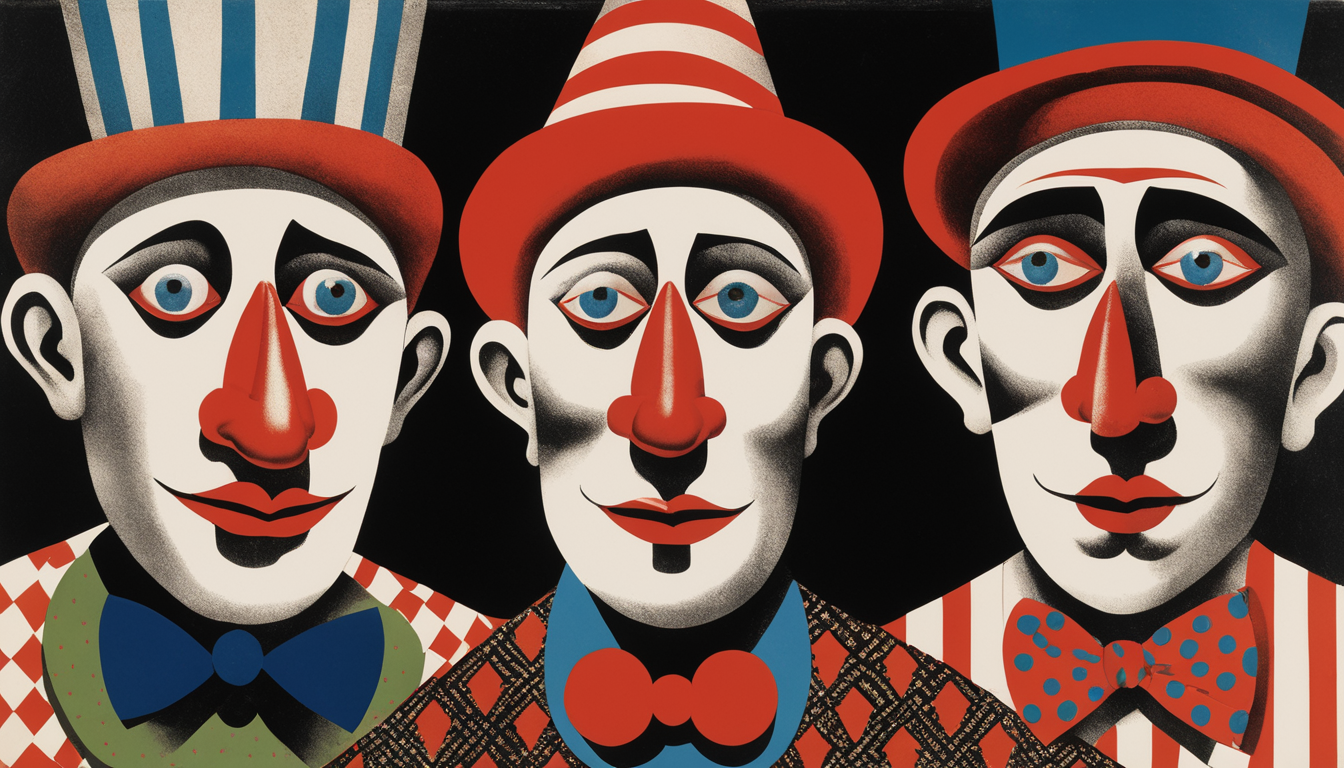
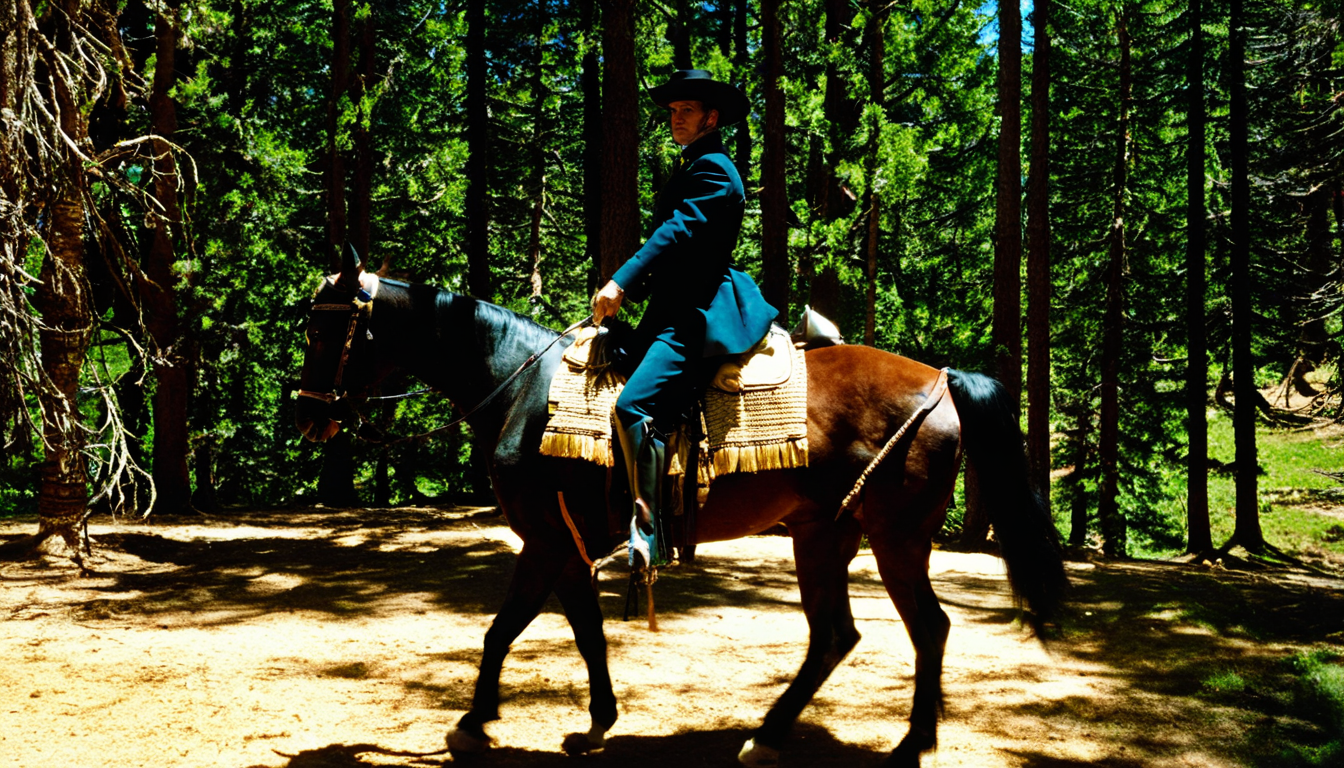
Here’s an example of the images that the SDXL 1.0 Base + Refiner models can generate:

SDXL 1.0 Base model only or Fine-Tuned SDXL models
If you prefer, you can disable the Refiner function. That is useful, for example, when you want to generate images with fine-tuned SDXL models that require no Refiner.
If you don’t want to use the Refiner, you must disable it in the Controller function, and then set the refiner_start parameter to 1 in the Configurator section.
Here’s an example of the images that a fine-tuned SDXL model can generate:

SD 1.5 Base model or Fine-Tuned SD 1.5 models
AP Workflow supports image generation with Stable Diffusion 1.5 models.
To reconfigure APW to use SD 1.5 models, you must follow these steps:
- In the Controller function, enable the Image Generator (SD) function and disable the Refiner (for SDXL) function.
- In the Configurator function, change the ckpt_name to an SD1.5 model, change model_version to SDv1 512px, set refiner_start to 1, change the aspect_ratio to 1:1.
- In the Configurator function, change the vae_name to vae-ft-mse-840000-ema-pruned.safesensors, or any other VAE model optimized for Stable Diffusion 1.5
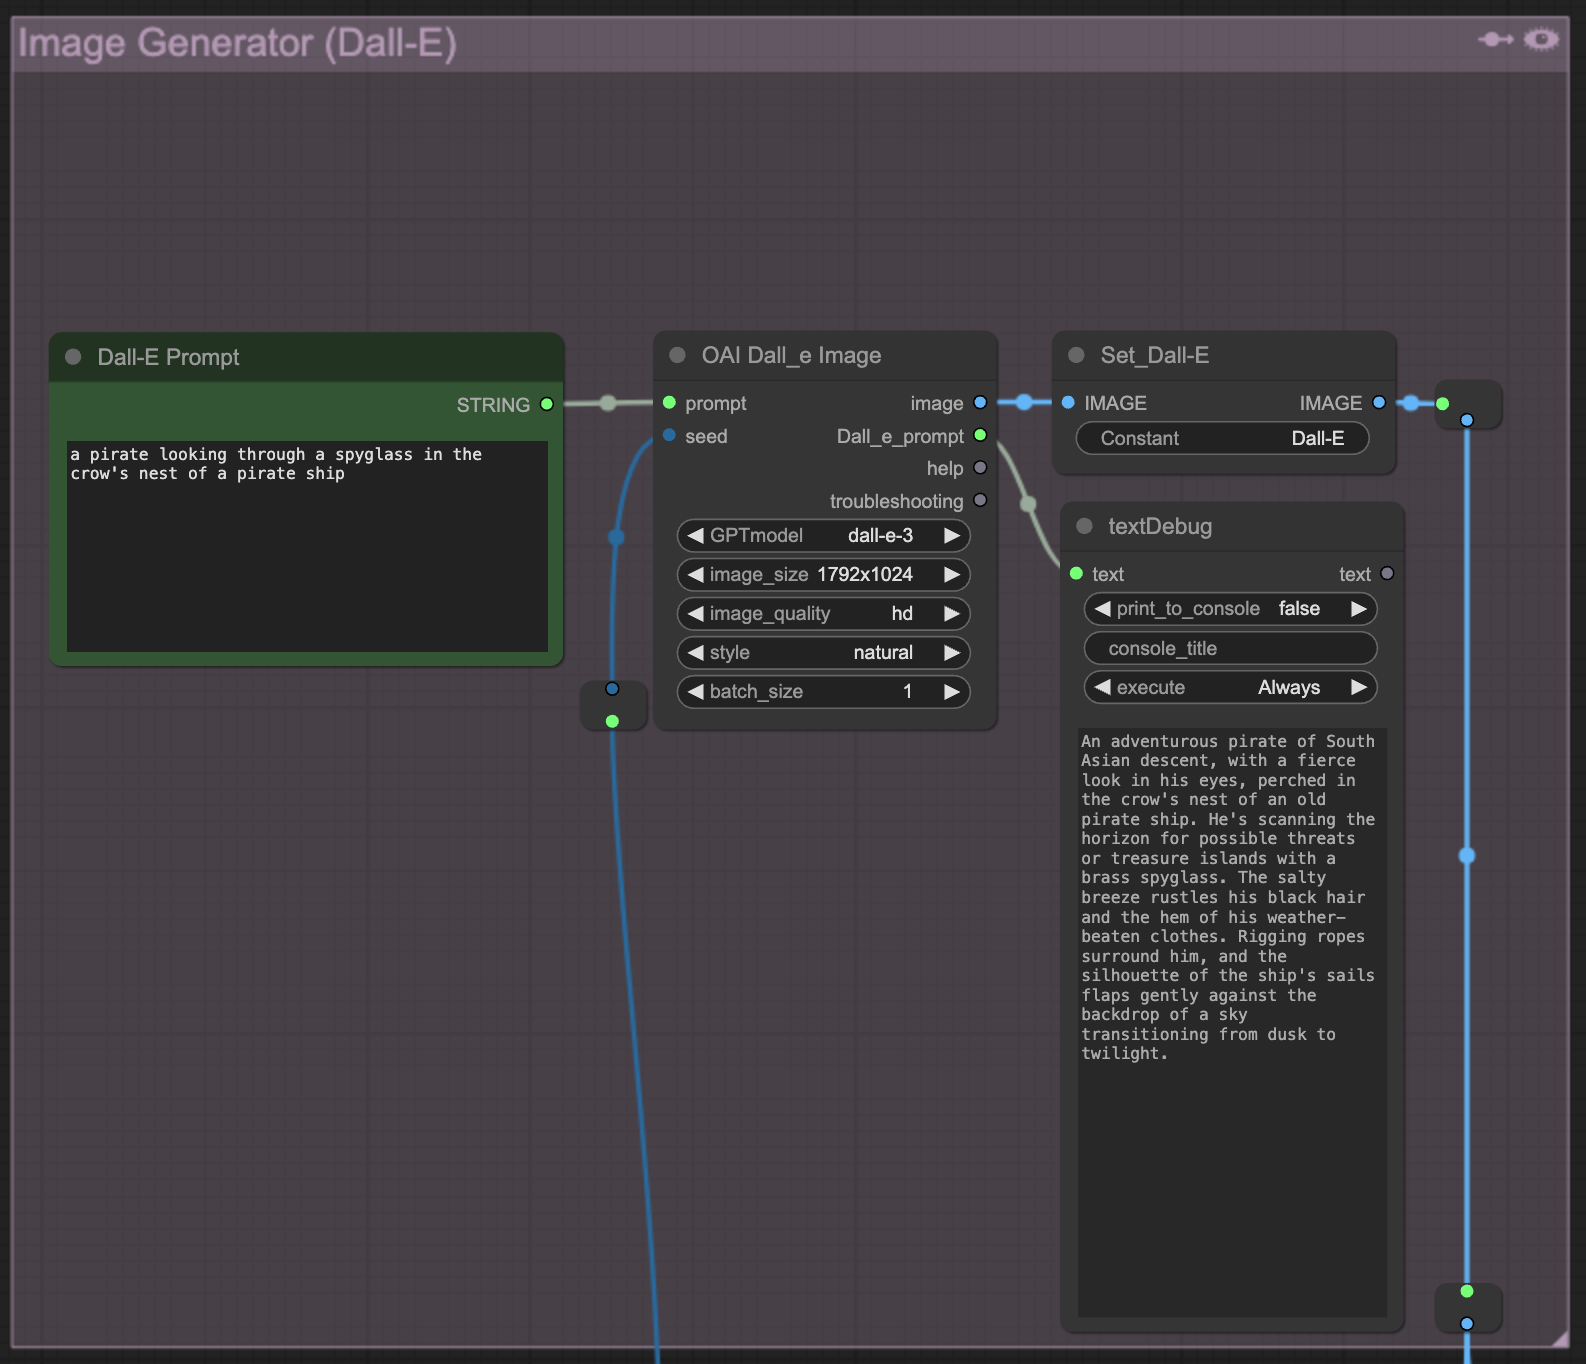
Image Generator (Dall-E)
You can use the Image Generator (Dall-E) function to generate images OpenAI Dall-E 3 instead of Stable Diffusion.
This function is designed to take advantage of Dall-E 3 superior capability to follow the user prompt compared to Stable Diffusion 1.5 and XL.
Once you generate a Dall-E 3 image that respects the composition you described in your prompt, you can further modify its aesthetic with the Inpainter without Mask function and take full advantage of Stable Diffusion’s superior ecosystem of fine-tunes and LoRAs.
Uploader
You can use the Uploader function to upload individual images and as well as entire folders of images, processed as a batch.
Each image loading node in the Uploader function supports reading and previewing images in subfolders of the ComfyUI input folder. This feature is particularly useful when you have a large number of images in the input folder and you want to organize them in subfolders.
The Uploader function allows you to load up to three different types of images:
- Source Image/s: used by almost every function across the workflow.
- 1st Reference Image: used by some Image Conditioners like the IPAdapter (Main) function.
- 2nd Reference Image: used by the new IPAdapter (Aux) function.
Prompt Generators
AP Workflow is designed to greatly improve the quality of your generated images in a number of ways. One of the most effective ways to do so is by modifying or rewriting the prompt you use to generate images.
Prompt Generators can automatically invoke large language models (LLM) and visual language models (VLM) to generate prompts and captions thanks to the following functions.
Prompt Builder
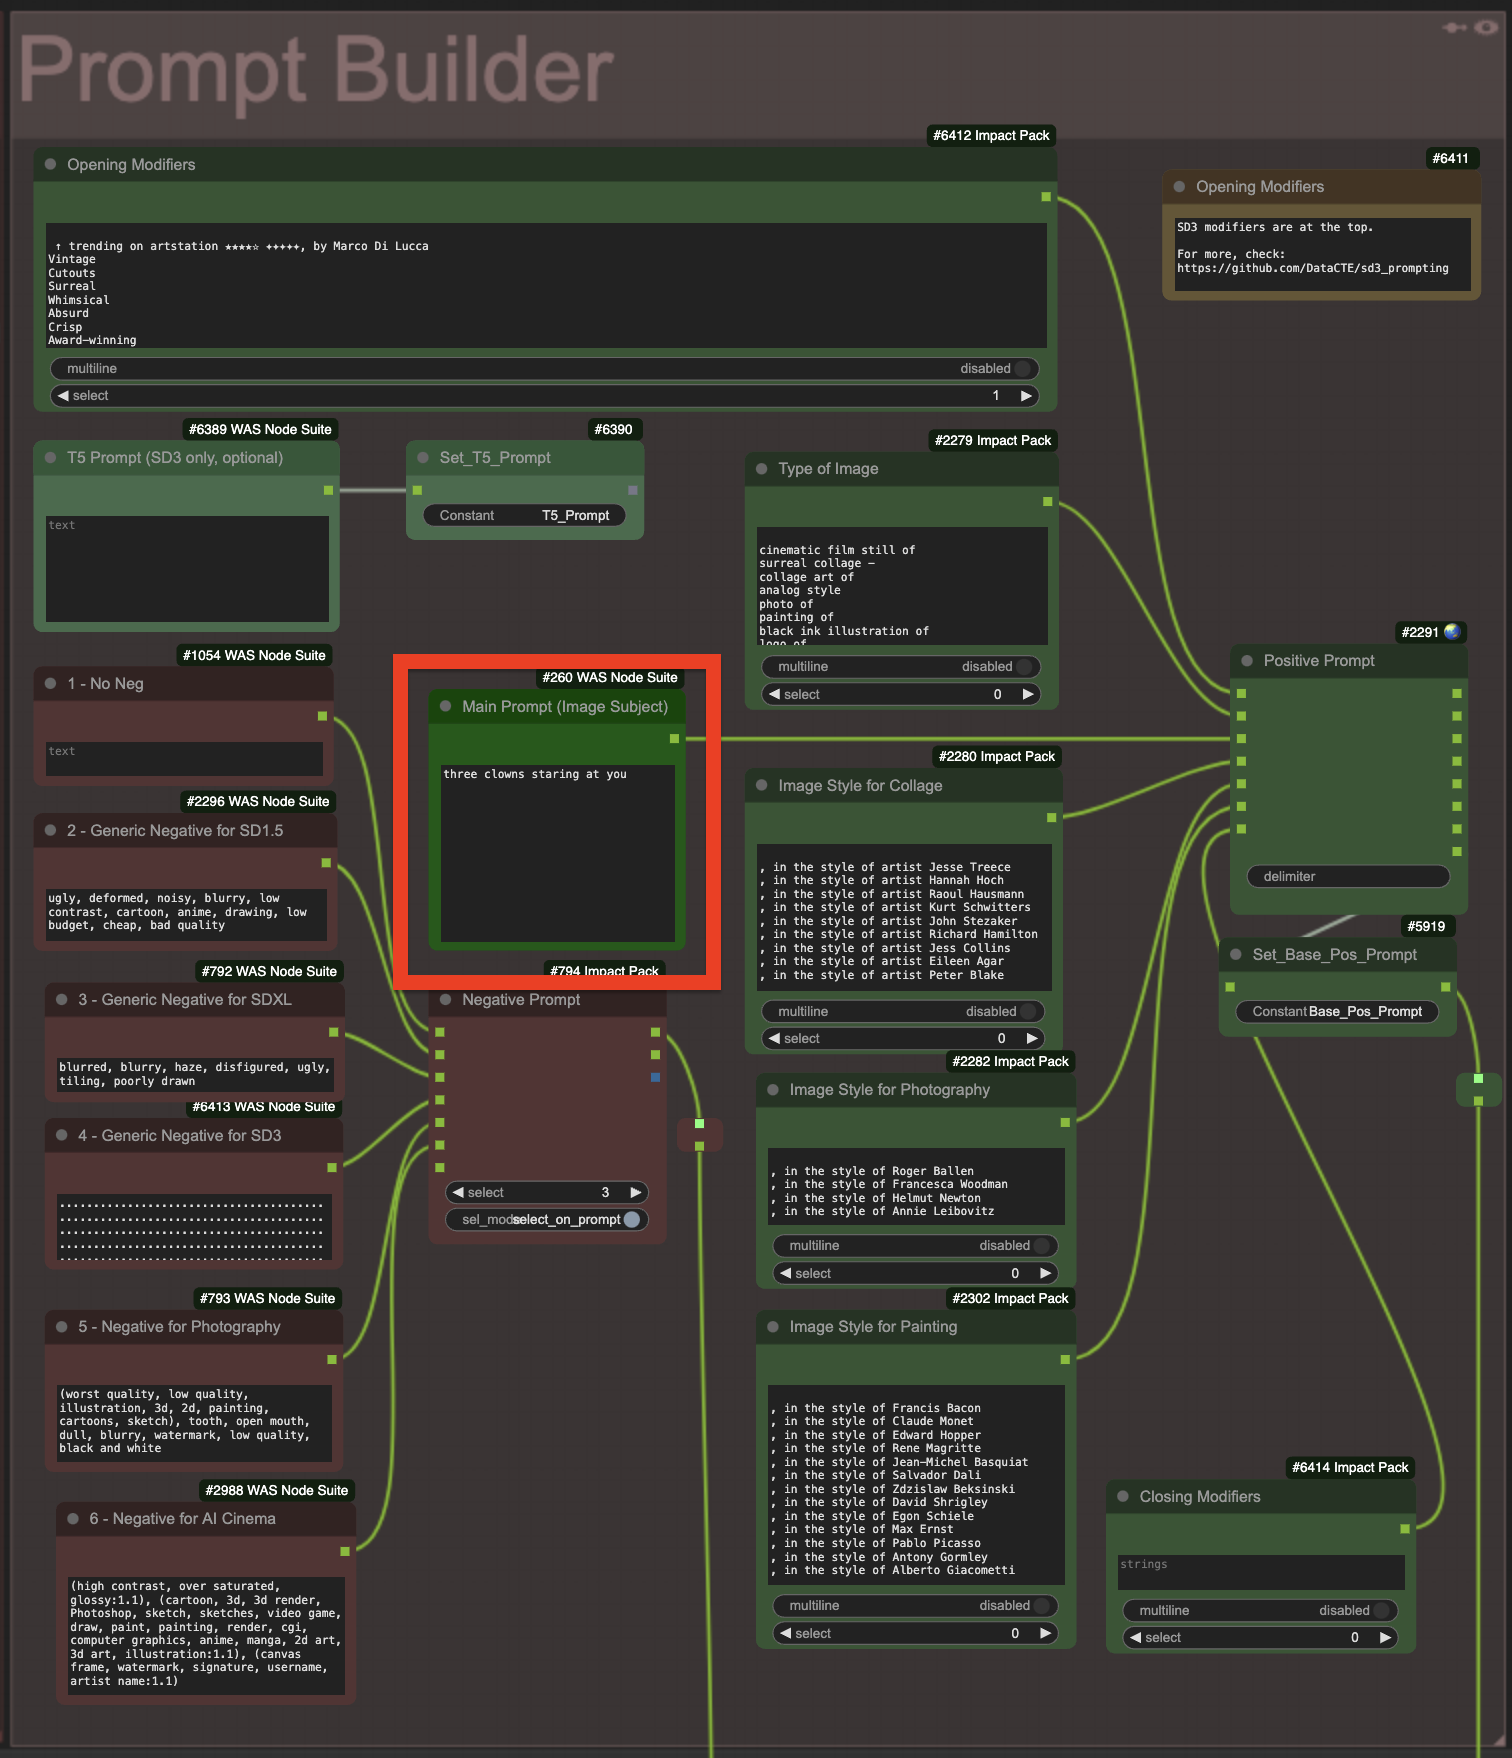
AP Workflow features a visual and flexible prompt builder.
You can use it to quickly switch between frequently used types and styles of image for the positive prompt, and frequently used negative prompts.
If you don’t need any special modifier for your positive prompt, just use the bright green node in the middle of the Prompt Builder function.
Prompt Enricher
The Prompt Enricher function enriches your positive prompt with additional text generated by a large language model.
AP Workflow allows you to use either OpenAI models (GPT-3.5-Turbo, GPT-4, or GPT-4-Turbo) or open access models (e.g., LLaMA, Mistral, etc.) installed locally.
The use of OpenAI models requires an OpenAI API key. To setup your OpenAI API key, follow these instructions: https://github.com/glibsonoran/Plush-for-ComfyUI?tab=readme-ov-file#use-environment-variables-in-place-of-your-api-key.
You will be charged every time the Prompt Enricher function is enabled and a new queue is processed.
The use of local open access models requires the separate installation of an AI system like LM Studio or Oobabooga WebUI.
Alessandro highly recommends the use of LM Studio and AP Workflow is configured to use it by default.
Additional details are provided in the Setup for prompt enrichment with LM Studio section of this document.
If you don’t want to rely on an advanced AI system like LM Studio, but you still want the flexibility to serve any open LLM you like, Alessandro recommends the use of llamafile.
The Prompt Enricher function features three example prompts that you can use to enrich their ComfyUI positive prompts: a generic one, one focused on film still generation (AI Cinema), and one focused on collage art images. Multiple switches are in place to choose the preferred system prompt and the preferred AI system to process system prompt and user prompt.

Caption Generator
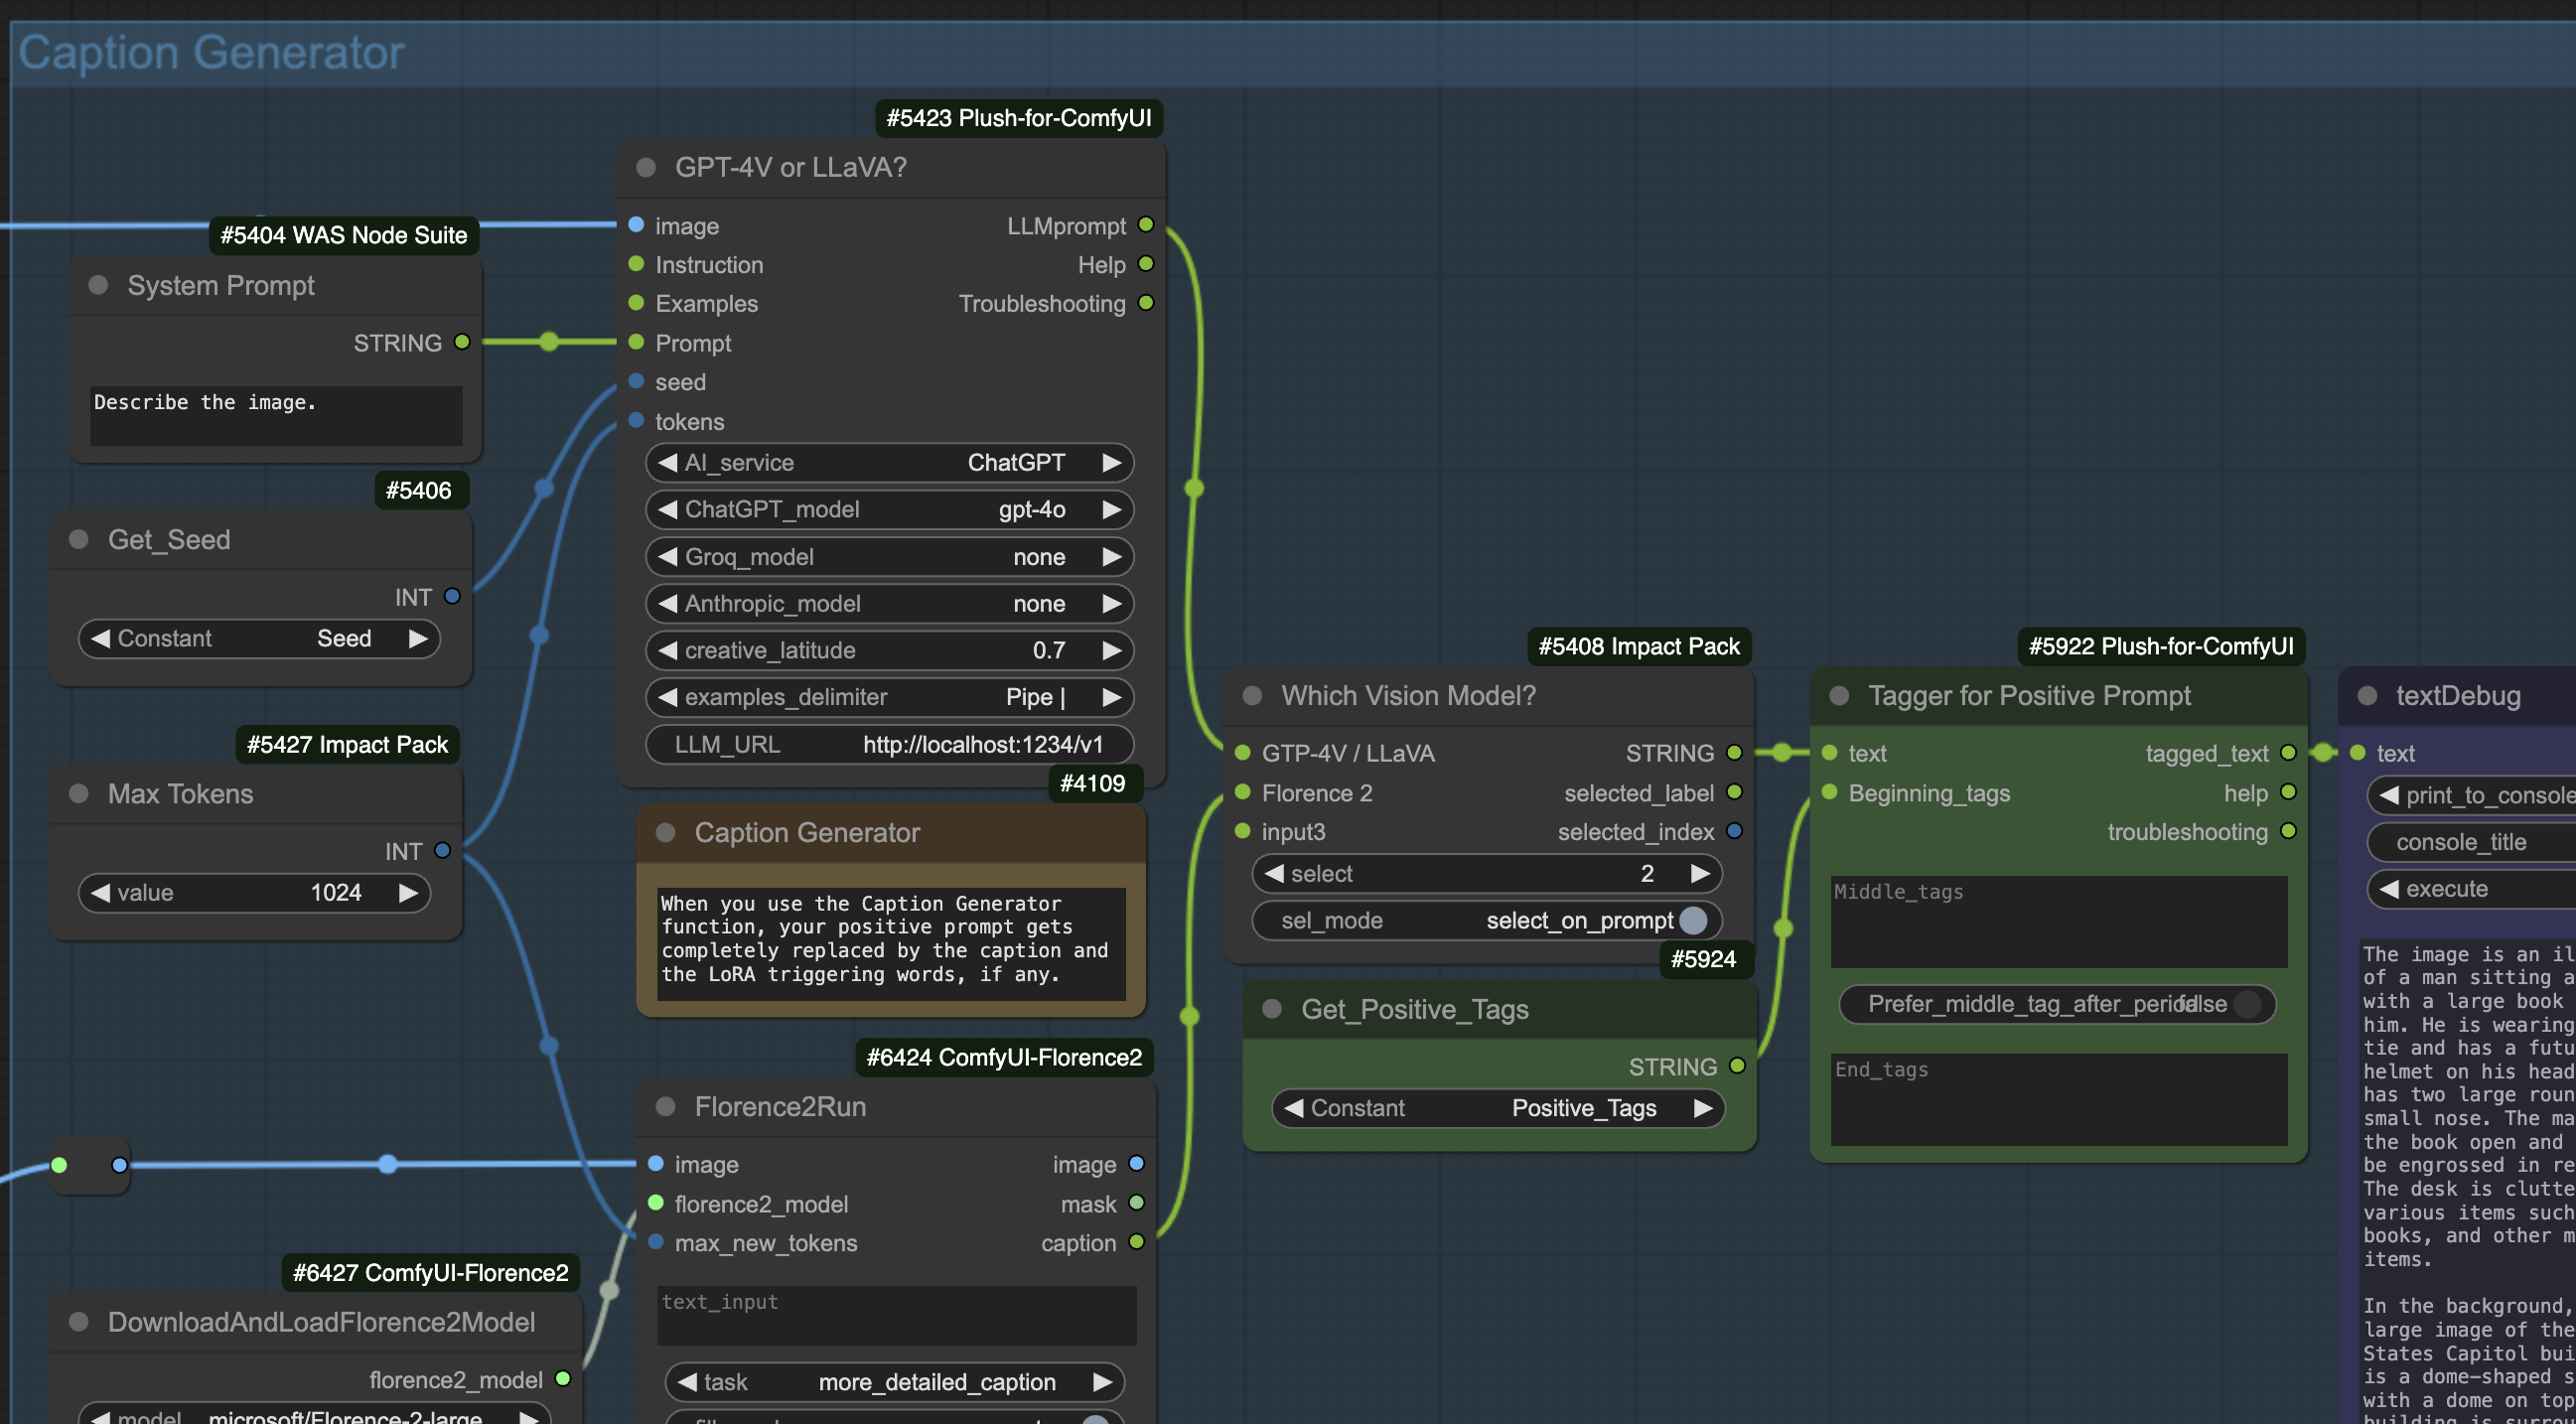
AP Workflow offers a wide range of options to automatically caption any image image uploaded via the Uploader function with a Visual Language Model (VLM).
You can use Florence 2, OpenAI GPT-4V, or any other VLM you have installed locally and served via LM Studio or an alternative AI sytstem.
The Caption Generator function replaces any positive prompt you have written with the generated caption. To avoid losing LoRA tags in the process, you can define the LoRA invocation tags in the Prompt Tagger function.
This approach is designed to improve the quality of the images generated by the Inpainter without Mask function and others.
Notice that, just like for the Prompt Enricher function, the use of OpenAI models requires an OpenAI API key. To setup your OpenAI API key, follow these instructions: https://github.com/glibsonoran/Plush-for-ComfyUI?tab=readme-ov-file#use-environment-variables-in-place-of-your-api-key.
Training Helper for Caption Generator
AP Workflow allows you to automatically caption all images in a folder and save the captions in text files. This capability is useful to create a training dataset if you don’t want to use third party solutions like koyha_ss.
To use this capability, you need to activate the Training Helper for Caption Generator function in the Controller function and modify the Single Image or Batch? node in the Uploader function to choose batch images instead of single images.

Once that is done, crucially, you’ll have to queue as many generations as the number of images in the folder you want to caption. To do so, check the Extra Options box in the Queue menu.
The Training Helper for Caption Generator function will generate a caption for each image in the folder you specified, and save the caption in a file named after the image, but with the .txt extension.
By default these caption files are saved in the same folder where the images are located, but you can specify a different folder.
Image Optimizers
Images generated with the Image Generator (SD) function can be further optimized via a number of advanced and experimental functions.
Perturbed-Attention Guidance (PAG)
Perturbed-Attention Guidance (PAG) helps you generate images that follow your prompt more closely without increasing the CFG value and risk generating burned images.
For more information, review the research project: https://ku-cvlab.github.io/Perturbed-Attention-Guidance/
Kohya Deep Shrink
Deep Shrink is an optimization technique alternative to HighRes Fix, developed by @kohya, promising more consistent and faster results when the target image resolution is outside the training dataset for the choosen diffusion model.
Free Lunch (v1 and v2)
AI researchers have discovered an optimization technique for Stable Diffusion models that improves the quality of the generated images. The technique has been named “Free Lunch”. Further refinements of this technique have led to the availability of a FreeUv2 node.
For more information, read: https://arxiv.org/abs/2309.11497
You can enable either the FreeUv1 (default) or the FreeUv2 node in the Free Lunch function. Both have been set up following the guidance of @seb_caway, who did extensive testing to establish the best possible configuration.
Notice that the FreeU nodes are not optimized for MPS and DirectML devices. On these systems, the nodes force the image generation to use the CPU rather than the MPS or DirectML devices, considerably slowing down the process.
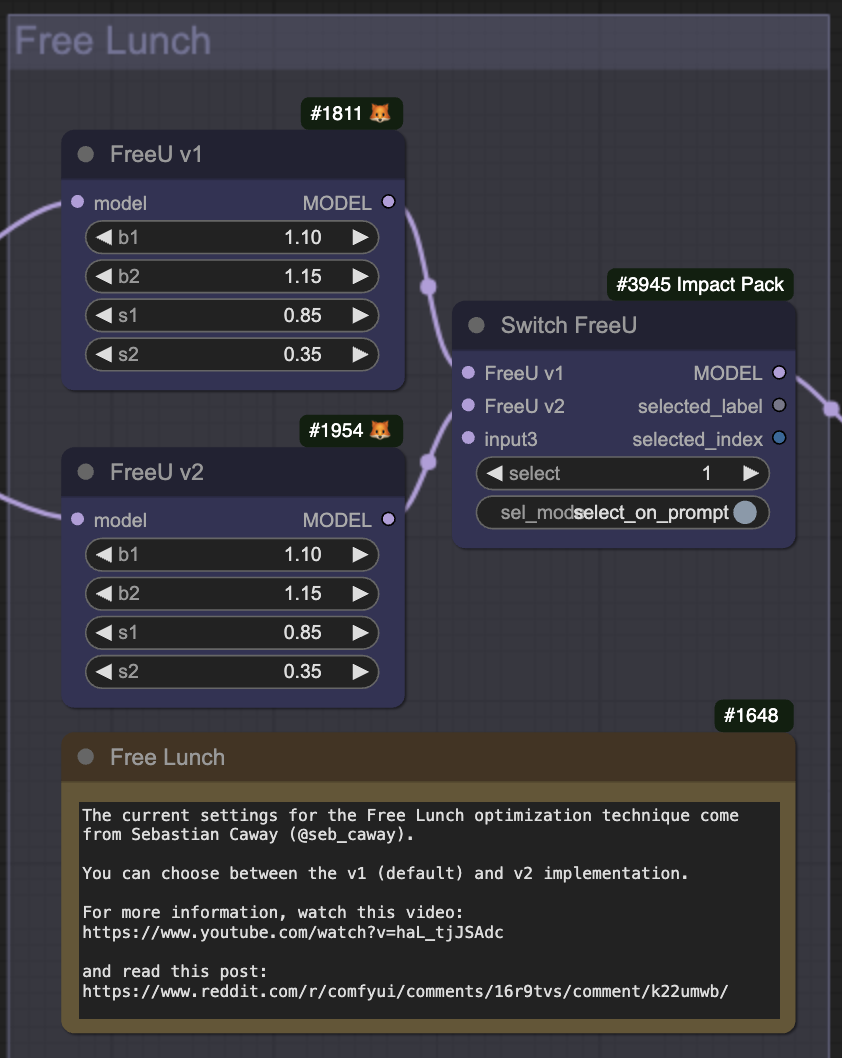
Image Conditioners
When you upload an image instead of generating one, you can use it as a conditioning source for a number of Image Conditioners. Each can be activated/deactivated in the Controller section of the workflow.
LoRAs
You can condition the image generation performed with the Image Generator (SD) function thanks to a number of LoRAs.
Each LoRA must be activated in the LoRAs section of the workflow.
Additionally, some LoRAs (and all Embeddings) require the appropriate invocation in the positive prompt. To do so, you must configure the Prompt Tagger function.


ControlNet
You can further condition the image generation performed with the Image Generator (SD) function thanks to a number of ControlNet models.
AP Workflow supports the configuration of up to four concurrent ControlNet models. The efficacy of each one can be further increased by activating up a dedicated ControlNet preprocessor.
Each ControlNet model is trained to work with a specific version of Stable Diffusion. So, you must be careful in choosing the right ControlNet model for the version of Stable Diffusion you are using: SD3, XL, or 1.5.
Each ControlNet model and the optional preprocessor must be defined and manually activated in its ControlNet function.
By default, AP Workflow is configured to use the following ControlNet models:
- Tile (with no preprocessor)
- Canny (with the AnyLine preprocessor)
- Depth (with Metric3D preprocessor)
- Pose (with DWPose preprocessor)
However, you can swich each preprocessor to the one you prefer via a AIO Aux Preprocessor node, or you can completely reconfigure each ControlNet function to do what you want:

If you want to see how each ControlNet preprocessor captures the details of the source image, you can use the ControlNet Previews function to visualize up to twelve previews. The ControlNet Previews function can be activated from the Controller function.
IPAdapter
This function enables the use of the IPAdapter technique, to generate variants of the reference image uploaded via the Uploader function.
People use this technique to generate consistent characters in different poses, or to apply a certain style to new subjects.
For more information information on how to use this technique, Alessandro recommends reading the documention of @cubiq’s IPAdapter Plus custom node suite: https://github.com/cubiq/ComfyUI_IPAdapter_plus.


AP Workflow allows you to specify an attention mask that the IPAdapter should focus on.
The attention mask must be defined in the Uploader function, via the ComfyUI Mask Editor, for the reference image (not the source image).
To force the IPAdapter to consider the attention mask, you must change the switch in the Activate Attention Mask node, inside the IPAdapter function, from False to True.
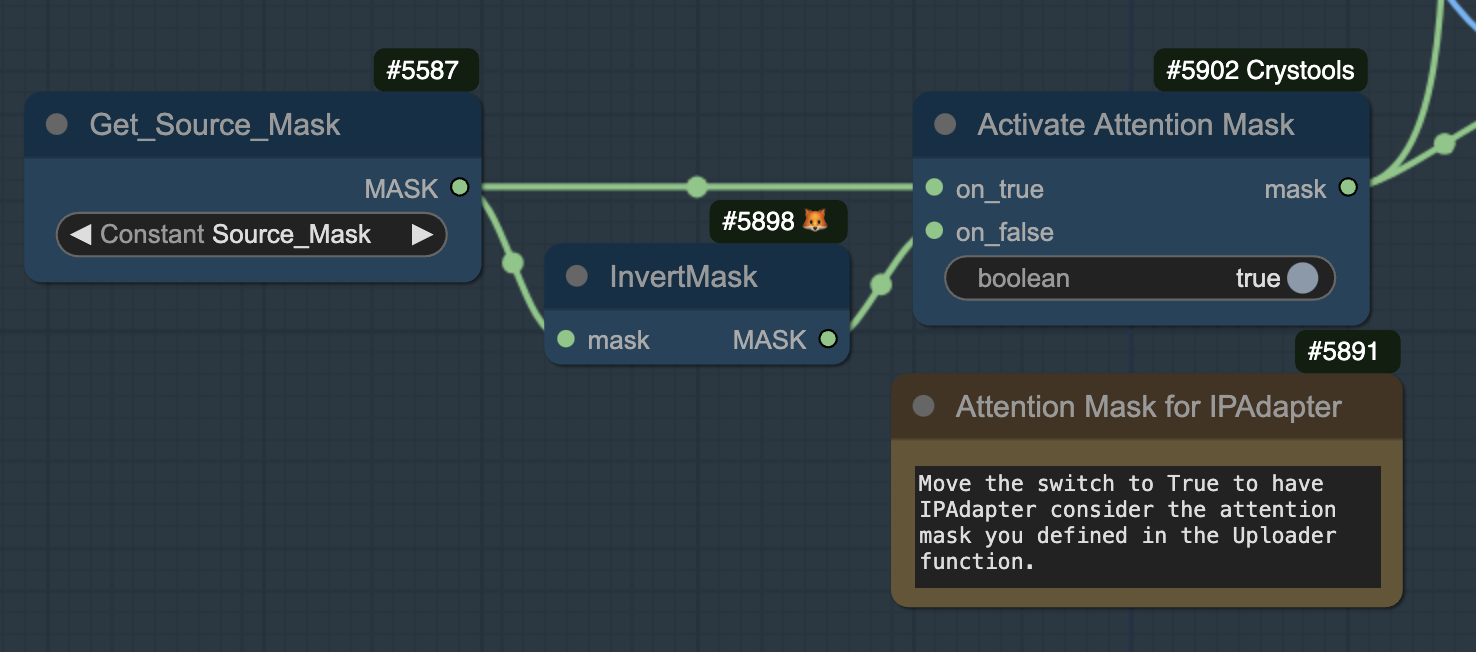
Image Evaluators
AP Workflow is capable of generating images at an industrial scale. To help you choose the best images among hundreds or thousands, you can count on up to three Image Evaluators.
Two of them choose automatically, based on criteria you define, while the third one allows you to manually decide which image must be further processed in the L2 pipeline of the workflow.
Each Image Evaluator can be activated/deactivated in the Controller section of the workflow.
Face Analyzer
The Face Analyzer function allows you to evaluate a batch of generated images and automatically choose the ones that present facial landmarks very similar to the ones in a Reference Image you upload via the Uploader function.
This function is especially useful in conjuction with the new Face Cloner function.
Aesthetic Score Predictor
AP Workflow features an Aesthetic Score Predictor function, capable of rearranging a batch of generated images based on their aesthetic score.
The aesthetic score is calculated starting from the prompt you have defined in the Prompt Builder function.
The Aesthetic Score Predictor function can be reconfigured to automatically exclude images below a certain aesthetic score. This approach is particularly useful when used in conjunction with the Image Chooser function to automatically filter a number a large number of generated images.
The Aesthetic Score Predictor function is not perfect. You might disagree with the score assigned to the images. In his tests, Alessandro found that the AI model used by this function does a reasonable good job at identifying the top two images in a batch.
Image Chooser
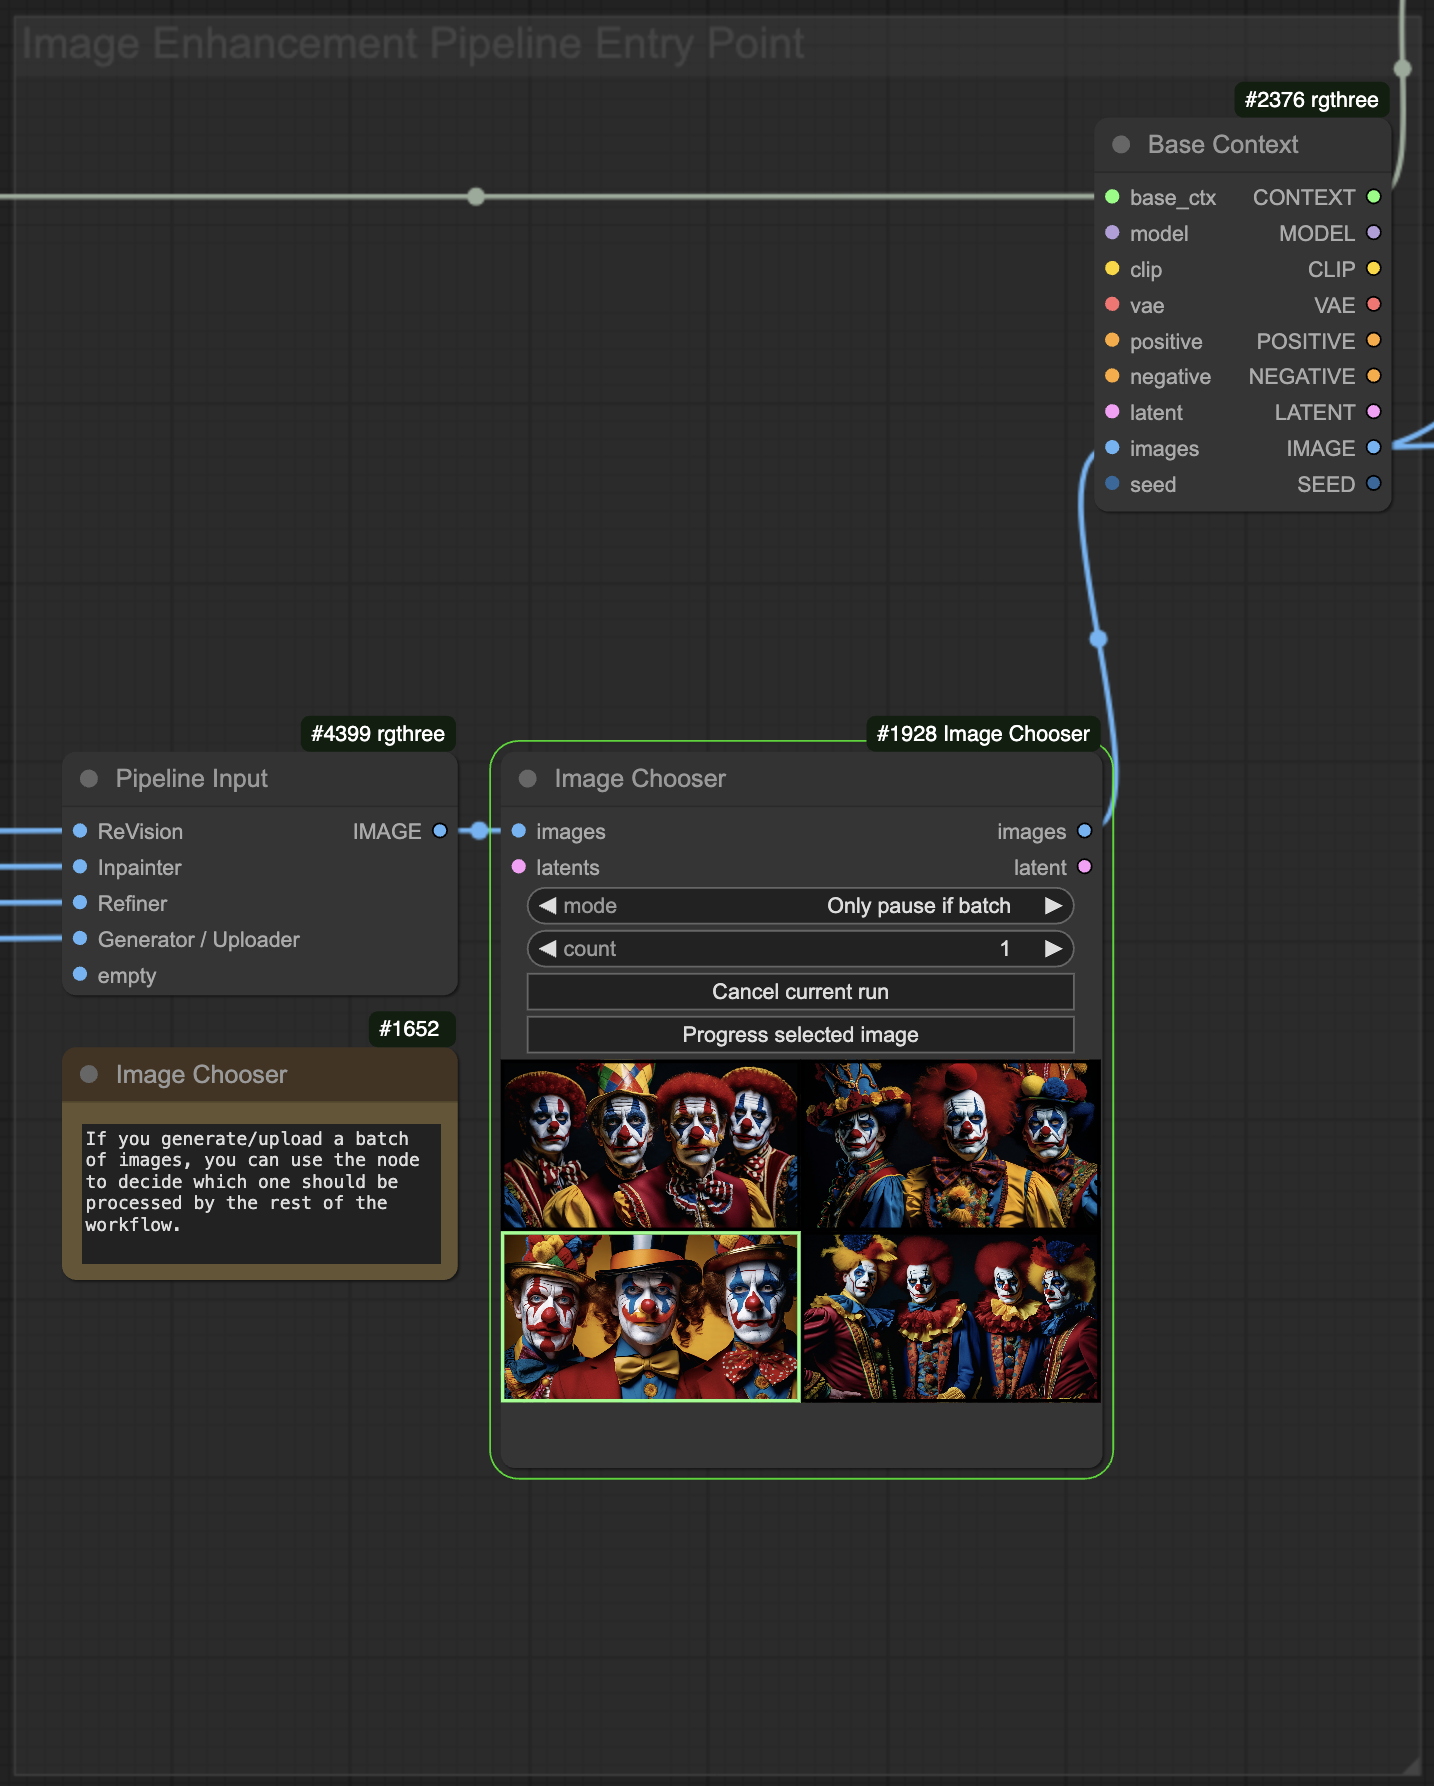
When you generate a batch of images with the Image Generator (SD) function, or you upload a series of images via the Uploader function, you might want to pause AP Workflow execution and choose a specific image from the batch to further process it with the Image Manipulators.
This is possible thanks to the Image Chooser node. By default, it’s configured in Pass through mode, which doesn’t pause the execution of the workflow.
Change the node mode from Pass through to Always pause or Only pause if batch to enforce a pause and choose the image.
To further support you in setting the possible configuration for AP Workflow before launching a large-scale image or video generation, AP Workflow includes two additional image evaluators:
XYZ Plot
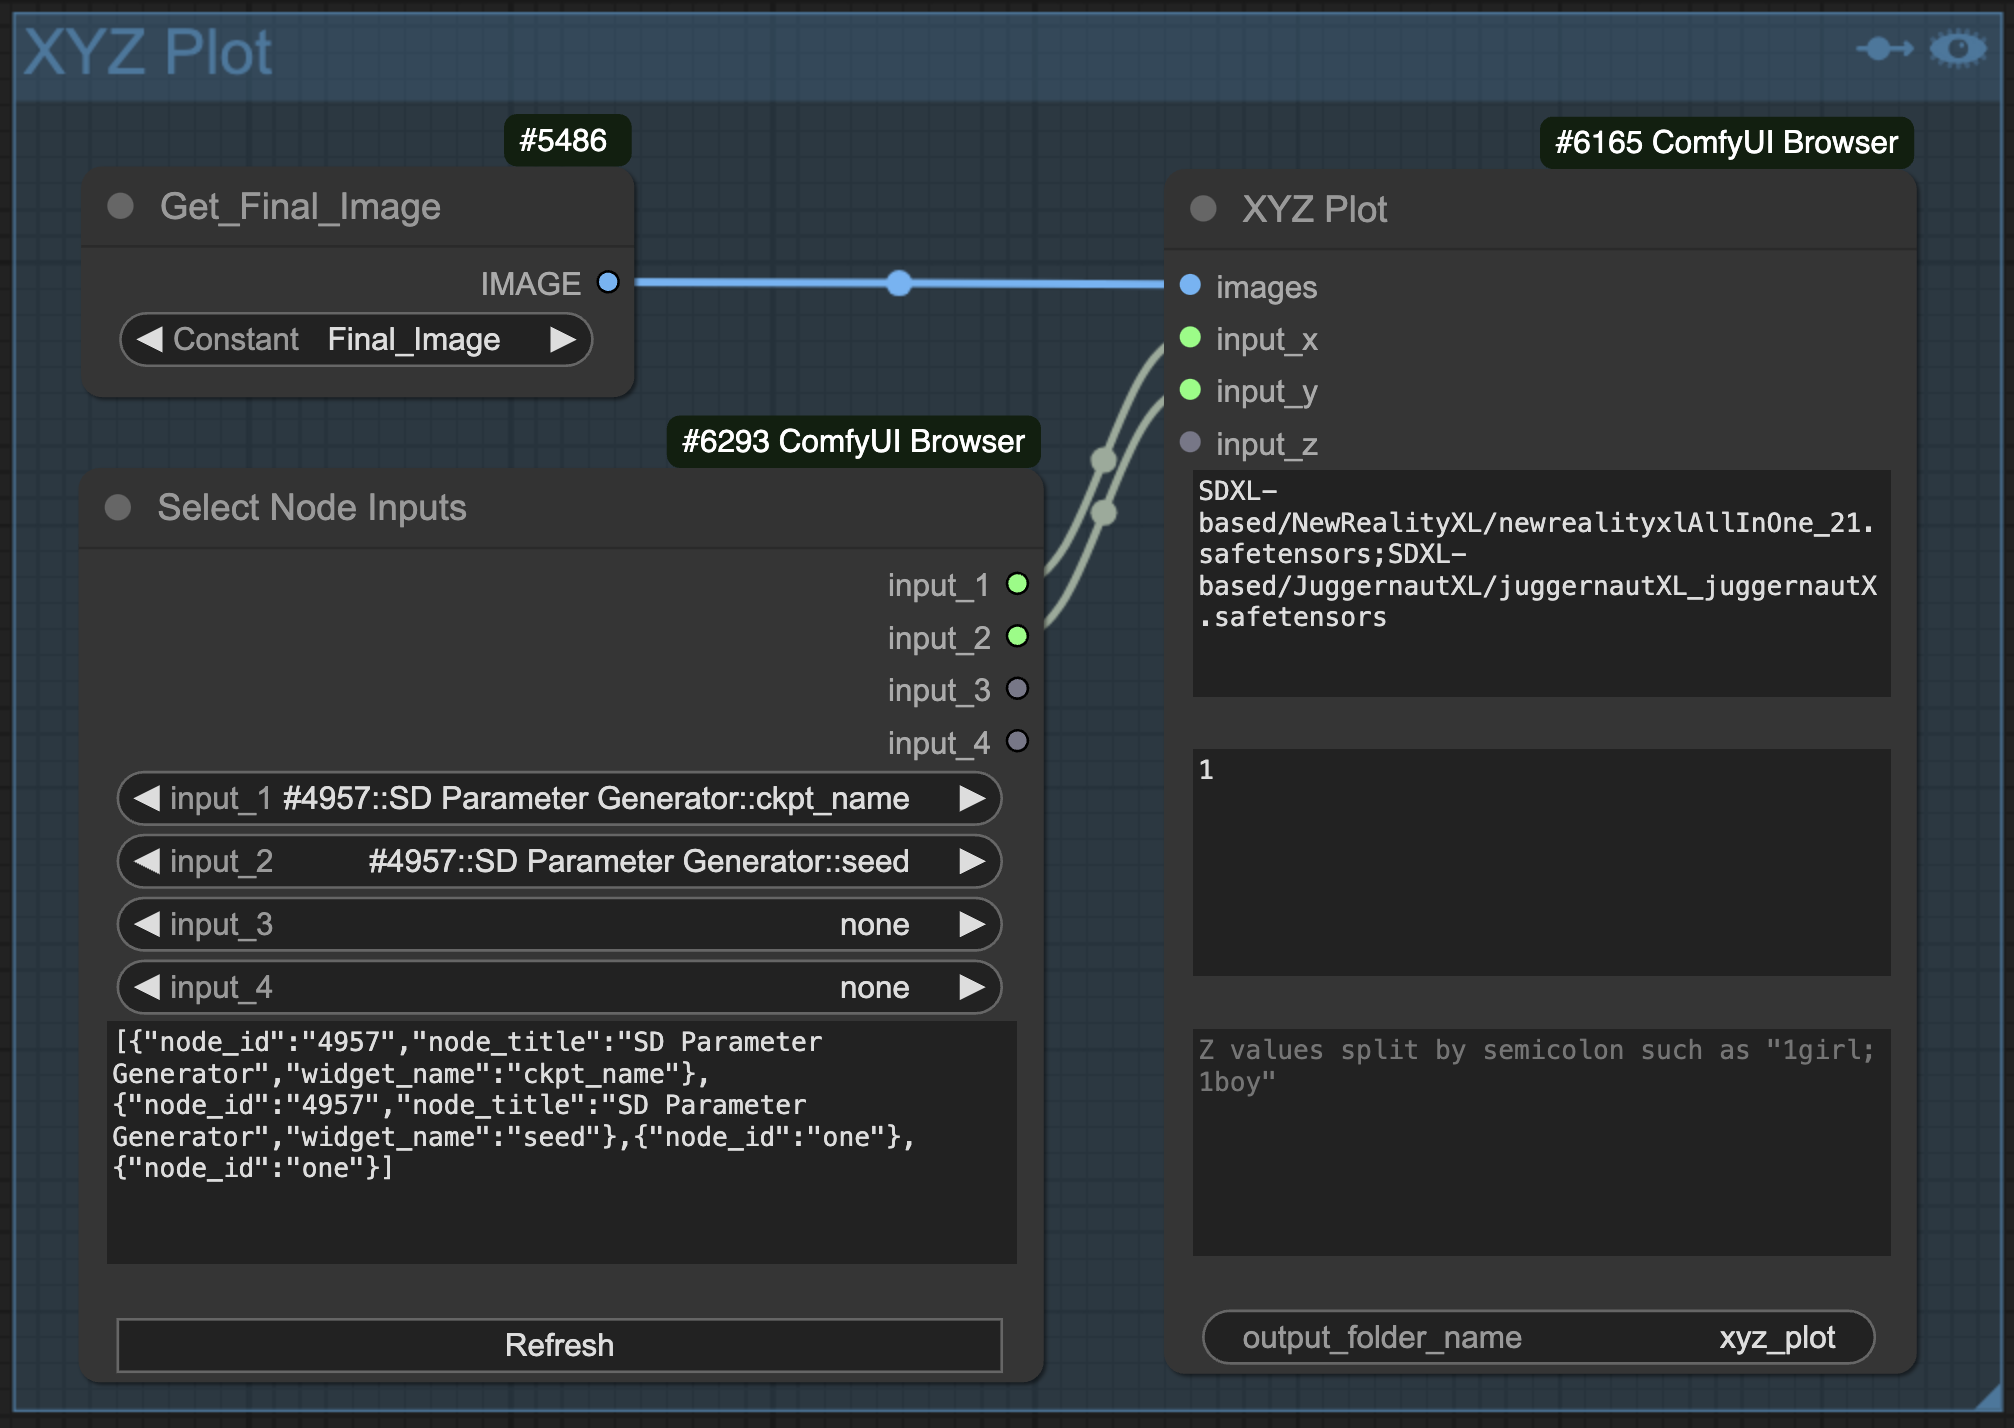
The XYZ Plot function generates a series of images permutating any parameter across any node in the workflow, according to the configuration you define.
ControlNet Previews
This function allows you to visualize how twelve different ControlNet models captures the details of the image you uploaded via the Uploader function.
Each preprocessor can be configured to load a different ControlNet model, so you are not constrained by the twelve models selected as defaults for AP Workflow.
The ControlNet Previews function is useful to decide what models to use in the ControlNet + Control-LoRAs function before you commit for a long image generation run. It’s recommended that you activate this function only once, to see the previews, and then deactivate it.
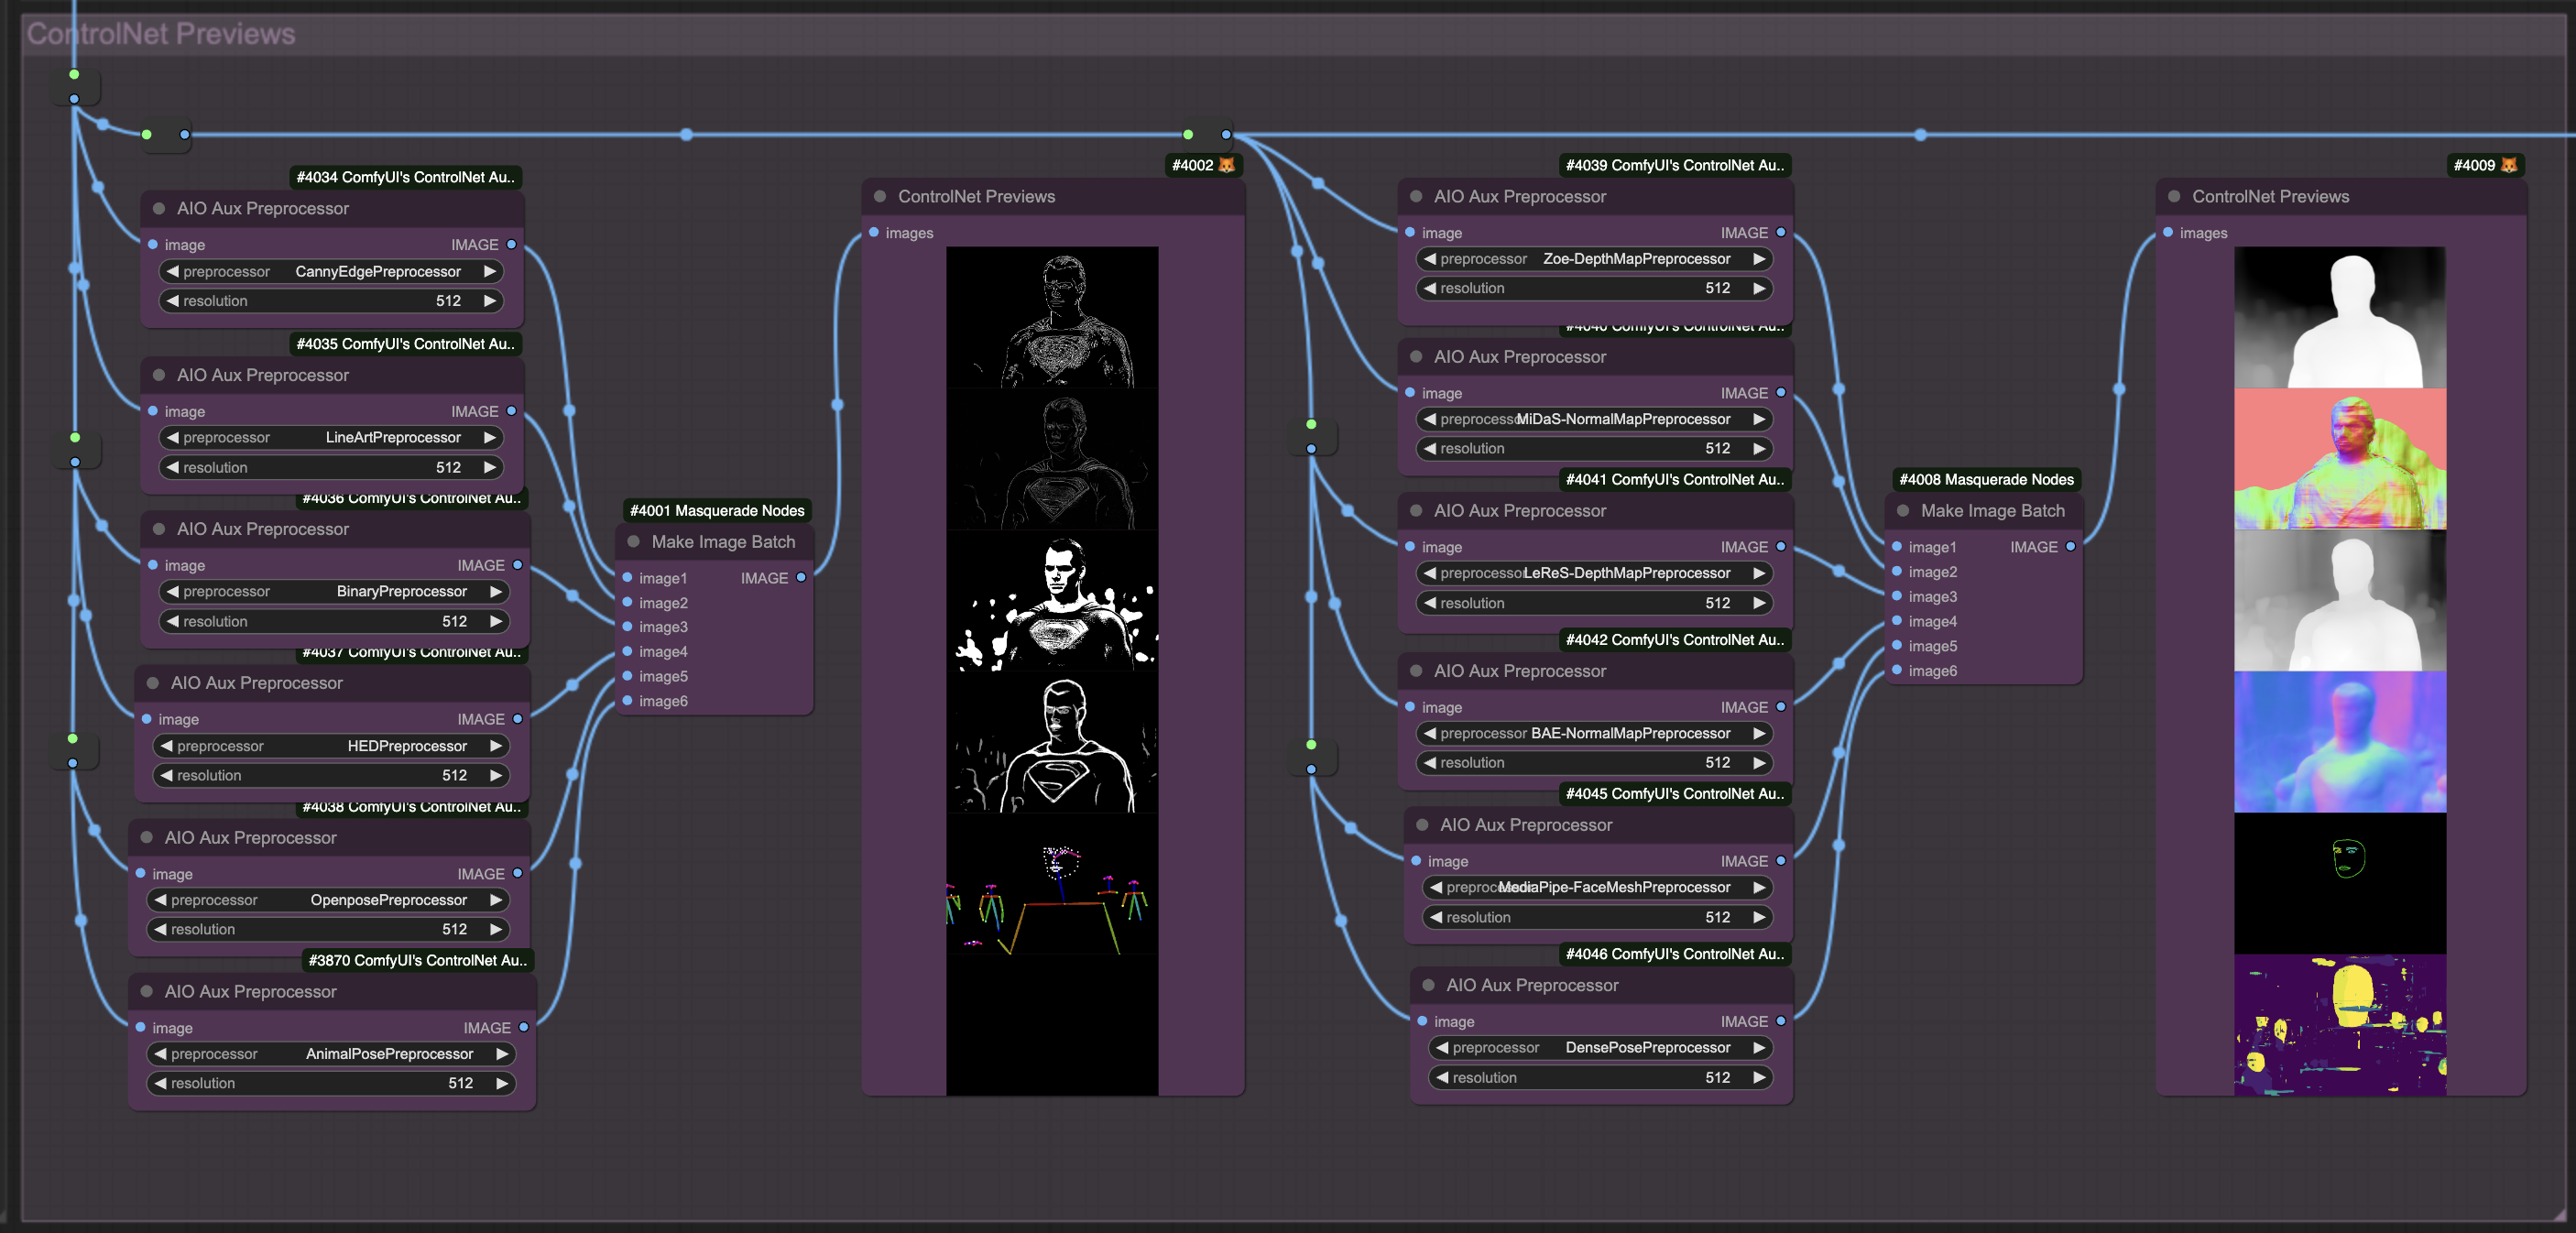
Image Manipulators
After you generate an image with the Image Generator (SD) function or upload an image with the Uploader function, you can use pass that image through a series of Image Manipulators. Each can be activated/deactivated in the Controller function.
Notice that you can activate multiple Image Manipulators in sequence, creating an image enhancement pipeline.
If every Image Enhancer is activated, the image will be passed through the following functions, in the specified order: Hand Detailer, Face Detailer, Object Swapper, Face Swapper, and finally Upscaler.
SDXL Refiner
This function enables the use of the SDXL 1.0 Refiner model, designed to improve the quality of images generated with the SDXL 1.0 Base model.
It’s useful exclusively in conjunction with the SDXL 1.0 Base model.
Face Detailer
The Face Detailer function identifies small and large faces in the source image, and attempts to improve their aesthetics according to two independent configurations: large faces require a different treatment than small faces.
The Face Detailer function will generate an image after processing small faces and another after also processing large faces.
Notice that the Face Detailer function uses a dedicated ControlNet XL Tile model and a dedicated SDXL diffusion model. They work even if your source image has been generated with a SD 1.5, Fine-Tuned SDXL, or SD3 model.
The reason for this design choice is that ControlNet XL Tile performs better than both ControlNet 1.5 Tile and ControlNet 3.0 Tile models.
Hand Detailer
The Hand Detailer function identifies hands in the source image, and attempts to improve their anatomy through two consecutive passes, generating an image after each pass.
The Hand Detailer function uses a dedicated Mesh Graphormer Depth preprocessor node and a SD1.5 Inpaint Depth Hand ControlNet model.
They work even if your source image has been generated with an SDXL 1.0 base model, a Fine-Tuned SDXL model, or an SD3 model.
The reason for this design choice is that no Inpaint Depth Hand model exists in the SDXL or SD3 variant.
However, since the Mesh Graphormer Depth preprocessor node occasionally struggles to identify hands in non-photographic images, you have the option to revert to the old DW preprocessor node.
Object Swapper
THe Object Swapper function is capable of identifying a wide range of objects and features in the source image thanks to the GroundingDINO technique.
You can describe the feature/s to be found in the source image with natural language.
Once an object/feature has been identified, it will be modified according to the prompt you defined in the Object Swapper function.
Notice that the Object Swapper function uses a dedicated ControlNet XL Tile model and a dedicated SDXL diffusion model. They work even if your source image has been generated with a SD 1.5, Fine-Tuned SDXL, or SD3 model.
The reason for this design choice is that ControlNet XL Tile performs better than both ControlNet 1.5 Tile and ControlNet 3.0 Tile models.


Notice that the Object Swapper function can be used also to modify the physical aspect of the subjects in the source image.


One of the most requested use case for the Object Swapper function is eyes inpainting.


Face Swapper
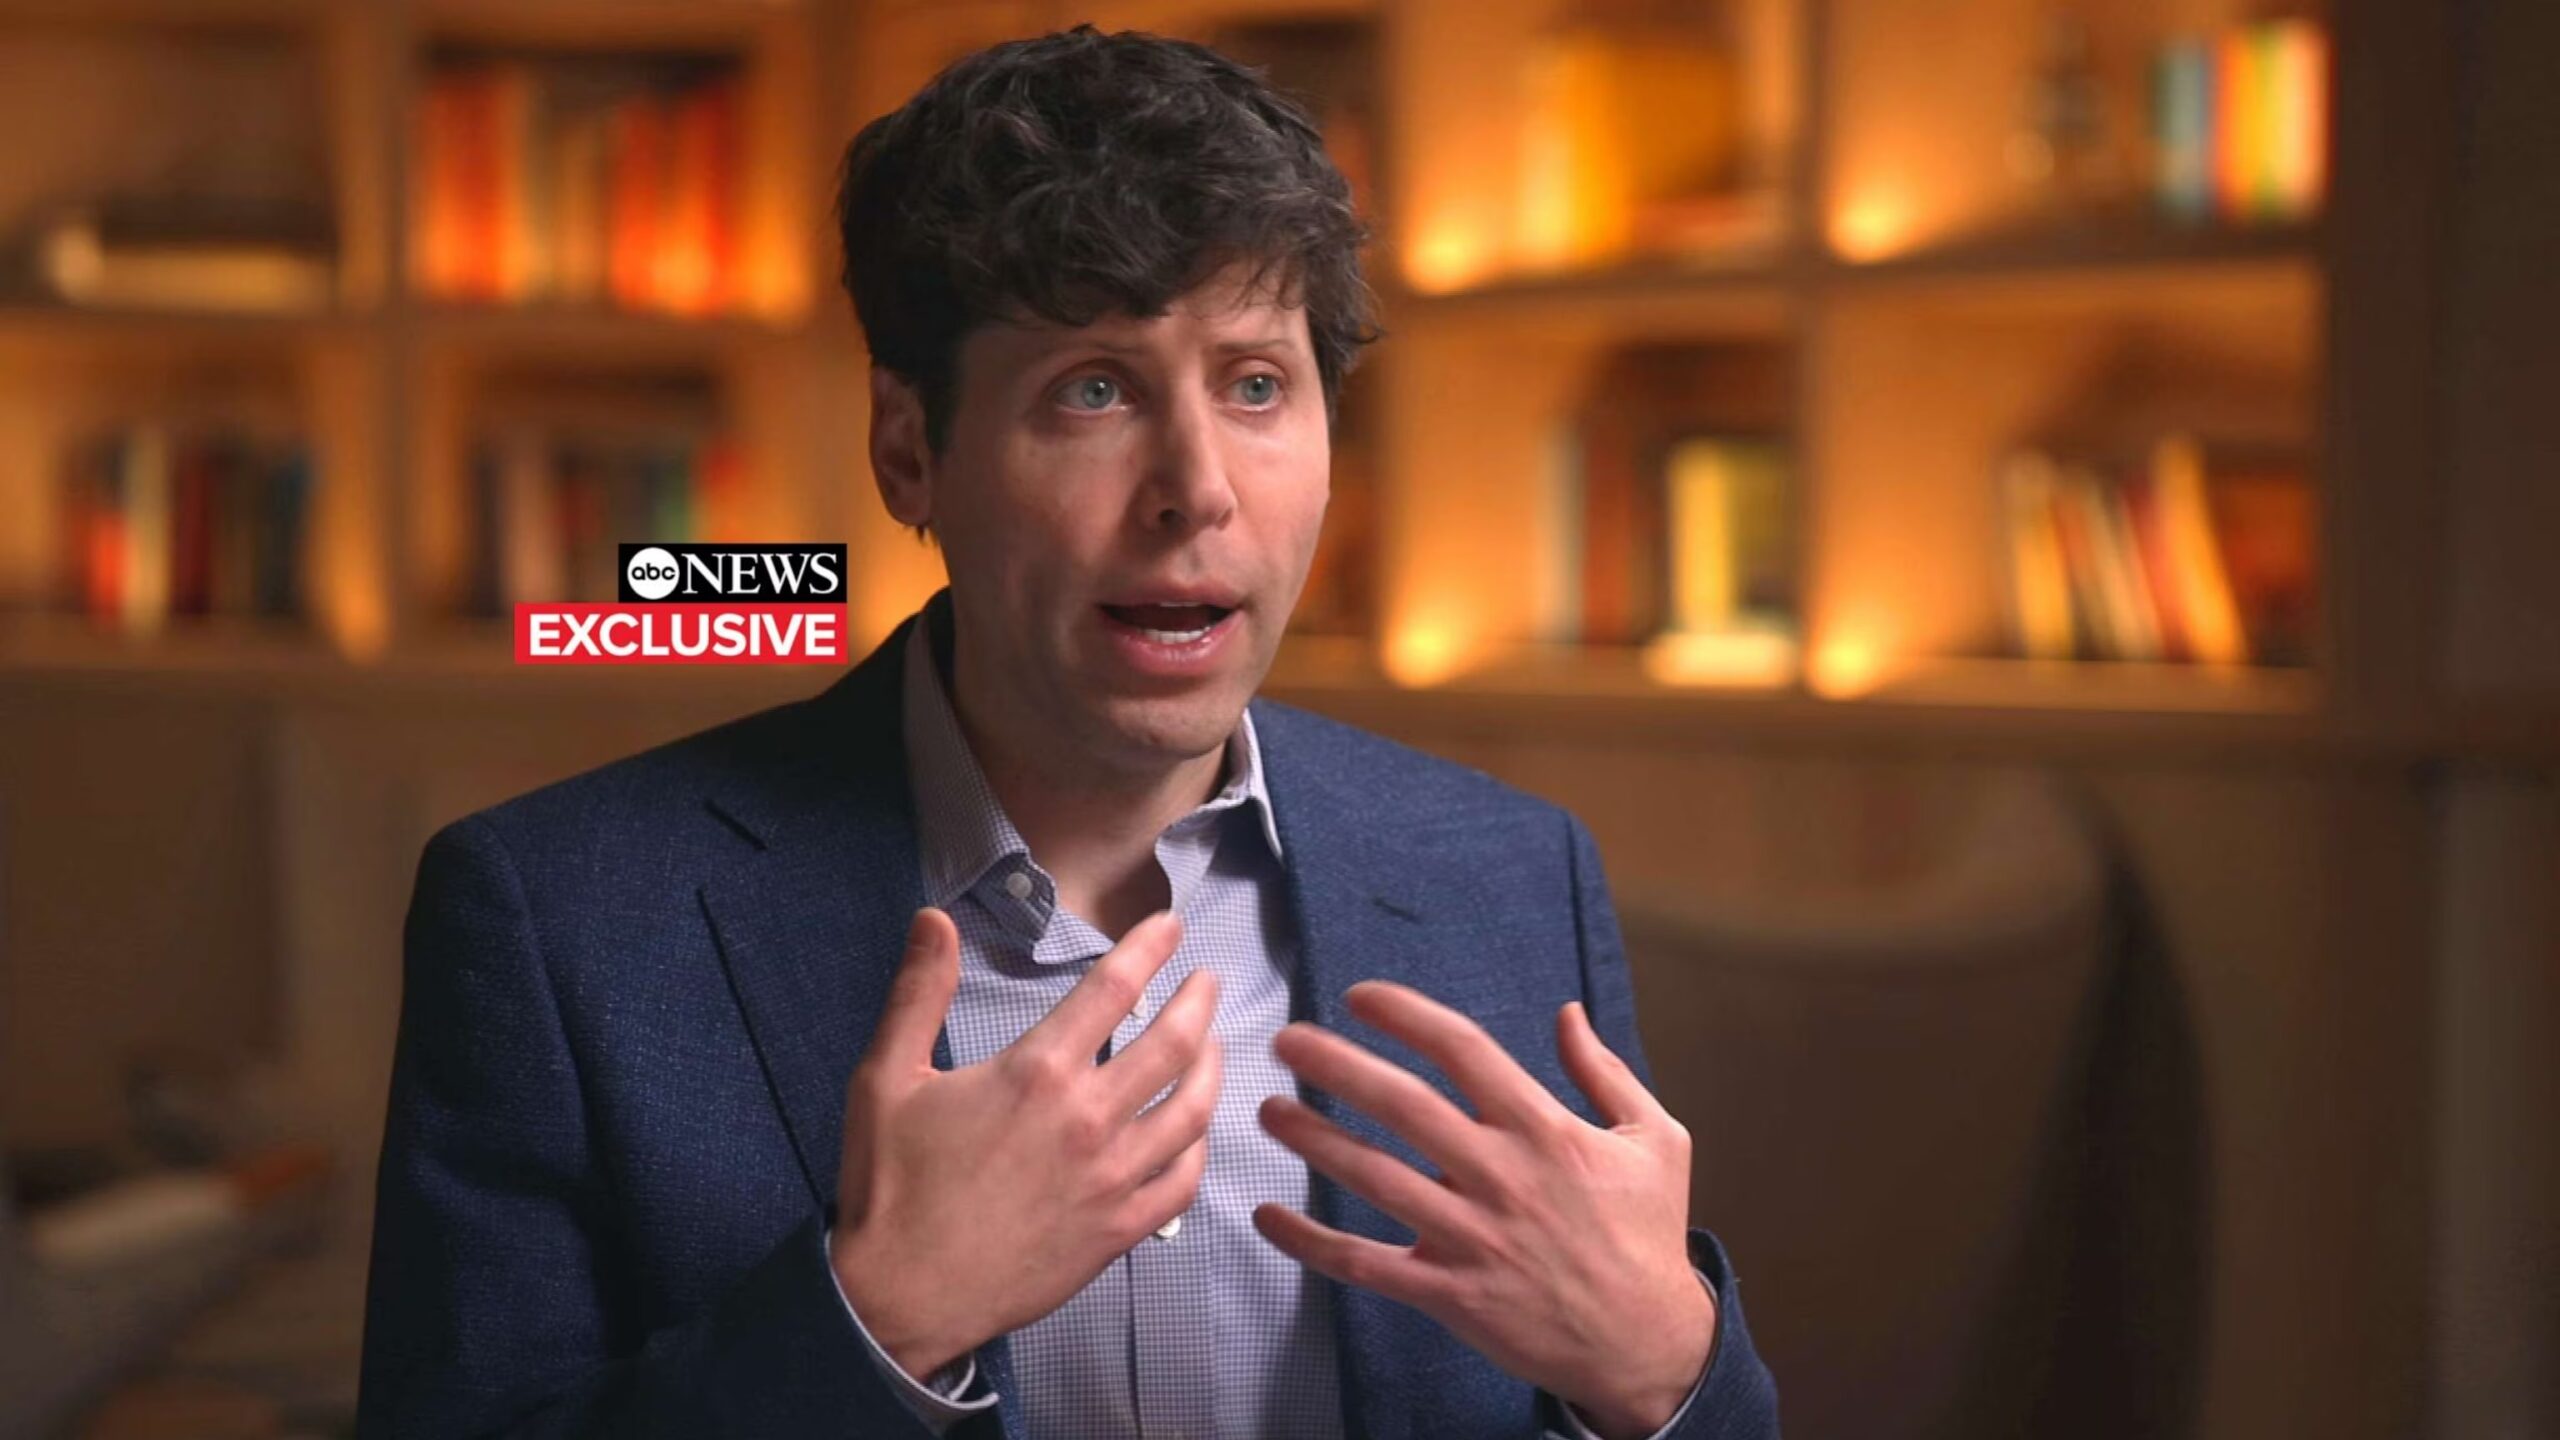
The Face Swapper function identifies the face of one or more subjects in the source image, and swaps them with a face of choice. If your source image has multiple faces, you can target the desired one via an index value.
You must upload an image of the face to be swapped via the 1st Reference Image node in the Uploader function.

Upscaler (CCSR)
AP Workflow abandons traditional upscaling approaches to embrace next-generation upscalers. The first one uses the Content Consistent Super-Resolution (CCSR) technique.
This node is easier to configure and it generates exceptional upscaling results, on par or superior to the ones you can obtain with Magnific AI or Topaz Gigapixel.
Upscaler (SUPIR)
AP Workflow abandons traditional upscaling approaches to embrace next-generation upscalers. The second one uses the SUPIR technique.
Differently from the Upscaler (CCSR) function, the Upscaler (SUPIR) function allows you to condition the image upscaling process with one or more LoRAs, and it allows to perform “creative upscaling” similar to the one offered by Magnific AI, by lowering the strength of the control_scale_end parameter.
Just like for the Upscaler (CCSR) function, the Upscaler (SUPIR) function generates exceptional upscaling results, on par or superior to the ones you can obtain with Magnific AI or Topaz Gigapixel.
Image Inpainters
AP Workflow offers the capability to inpaint and outpaint a source image loaded via the Uploader function with the inpainting model developed by @lllyasviel for the Fooocus project, and ported to ComfyUI by @acly.
This model generates superior inpainting results and it works with any model (rather than the only the ones that have been specifically trained for inpainting).
The inpainting process can be further conditioned by activating one or more ControlNet functions.
Notice that this form of inpainting is different from the one automatically performed by image manipulators function like Hand Detailer, Face Detailer, Object Swapper, and Face Swapper.
Inpainter without Mask
When no inpainting or outpainting mask is defined, the function will inpaint the entire source image, performing an operation known as img2img.
This approach is useful to reuse the same pose and setting of the source image while changing the subject and environment completely. To achieve that goal, you should set the value of the denoise parameter in the Inpainter node quite high (for example: 0.85).

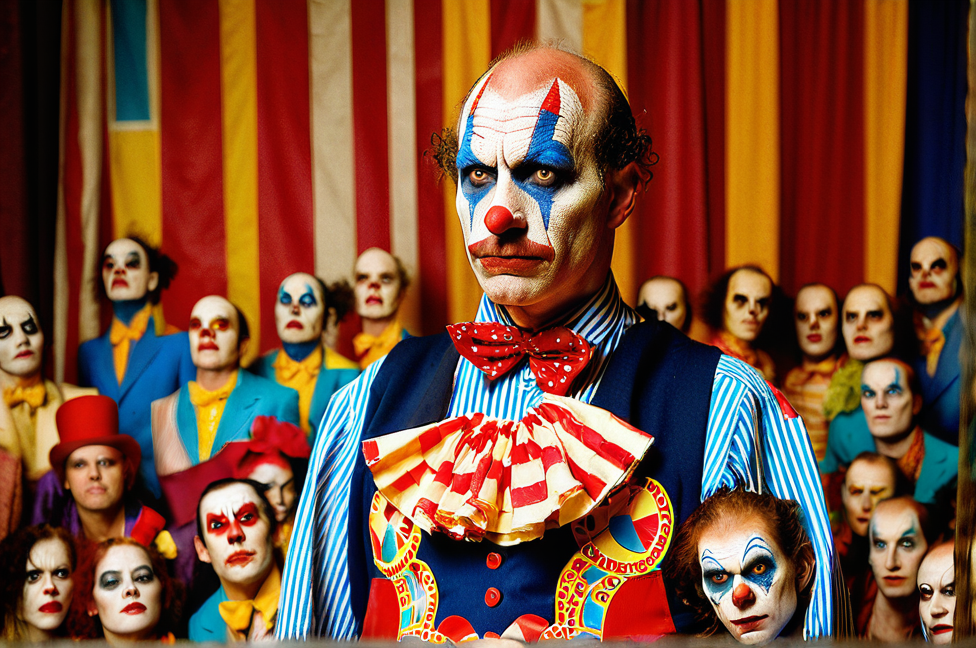
The Inpainter without Mask function can also be used to add details to a source image without altering its subject and setting. If that’s your goal, you should set the value of the denoise parameter in the Inpainter node to a very low value (for example: 0.20).
Inpainter with Mask
This function allows you to define a mask to only inpaint a specific area of the source image.
The value of the denoise parameter in the Inpainter node should be set low (for example: 0.20) if you want to keep the inpainted area as close as possible to the original.
The inpainting mask must be defined manually in the Uploader function, via the ComfyUI Mask Editor.


Outpainting Mask
This function allows you to define an outer mask to be used by the Inpainter with Mask function. This approach is useful when you want to extend the source image in one or more directions.
When the Outpainting Mask function is active, the value of the denoise parameter in the Inpainter with Mask function must be set to 1.0.
The outpainting mask must be defined manually in the Outpainting Mask function, by configuring the number of pixels to add to the image in every direction.


HighRes Fix
This function enables the use of the HighRes Fix technique, useful to upscale an image while avoiding duplicate subjects when the target resolution is outside of the training dataset for the selected diffusion model.
It’s mainly useful in conjunction with Stable Diffusion 1.5 base and fine-tuned models. Some people use it with SDXL models, too.
Video Generators
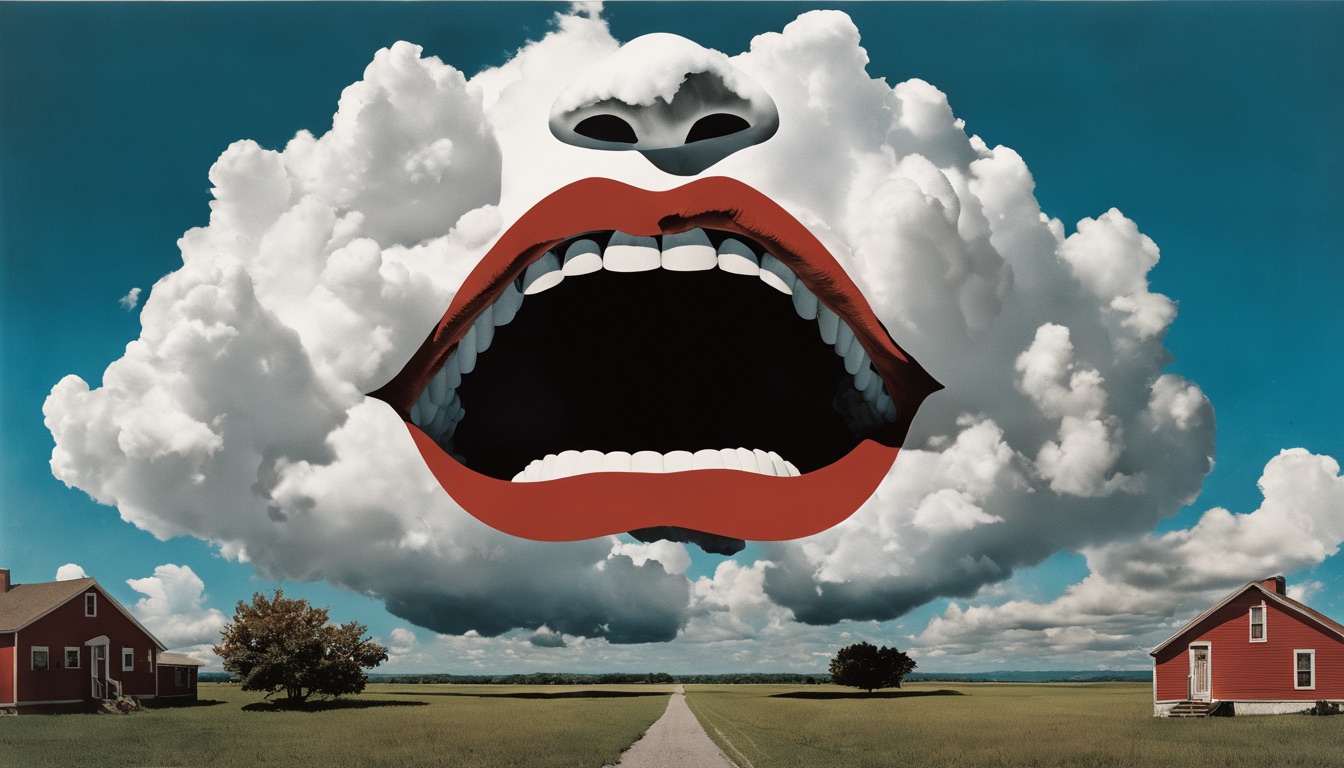
AP Workflow supports the new DynamiCrafter model.
This function turns images generated via the Image Generator function, or uploaded via the Uploader function, into animated GIFs and PNGs.

Auxiliary Functions
AP Workflow includes the following auxiliary functions:
Face Cloner
The Face Cloner function uses the InstantID technique to quickly change the style of any face in a Reference Image you upload via the Uploader function.
To measure the likeness of the generated face to the original one, and select the most similar in a batch of generated faces, you can use the Face Analyzer function.
Colorizer
AP Workflow includes a Colorizer function, able to colorize a monochrome image uploaded via the Uploader function.
While AP Workflow allows you to colorize an image in other ways, for example via the Inpainting without Mask function, the Colorizer function is more accurate and significantly faster.
Watermarker
This function generates a copy of the image/s you are processing with AP Workflow with a text of your choice in the position of your choice.
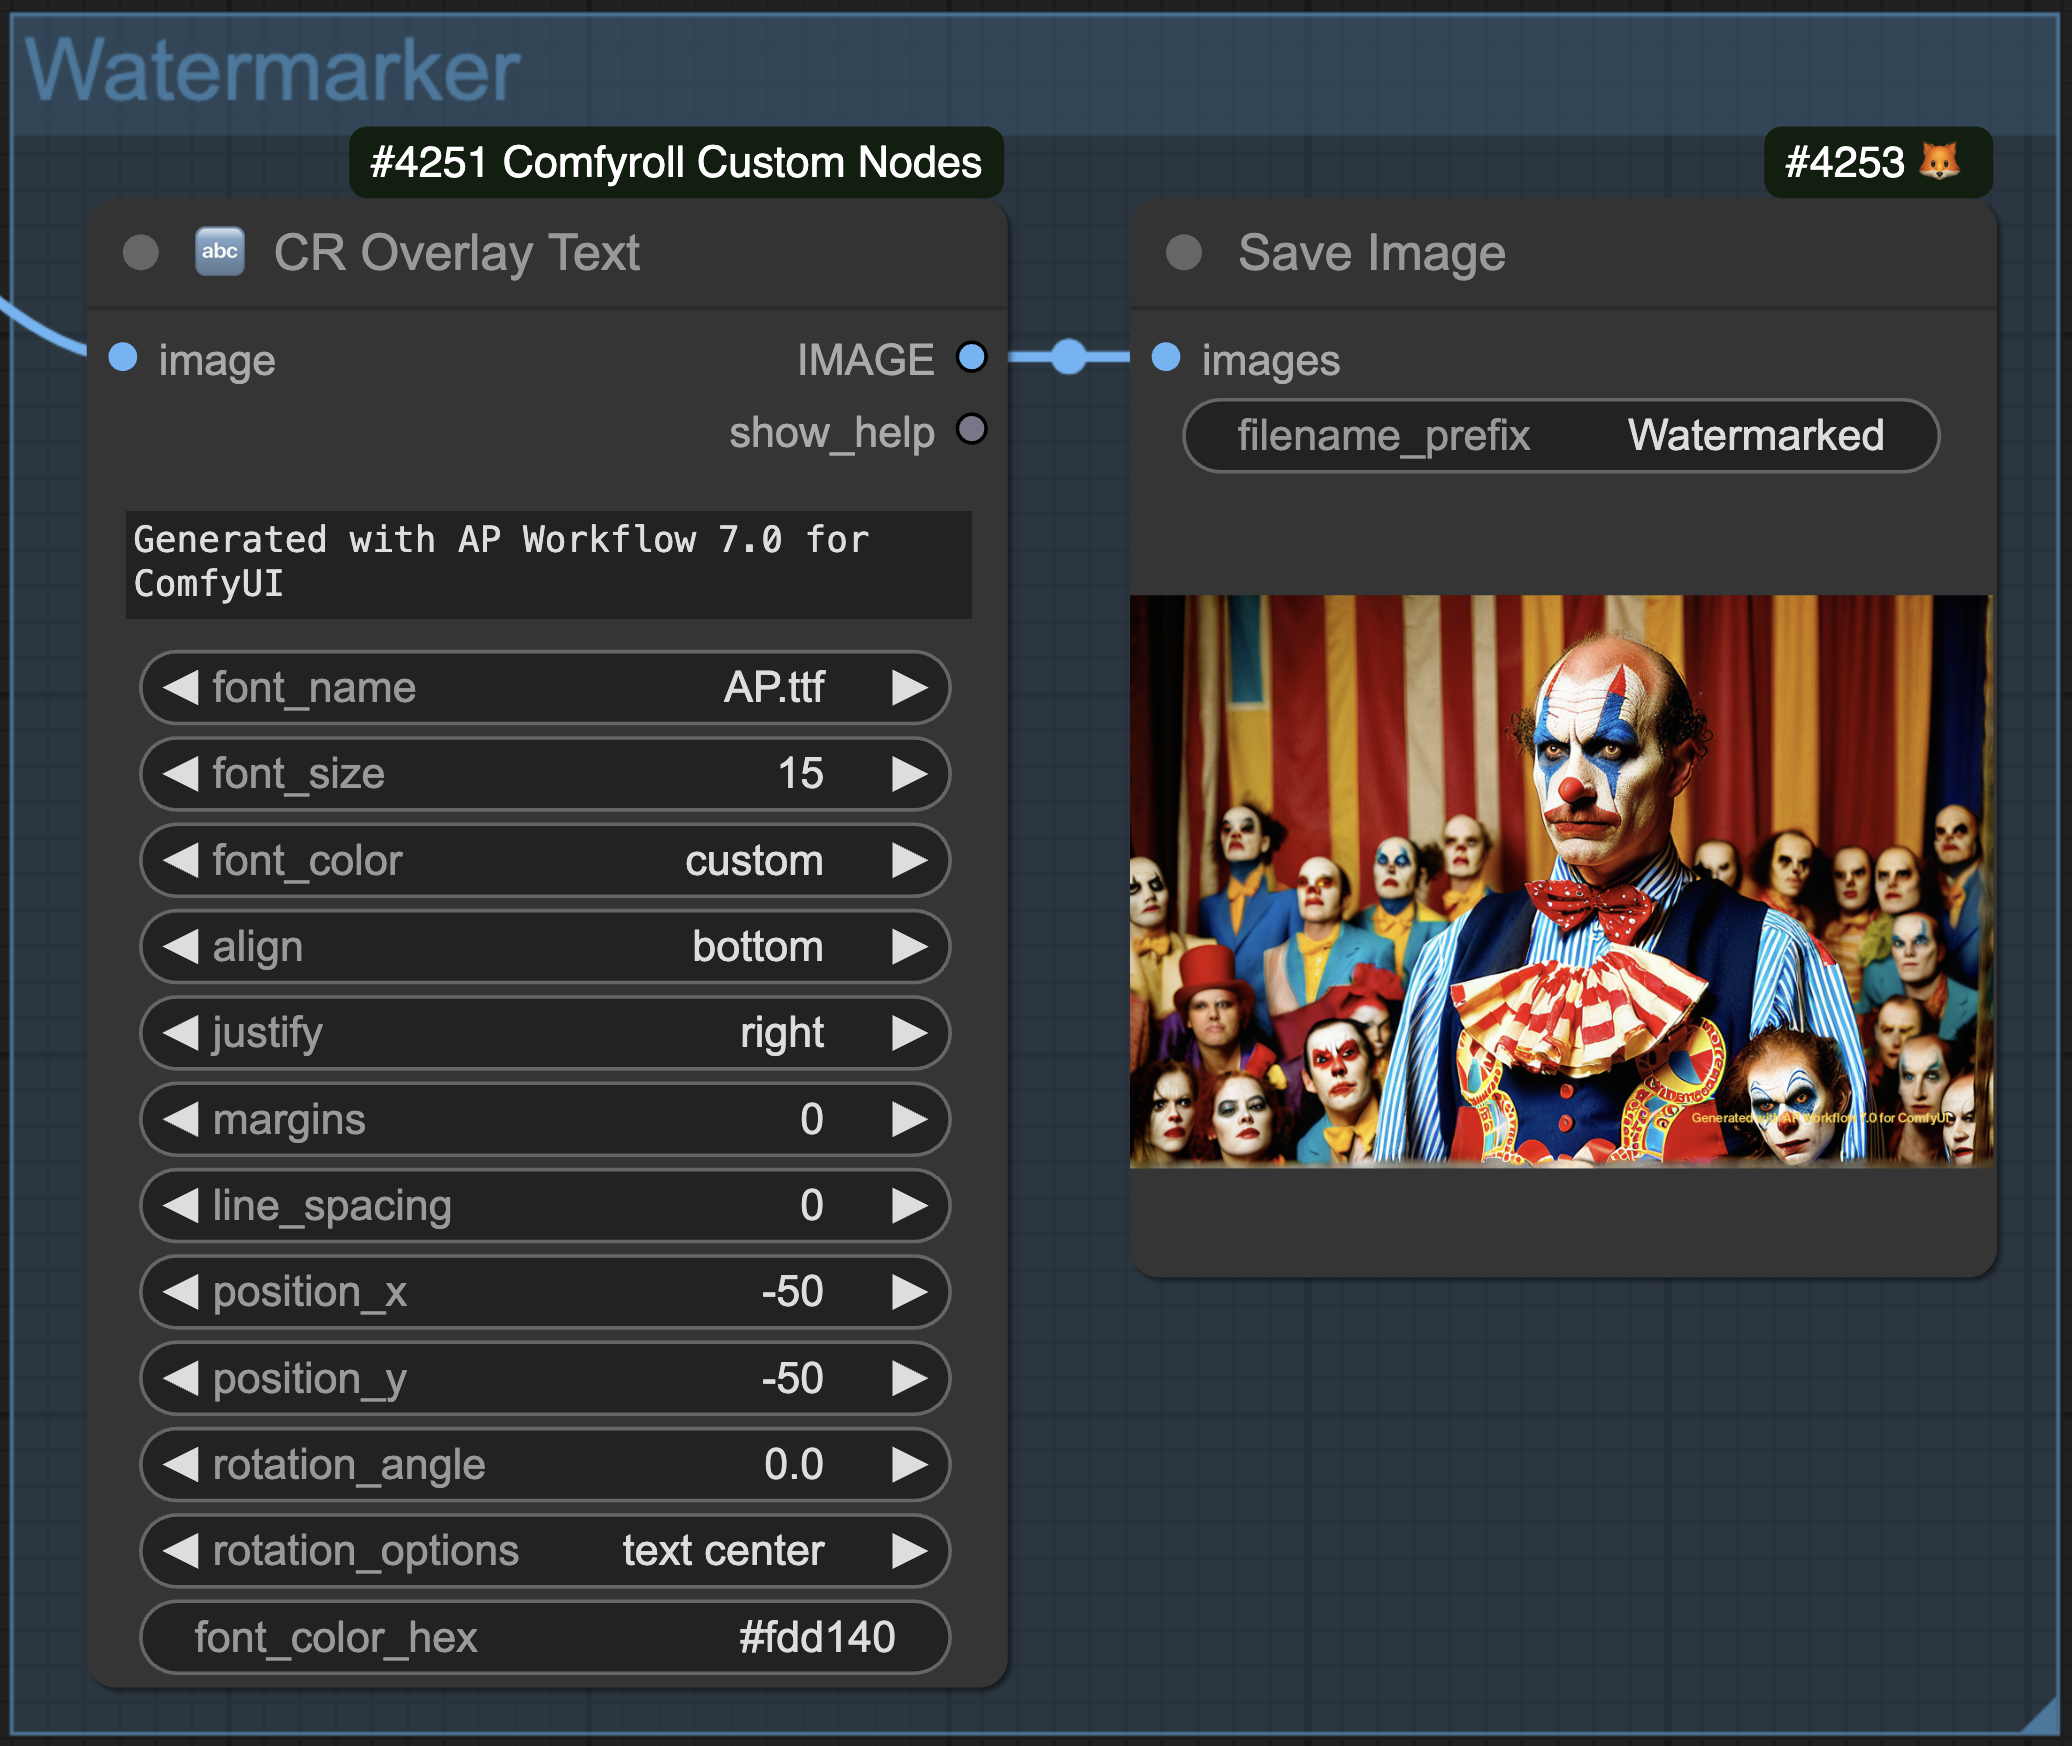
You can add your fonts to the /ComfyUI/custom_nodes/ComfyUI_Comfyroll_CustomNodes/fonts folder.
Notice that the text of the watermark is not the same text you define in the Add a Note to Generation node in the Configurator function.
Also notice that the Watermarker function is not yet capable of watermarking generated videos.
Debug Functions
Scattered across the AP Workflow, you’ll several nodes in dark blue color. These nodes are designed to help you debug the workflow and understand the impact of each node on the final image. They are completely optional and can be muted or removed without impact on the functionality of the workflow.
Additionally, AP Workflow includes the following debug capabilities:
Image Comparer
The always-on Image Comparer function is capable of comparing the source image, either uploaded via the Uploader function or generated via the Image Generator (SD) function, with the final image generated by the workflow.
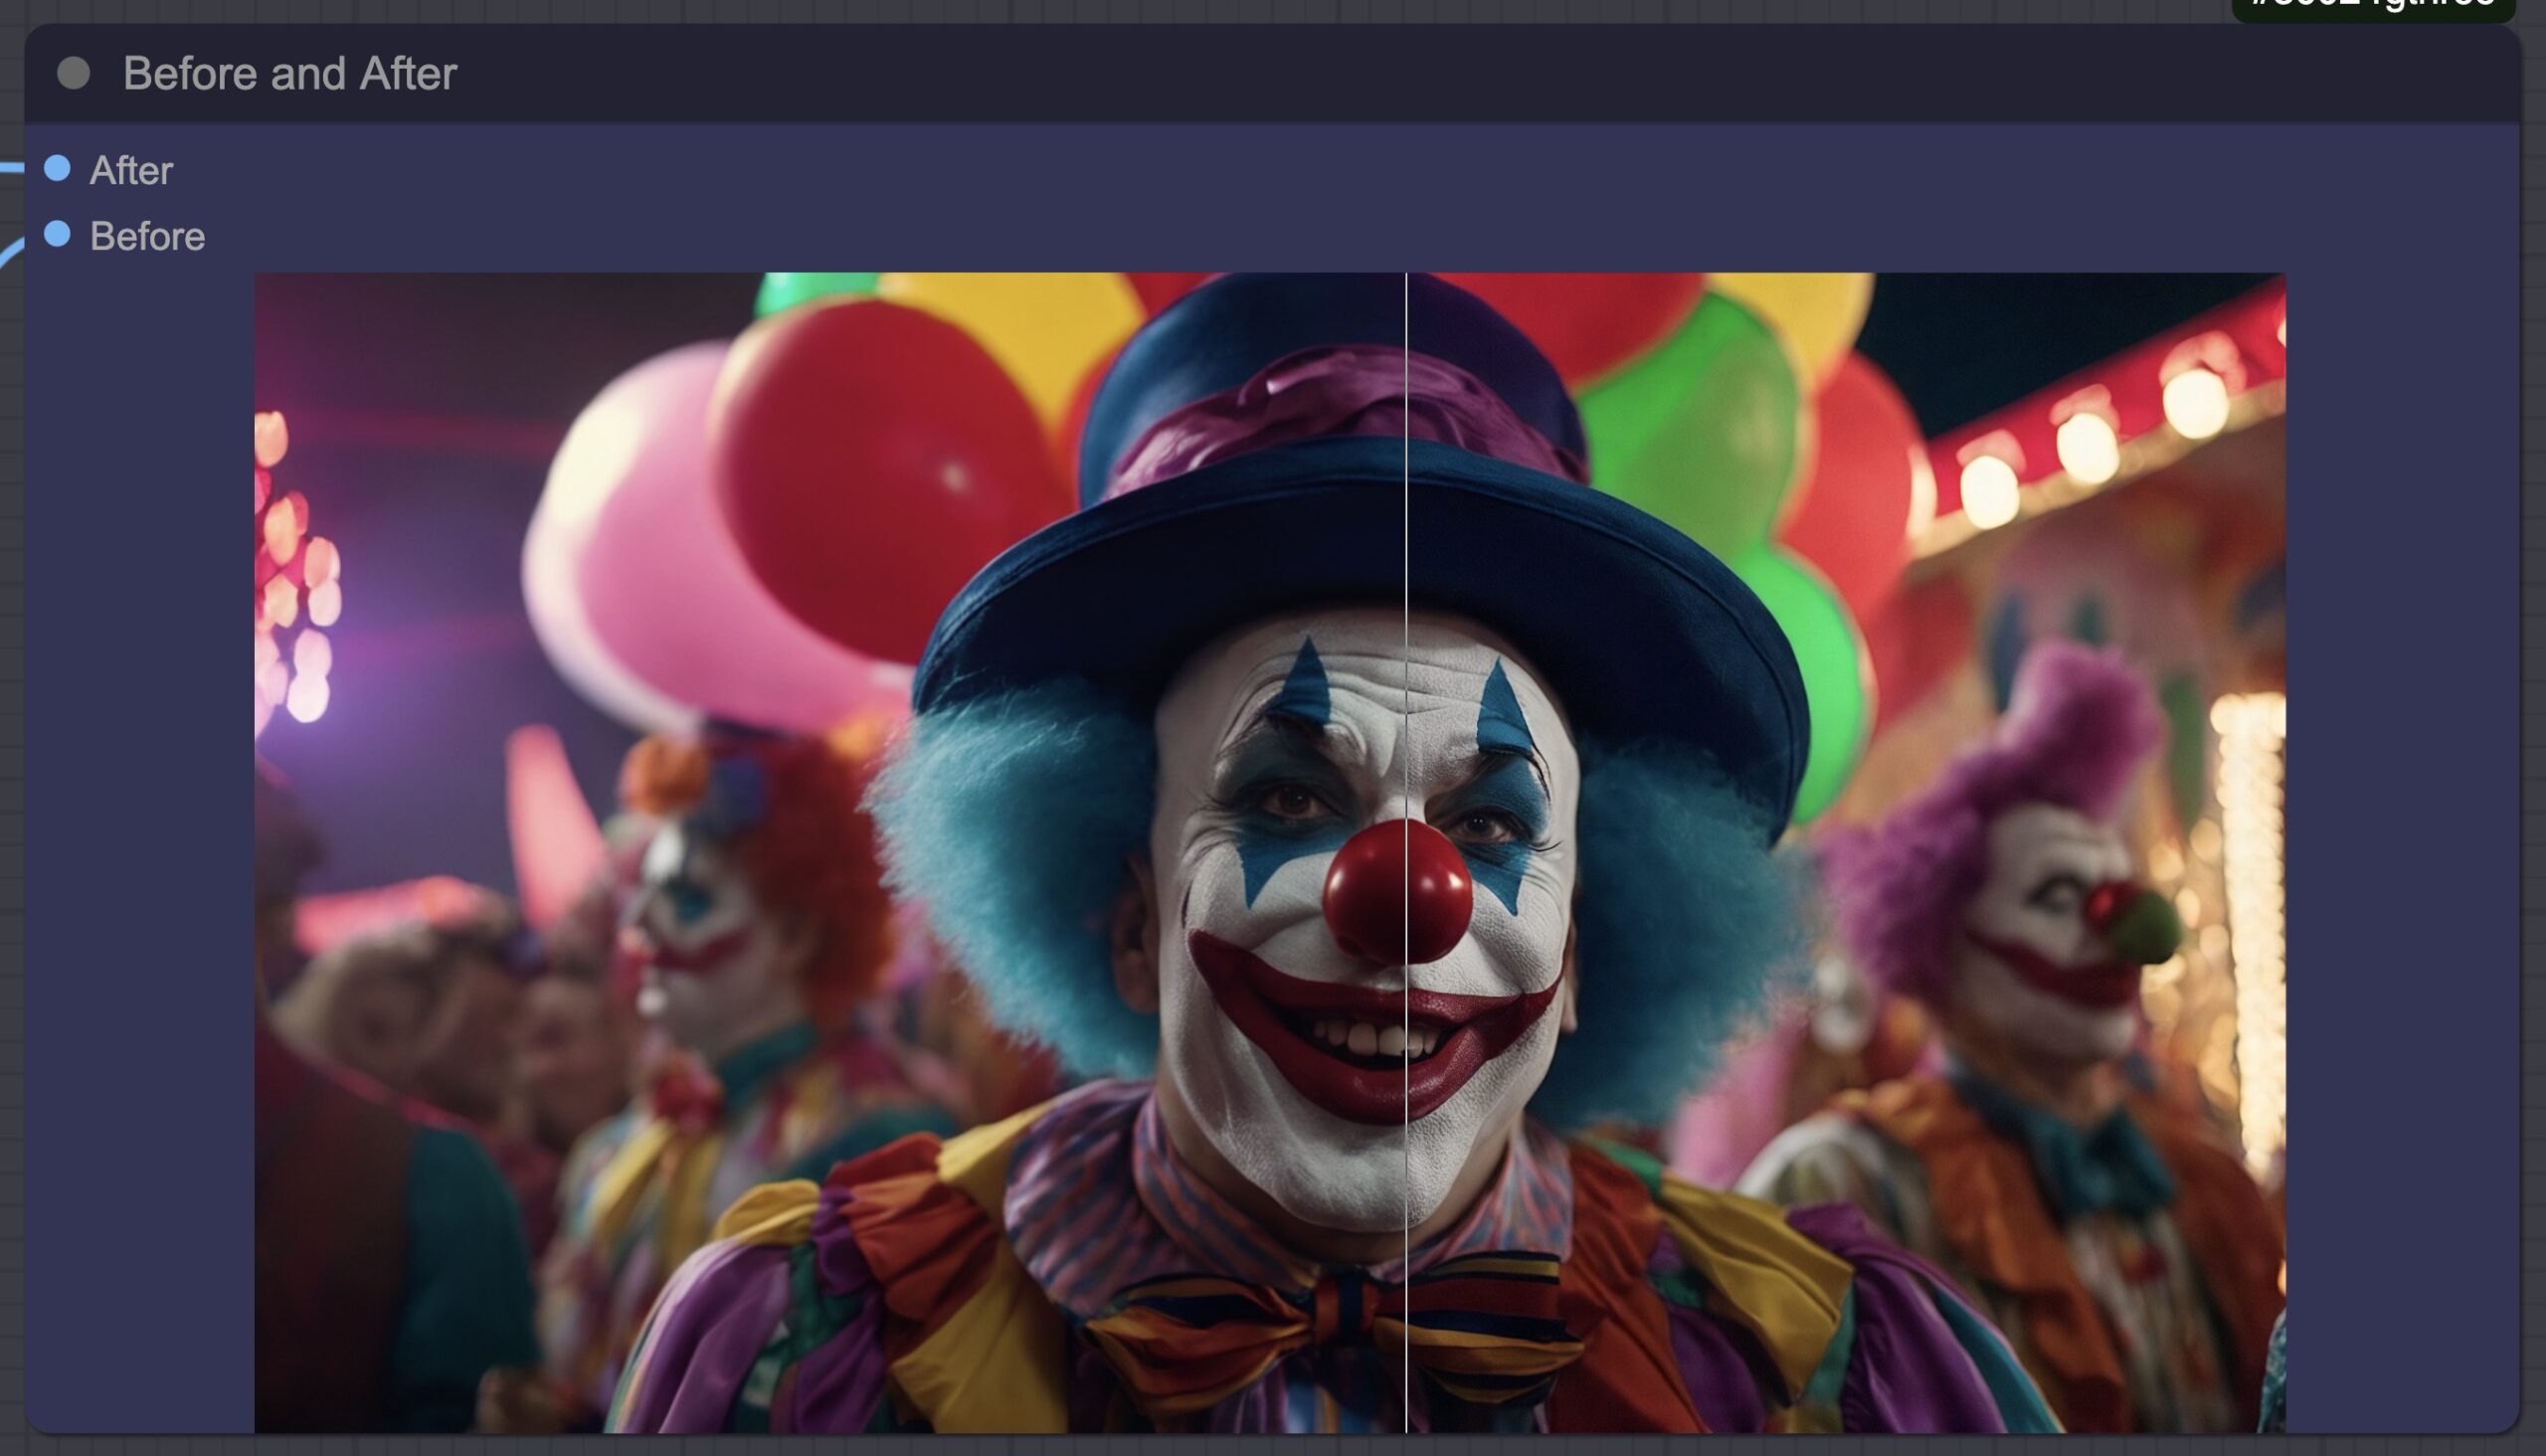
Additional Image Comparer nodes are scattered across the workflow to help you see the incremental changes made to the image throughtout the image generation pipeline.
Notifications
AP Workflow alerts you when a job in the queue is completed with both a sounds and a browser notification. You can disable either by simply muting the corresponding nodes in the Magic function.
You can also configure an extra node to send notifications to your personal Discord server via webhooks, or use a webhook provided by automation services like Zapier to send notifications to your inbox, phone, etc.
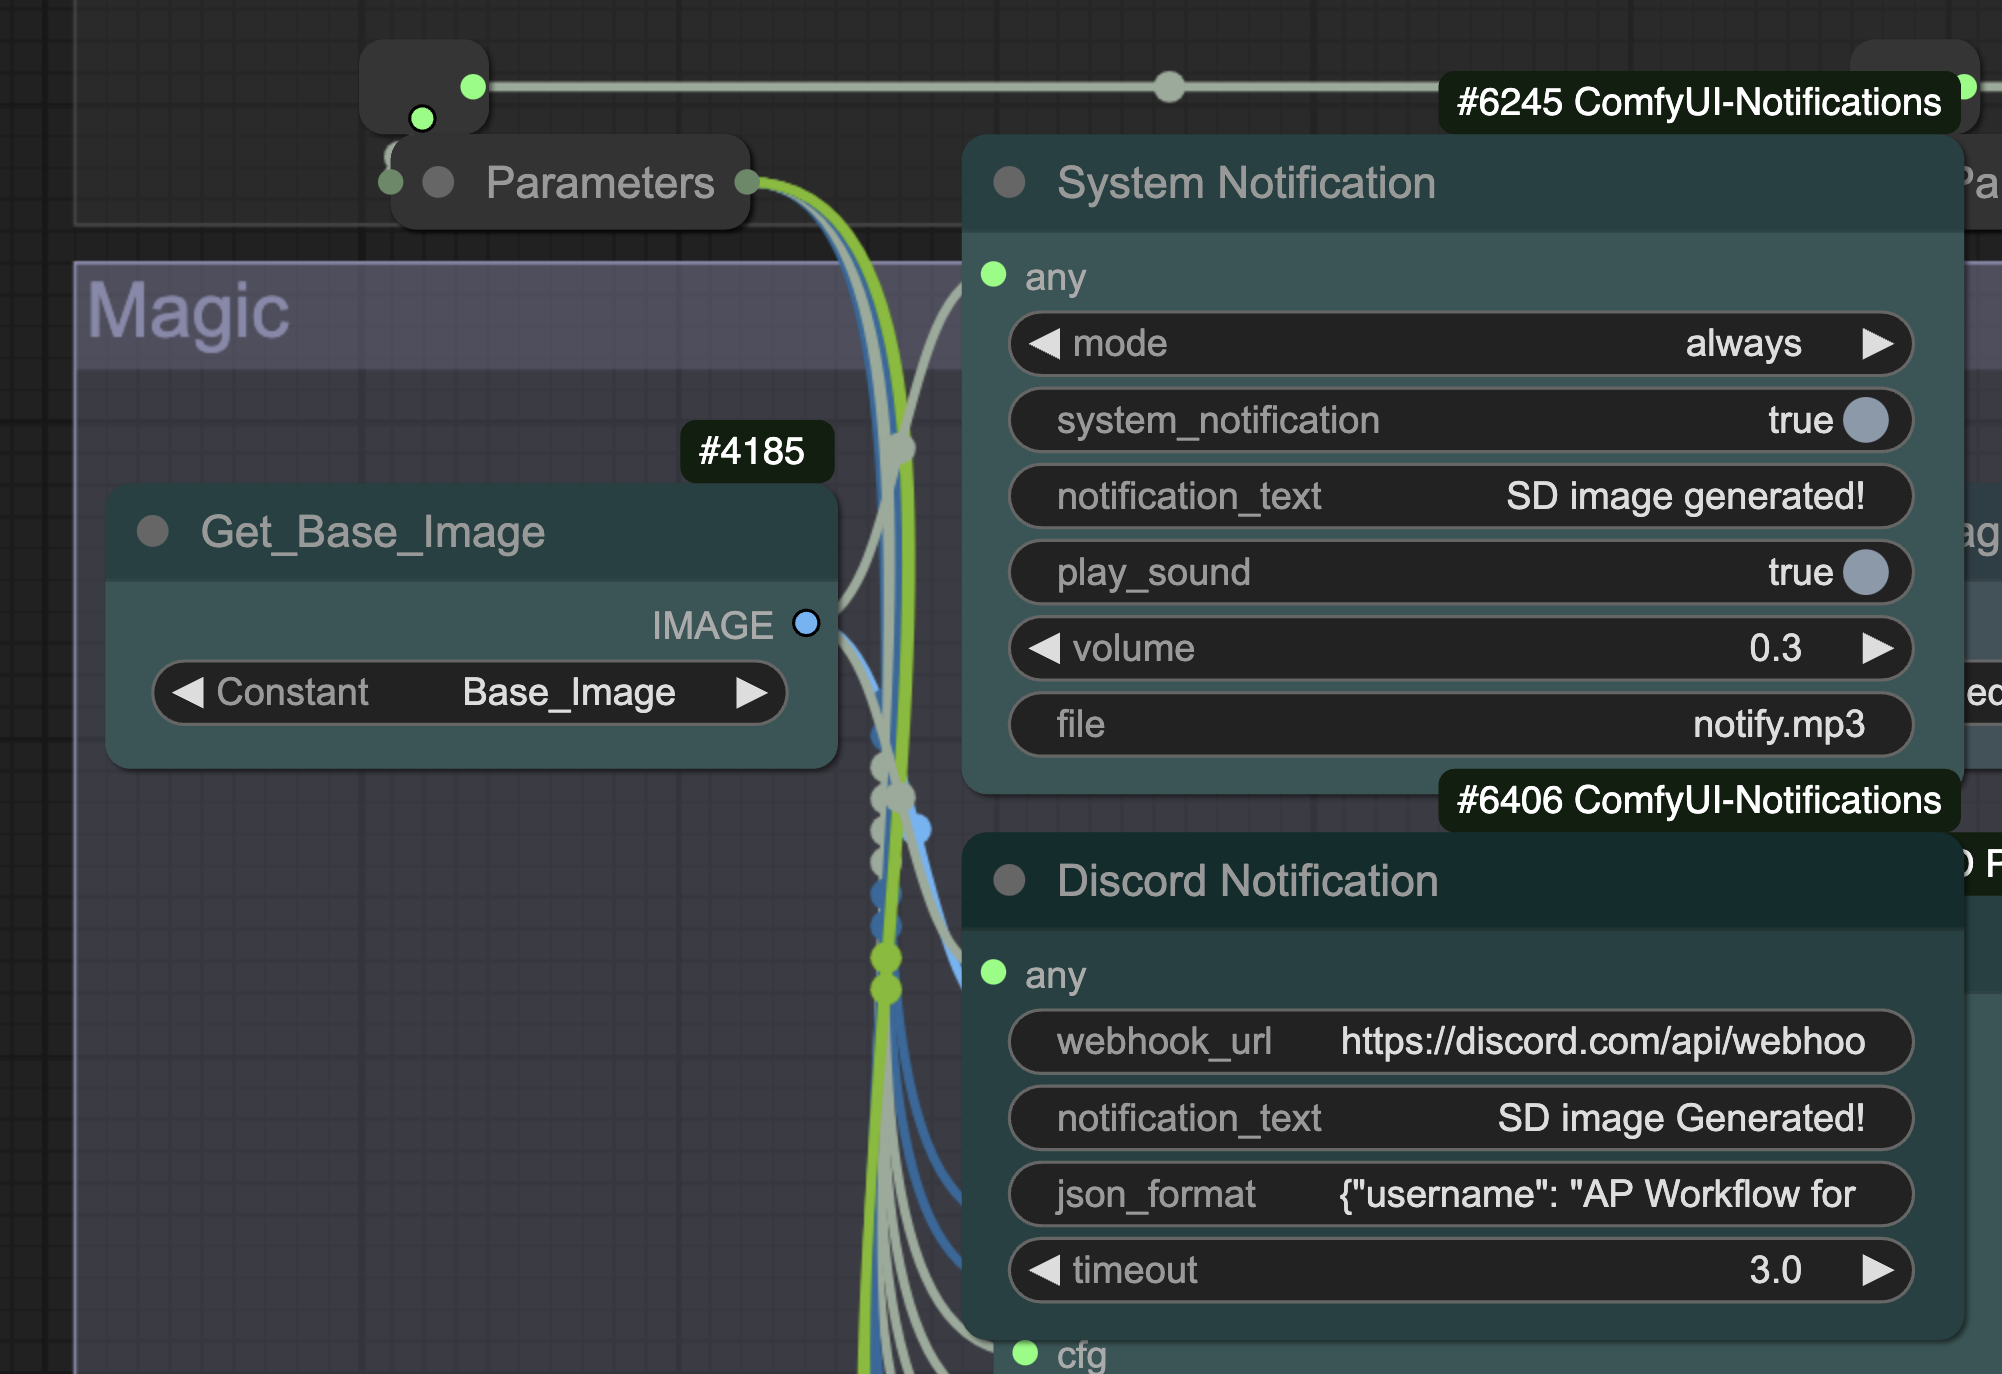
Image Metadata
All images generated or manipulated with AP Workflow include metadata about the prompts and the generation parameters used by ComfyUI. That metadata should be readable by A1111 WebUI, Vladmandic SD.Next, SD Prompt Reader, and other applications.
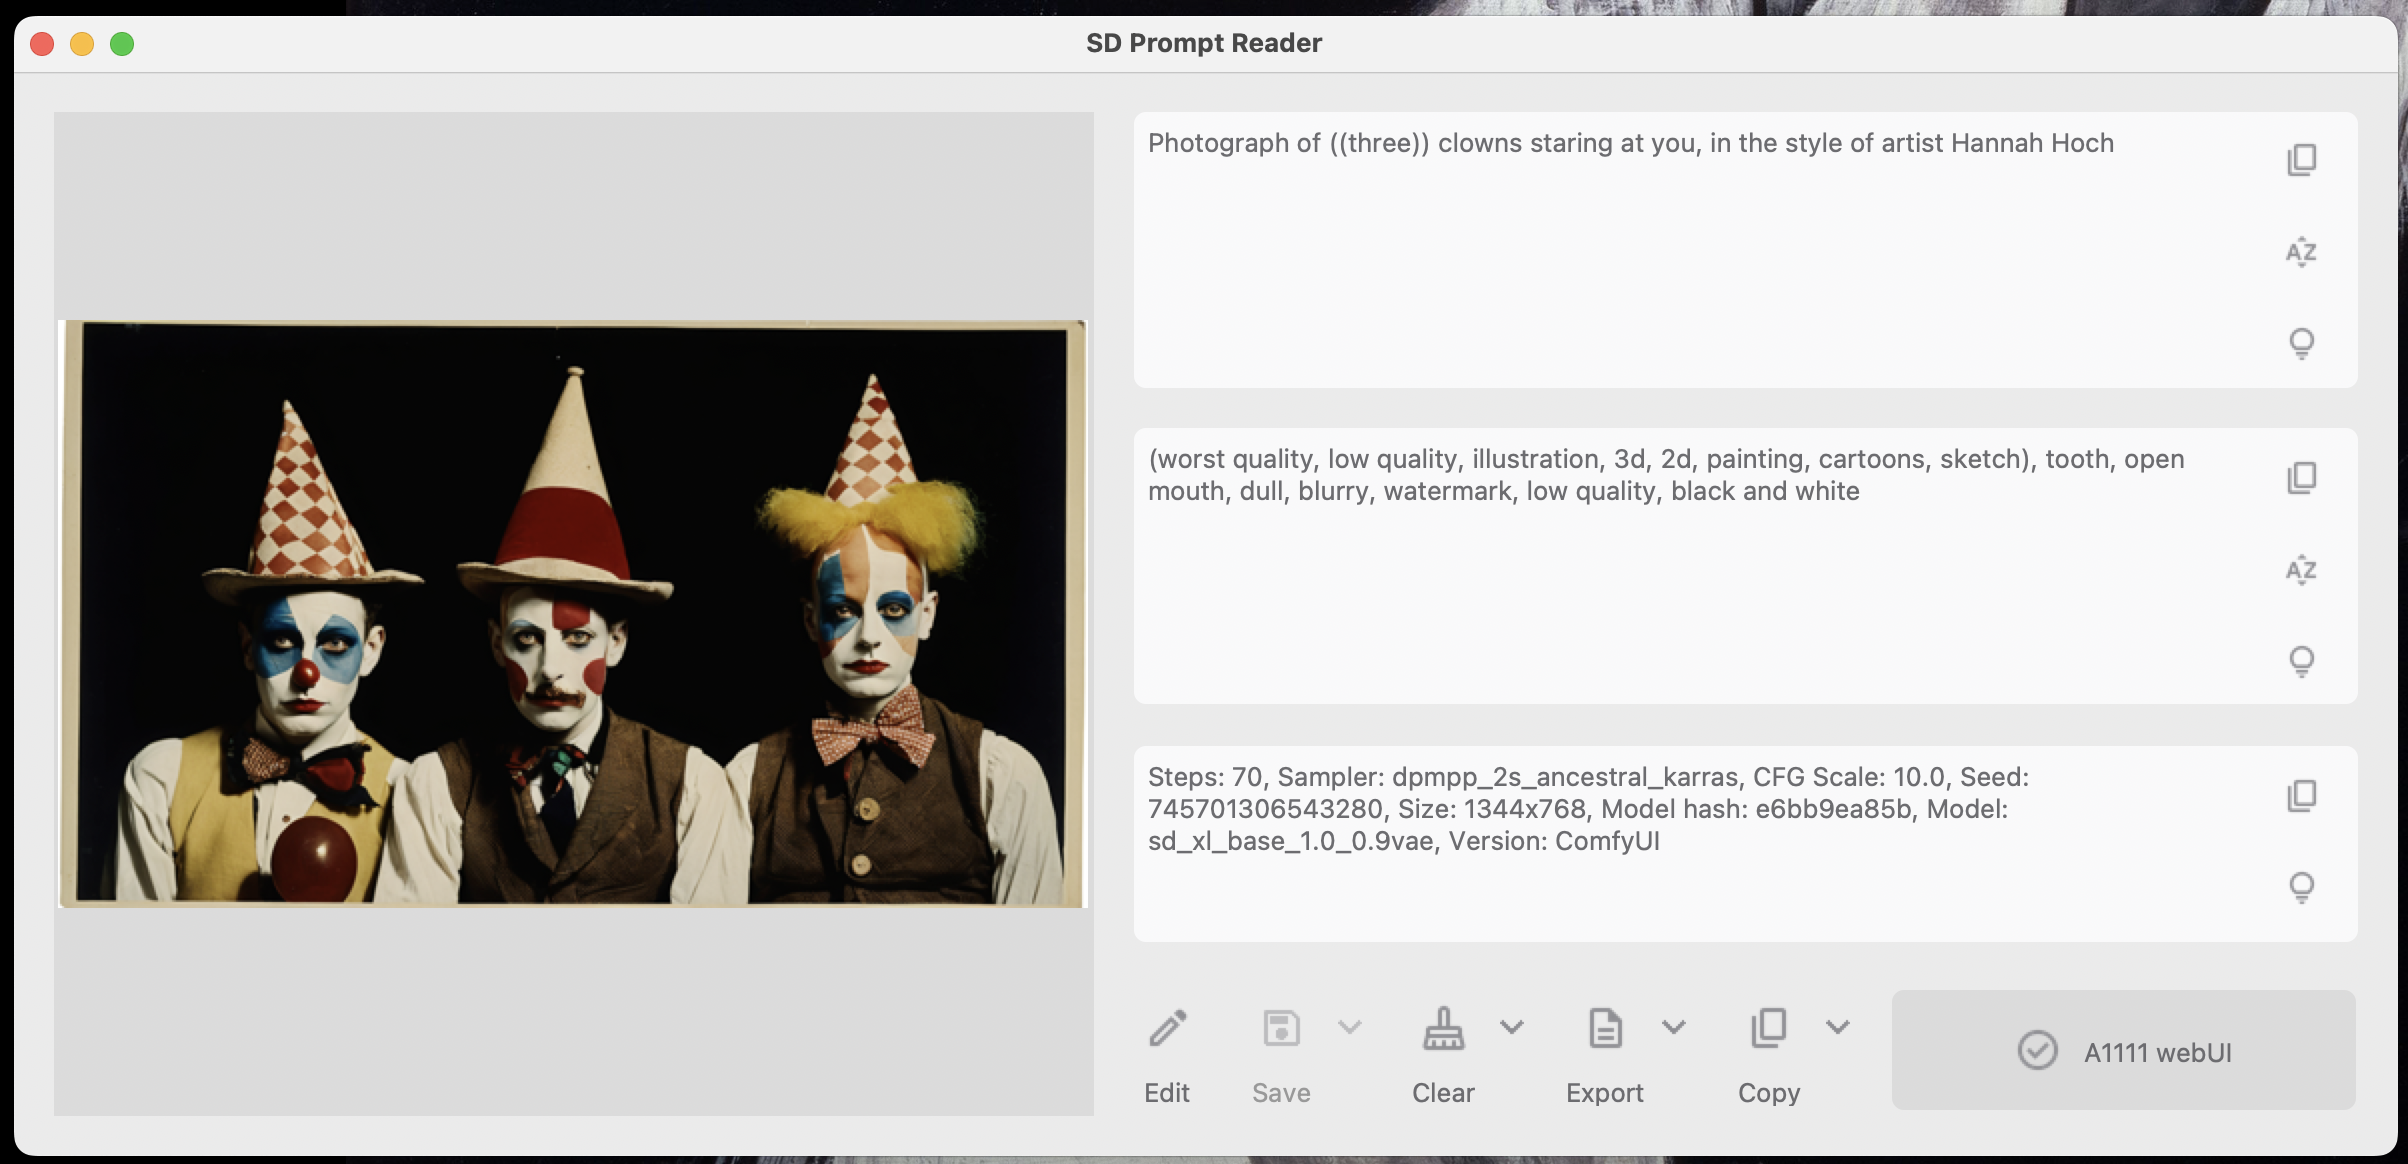
Only the videos generated with AP Workflow don’t embed the metadata.
Prompt and Parameters Print
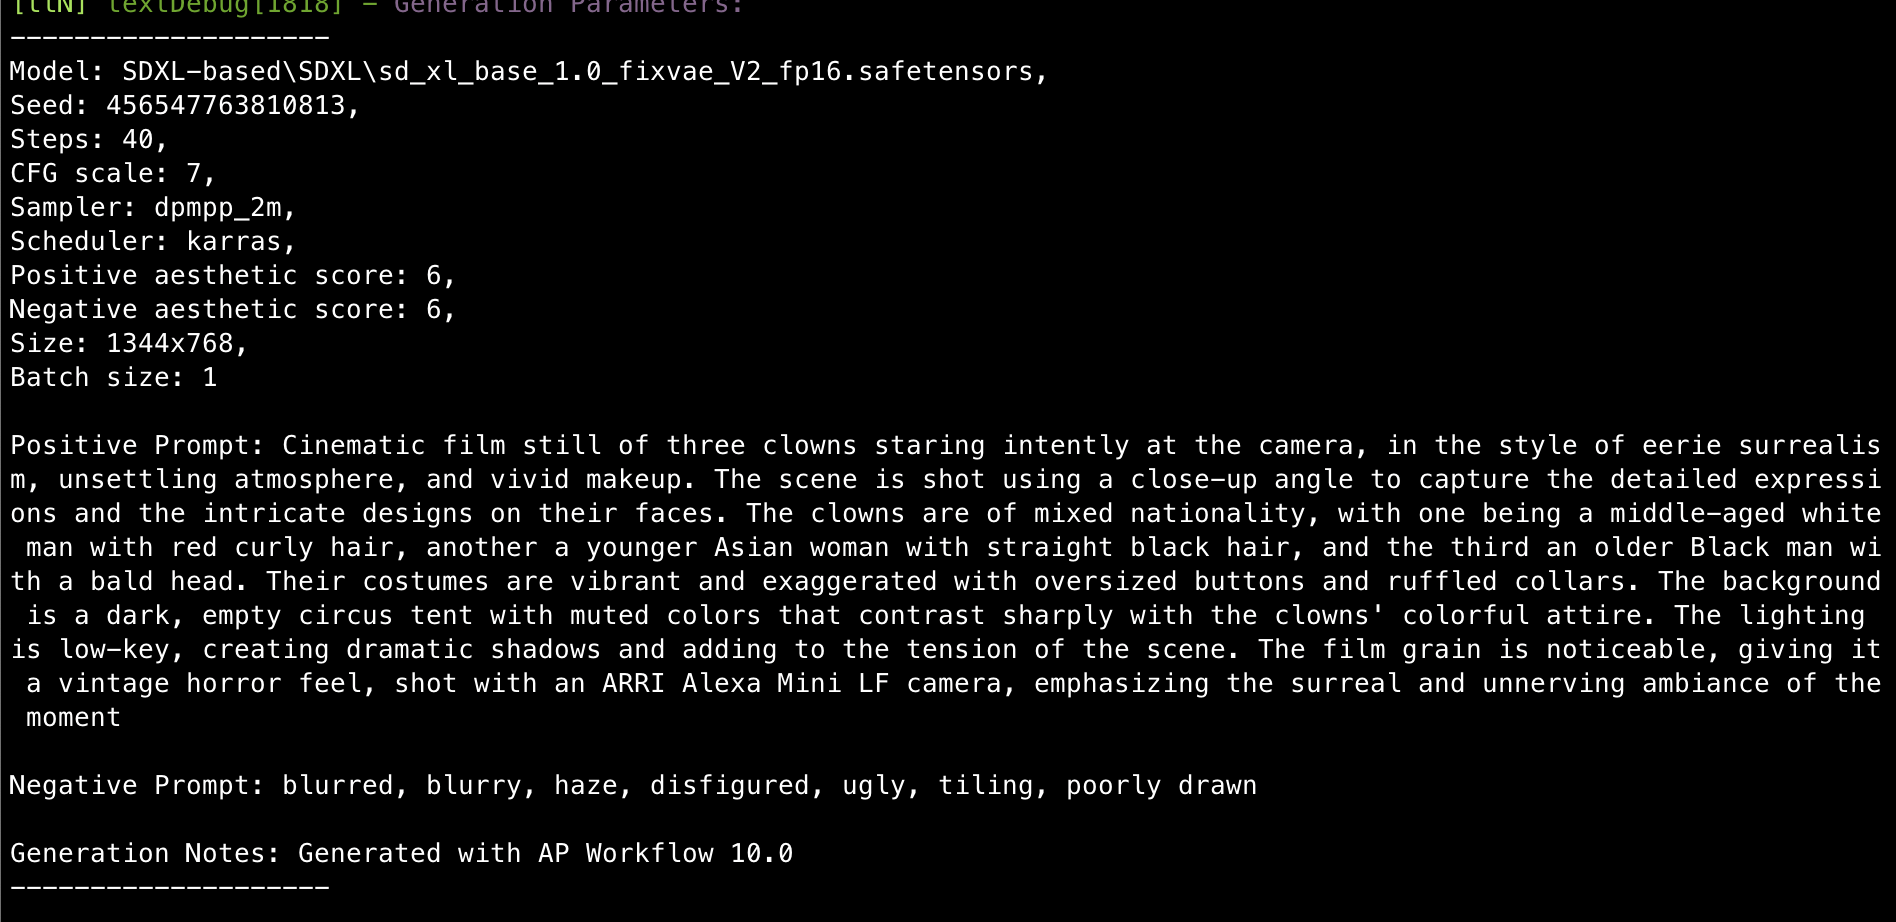
Both negative and positive prompt, together with a number of parameters, are printed in the terminal to provide more information about the ongoing image generation.
You can also write a note about the next generation. The note will be printed in the terminal as soon as the ComfyUI queue is processed.
This information can be further saved in a file by adding the appropriate node, if you wish so.
Support
Required Custom Nodes
If, after loading the workflow, you see a lot of red boxes, you must install some custom node suites.
AP Workflow depends on multiple custom nodes that you might not have installed. You should download and install ComfyUI Manager, and then install the required custom nodes suites to be sure you can run this workflow.
You have two options:
- Recommended: Restore AP Workflow custom node suites snapshot.
- Discouraged: Install the required custom node suites manually.
Restore AP Workflow custom node suites snapshot
The manual installation of the required custom node suites has been proven unreliable for many users. To improve your chances to run this workflow, you should create a clean install of ComfyUI, manually install the ComfyUI Manager, and then restore a snapshot of Alessandro’s ComfyUI working environment.
This will help you install a version of each custom node suite that is known to work with AP Workflow 10.0.
Instructions:
- Install ComfyUI in a new folder to create a clean, new environment (a Python 3.10 venv is recommended).
- Install ComfyUI Manager.
- Shut down ComfyUI.
- Download the snapshot.
- Move/copy the snapshot to the /ComfyUI/custom_nodes/ComfyUI-Manager/snapshots folder.
- Restart ComfyUI.
- Open ComfyUI Manager and then the new Snapshot Manager.
- Restore the AP Workflow 10.0 Custom Nodes Snapshot.
- Restart ComfyUI.
Notice that the Snapshot Manager is a relatively new, experimental feature and it might not work in every situation. If you encounter errors, check the documentation: https://github.com/ltdrdata/ComfyUI-Manager#snapshot-manager
Install the required custom node suites manually
Install the nodes listed below via ComfyUI Manager.
Notice that some of these nodes conflict with others that you might have already installed. This is why this option is highly discouraged and you should not use it unless you know how to troubleshoot a ComfyUI environment.
- \ComfyUI\custom_nodes\websocket_image_save.py
- \ComfyUI\custom_nodes\comfyui-previewlatent
- \ComfyUI\custom_nodes\ComfyUI-post-processing-nodes
- \ComfyUI\custom_nodes\sd-perturbed-attention
- \ComfyUI\custom_nodes\masquerade-nodes-comfyui
- \ComfyUI\custom_nodes\cg-image-picker
- \ComfyUI\custom_nodes\ComfyUI_InstantID
- \ComfyUI\custom_nodes\ComfyUI_experiments
- \ComfyUI\custom_nodes\ComfyUI-Notifications
- \ComfyUI\custom_nodes\ComfyUI_IPAdapter_plus
- \ComfyUI\custom_nodes\comfyui-inpaint-nodes
- \ComfyUI\custom_nodes\ComfyUI-DynamiCrafterWrapper
- \ComfyUI\custom_nodes\comfyui-browser
- \ComfyUI\custom_nodes\ComfyUI-PickScore-Nodes
- \ComfyUI\custom_nodes\ComfyUI-Advanced-ControlNet
- \ComfyUI\custom_nodes\ComfyUI-N-Sidebar
- \ComfyUI\custom_nodes\ComfyUI-Custom-Scripts
- \ComfyUI\custom_nodes\ComfyUI-Frame-Interpolation
- \ComfyUI\custom_nodes\ComfyUI-KJNodes
- \ComfyUI\custom_nodes\comfyui_segment_anything
- \ComfyUI\custom_nodes\ComfyUI-Florence2
- \ComfyUI\custom_nodes\rgthree-comfy
- \ComfyUI\custom_nodes\ComfyUI_Comfyroll_CustomNodes
- \ComfyUI\custom_nodes\comfyui-prompt-reader-node
- \ComfyUI\custom_nodes\comfyui_controlnet_aux
- \ComfyUI\custom_nodes\ComfyUI_tinyterraNodes
- \ComfyUI\custom_nodes\ComfyUI-TiledDiffusion
- \ComfyUI\custom_nodes\ComfyUI-Inspire-Pack
- \ComfyUI\custom_nodes\failfast-comfyui-extensions
- \ComfyUI\custom_nodes\ComfyUI_FaceAnalysis
- \ComfyUI\custom_nodes\ComfyUI-dnl13-seg
- \ComfyUI\custom_nodes\Plush-for-ComfyUI
- \ComfyUI\custom_nodes\ComfyUI-SUPIR
- \ComfyUI\custom_nodes\ComfyUI-DDColor
- \ComfyUI\custom_nodes\ComfyUI-VideoHelperSuite
- \ComfyUI\custom_nodes\ComfyUI-Manager
- \ComfyUI\custom_nodes\ComfyUI-Impact-Pack
- \ComfyUI\custom_nodes\was-node-suite-comfyui
- \ComfyUI\custom_nodes\comfy_mtb
- \ComfyUI\custom_nodes\comfyui-reactor-node
- \ComfyUI\custom_nodes\ComfyUI-CCSR
- \ComfyUI\custom_nodes\ComfyUI-VoiceCraft
- \ComfyUI\custom_nodes\ComfyUI-Crystools
AttributeError: module ‘cv2.gapi.wip.draw’ has no attribute ‘Text’
after which, ComfyUI will fail to import multiple custom node suites at startup.
If so, you must perform the following steps:
- Terminate ComfyUI.
- Manually enter its virtual environment from the ComfyUI installation folder by typing: source venv/bin/activate
- Type: pip uninstall -y opencv-python opencv-contrib-python opencv-python-headless
- Type: pip install opencv-python==4.7.0.72
- Restart ComfyUI.
Required AI Models
Many nodes used throughouth AP Workflow require specific AI models to perform their task. While some nodes automatically download the required models, others require you to download them manually.
At today, there’s not an easy way to export the full list of models Alessandro is using in his ComfyUI environment.
The best way to know which models you need to download is by opening ComfyUI Manager and proceed to the Install Models section. Here you’ll find a list of all the models each node requires or recommends to download.
Alessandro’s paths don’t necessarily match your paths, and ComfyUI doesn’t automatically remap AP Workflow AI models to the AI models to your paths.
Additionally, in some cases, if ComfyUI cannot find the AI model that a node requires, it might automatically reassign another model to a certain node. For example, this happens with ControlNet-related nodes.
Most errors encountered by AP Workflow users can be solved by carefully reviewing the image of the workflow on this page, and the manual remapping of the AI models in the nodes.
Node XYZ failed to install or import
Occasionally, AP Workflow users can’t install or import a custom node suite necessary to run AP Workflow. This happens when you try to use AP Workflow in a pre-existing ComfyUI environment that you have installed loooooooooong time ago.
If you have a similar problem, be sure to:
-
Have all your packages up to date in your Python virtual environment for ComfyUI.
To do so:- Terminate ComfyUI.
- Manually activate its Python virtual environment with source /venv/bin/activate.
- Run pip install -U pip to upgrade pip.
- Run pip install -U setuptools to upgrade setuptools.
- Run pip install -U wheel to upgrade wheel.
- Run pip install -U -r requirements.txt to upgrade all the packages in the virtual environment.
- Check the installation instructions of the custom node suite you are having troubles with.
If you have installed ComfyUI in a new environment and you still fail to install or import a custom node suite, open an issue on the GitHub repository of the author.
Setup for Prompt Enrichment With LM Studio
AP Workflow allows you to enrich their positive prompt with additional text generated by a locally-installed open access large language model.
AP Workflow supports this feature through the integration with LM Studio.
Any model supported by LM Studio can be used by AP Workflow, including all models at the top of the HuggingFace LLM Leaderboard.
Guidance on how to install and configure LM Studio is beyond the scope of this document and you should refer to the product documentation for more information.
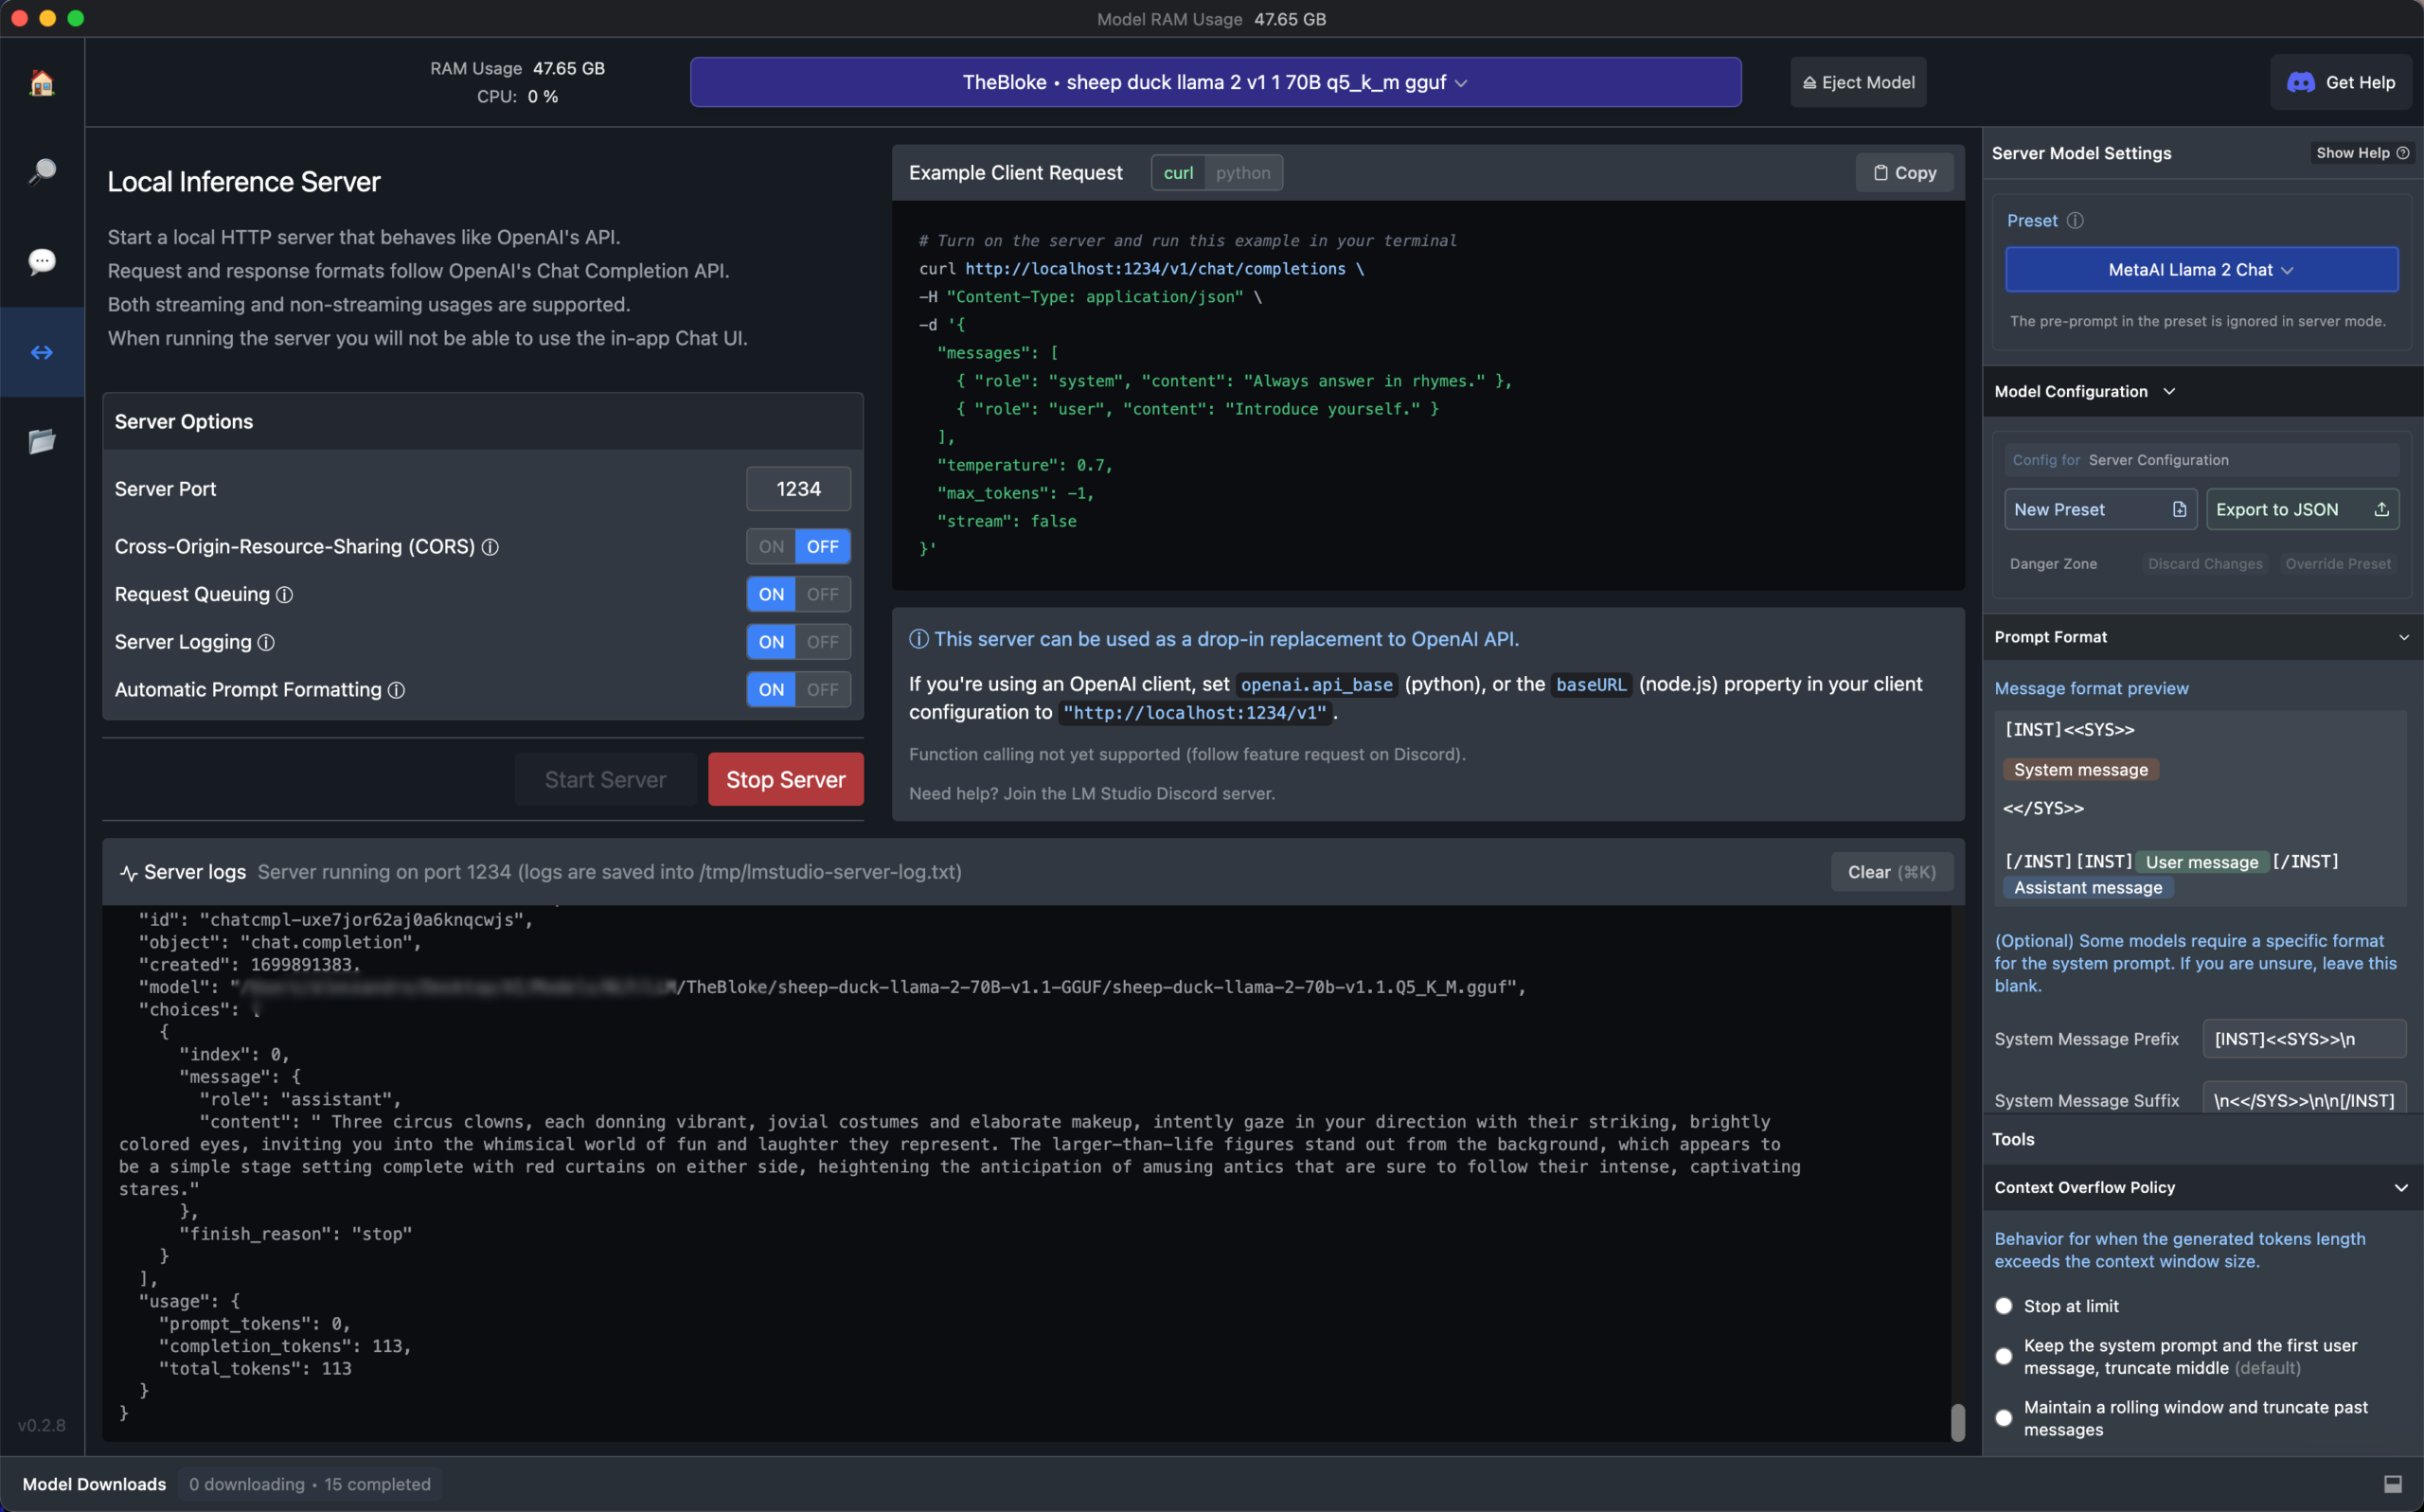
Once LM Studio is installed and configured, you must load the LLM of choice, assign to it the appropriate preset, and activate the Local Inference Server.
Alessandro usually works with LLaMA 3 fine-tuned models and the LLaMA 3 preset (which LM Studio automatically downloads).
Secure ComfyUI connection with SSL
If you need to secure the connection to your ComfyUI instance with SSL you have multiple options.
In production environments, you typically use signed SSL certificates served by a reverse proxy like Nginx or Traefik.
In small, development environments, you might want to server SSL certificates directly from the machine where ComfyUI is installed.
If so, you have multiple possibilities, described below.
If you already have signed SSL certificates.
- Use the following flags to start your ComfyUI instance:
–tls-keyfile “path_to_your_folder_of_choice\comfyui_key.pem” –tls-certfile “path_to_your_folder_of_choice\comfyui_cert.pem”
If you don’t have signed SSL certificates, you want to test ComfyUI with a self-signed certificate, and you want to connect to it from the same machine where it’s running.
- Download the latest mkcert binary for your operating system, save it in an appropriate folder, and rename it as mkcert (purely for convenience).
- Open the terminal app you prefer and go to the folder where you stored the mkcert binary.
-
Install the certificate authority by executing following command:
mkcert -install -
Generate a new certificate for your ComfyUI machine by executing following command:
mkcert localhost - (purely for convenience) Rename the generated files from localhost.pem to comfyui_cert.pem and from localhost-key.pem to comfyui_key.pem
- Move comfyui_cert.pem and comfyui_key.pem to a folder where you want to store the certificate in a permanent way. For example: C:\Certificates\
-
Use the following flags to start your ComfyUI instance:
–tls-keyfile “C:\Certificates\comfyui_key.pem” –tls-certfile “C:\Certificates\comfyui_cert.pem”
If you don’t have signed SSL certificates, you want to test ComfyUI with a self-signed certificate, and you want to connect to it from another machine in the local network.
On the Windows/Linux/macOS machine where ComfyUI is installed:
- Download the latest mkcert binary for your operating system, save it in an appropriate folder, and rename it as mkcert (purely for convenience).
- Open the terminal app you prefer and go to the folder where you stored the mkcert binary.
-
Install the certificate authority by executing following command:
mkcert -install -
Generate a new certificate for your ComfyUI machine by executing following command:
mkcert ip_address_of_your_comfyui_machine
(for example, for 192.168.1.1, run mkcert 192.168.1.1) - (purely for convenience) Rename the generated files from 192.168.1.1.pem to comfyui_cert.pem and from 192.168.1.1-key.pem to comfyui_key.pem
- Move comfyui_cert.pem and comfyui_key.pem to a folder where you want to store the certificate in a permanent way. For example: C:\Certificates\
-
Use the following flags to start your ComfyUI instance:
–tls-keyfile “C:\Certificates\comfyui_key.pem” –tls-certfile “C:\Certificates\comfyui_cert.pem” -
Find the mkcert rootCA.pem file created at step #4.
For example, in Windows 11, the file is located in C:\Users\your_username\Application Data\mkcert - Copy rootCA.pem on a USB key and transfer it to the machine that you want to use to connect to ComfyUI.
On the macOS machine that you want to use to connect to ComfyUI:
- Open Keychain Access
- Drag and drop the rootCA.pem file from the USB key into the System keychain.
- Enter your administrator password if prompted.
- Find the rootCA.pem certificate in the System keychain, double-click it, and expand the Trust section.
- Set When using this certificate to Always Trust.
- Close the certificate window and enter your administrator password again if prompted.
- If you had a ComfyUI tab already open in your browser, close it and connect to ComfyUI again.
On the Windows machine that you want to use to connect to ComfyUI:
- Open the Microsoft Management Console by pressing Win + R and typing mmc.
- In the Microsoft Management Console, go to File > Add/Remove Snap-in.
- In the Add or Remove Snap-ins window, select Certificates from the list and click Add.
- Choose Computer account when prompted for which type of account to manage.
- Select Local computer (the computer this console is running on).
- Click Finish, then OK to close the Add or Remove Snap-ins window.
- In the Microsoft Management Console, expand Certificates (Local Computer) in the left-hand pane.
- Expand Trusted Root Certification Authorities.
- Right-click on Certificates under Trusted Root Certification Authorities and select All Tasks > Import.
- In the Certificate Import Wizard, click Next.
- Click Browse and navigate to the USB key where you saved the rootCA.pem file.
- Change the file type to All Files (*.*) to see the rootCA.pem file.
- Select the rootCA.pem file and click Open, then Next
- Ensure Place all certificates in the following store is selected and Trusted Root Certification Authorities is chosen as the store.
- Click Next, then Finish to complete the import process.
- To verify the certificate is installed, go back to the Microsoft Management Console. Expand Trusted Root Certification Authorities and click on Certificates. Look for your rootCA certificate in the list. It should now be trusted by the system.
- Restart the Windows machine if necessary.
On the Ubuntu Linux machine that you want to use to connect to ComfyUI:
- Copy the rootCA.pem file from the USB key to the /usr/local/share/ca-certificates directory.
-
Update the CA store by running the following command in a terminal window:
sudo update-ca-certificates -
Verify the installation by running the following command in a terminal window:
sudo ls /etc/ssl/certs/ | grep rootCA.pem
FAQ
Are you trying to replicate A1111 WebUI, Vladmandic SD.Next, or Invoke AI?
Alessandro never intended to recreate those UIs in ComfyUI and has no plan to do so in the future.
While AP Workflow enables some of the capabilities offered by those UIs, its philosophy and goals are very different. Read below.
Why are you using ComfyUI instead of easier-to-maintain solutions like A1111 WebUI, Vladmandic SD.Next, or Invoke AI?
- Alessandro wanted to learn, and help others learn, the SDXL architecture, understanding what goes where and how different building blocks influence the generation. A1111 WebUI and similar tools makes it harder. With ComfyUI, you knows exactly what’s happening. So AP Workflow is, first and foremost, a learning tool.
- While Alessandro considers A1111 WebUi and similar toos invaluable, and he’s grateful for their gift to the community, he finds their interfaces chaotic. He wanted to explore alternative design layouts. Many people might argue that ComfyUI is even more chaotic than A1111 WebUI or that AP Workflow, in particular, is more chaotic than A1111 WebUI.
Ultimately, different brains process information in different ways, and some people prefer one approach over the other. Some people find node systems easier to work with than more standard UIs. - Alessandro served in the enterprise IT industry for over two decades. ComfyUI allowed him to demostrate how AI models paired with automation can be used to create complex image generation pipelines useful in certain industrial applications. This is not currently possible with A1111 WebUI and similar solutions.
- The most sophisticated AI systems we have today (Midjourney, ChatGPT, etc.) don’t generate images or text by simply processing the user prompt. They depend on complex pipelines and/or Mixture of Experts (MoE) which enrich the user prompt and process it in many different ways. Alessandro’s long-term goal is to use ComfyUI to create multi-modal pipelines that can produce digital outputs as good as the ones from the AI systems mentioned above, without human intervention. AP Workflow 5.0 was the first step in that direction. The goal is not attainable with A1111 WebUI and similar solutions as they are implemented today.
I Need More Help!
AP Workflow is provided as is, for research and education purposes only.
However, if your company wants to build commercial solutions on top of ComfyUI and you need help with this workflow, you could work with Alessandro on your specific challenge.
Extras
Special Thanks
AP Workflow wouldn’t exist without the dozen of custom nodes created by very generous members of the AI community.
In particular, special thanks to:
@rgthree:
- His Reroute nodes are the most flexible reroute node you can find among custom node suites.
- His Context Big and Context Switch nodes are the best custom nodes available today to branch out an expansive workflow.
- His Fast Groups Muter/Bypasser nodes offer the ultimate flexibility in creating customized control switches.
- His Image Comparer node is an exceptional help in inspecting the image generation.
@receyuki:
- He evolved his SD Parameter Generator node to support the many needs of AP Workflow, working above and beyond to deliver the ultimate control panel for complex ComfyUI workflows.
@kijai:
- His Set and Get nodes allow the removal of most wires in the workflow without sacrificing the capability to understand the flow of information across the workflow.
- His CCSR and SUPIR nodes makes exceptional upscaling possible.
- His DDColor node powers the Colorizer function of the workflow.
- His Florence2Run node powers a key part of the Caption Generator function of the workflow.
- His DynamiCrafterI2V node is the main engine of the Video Generator function of the workflow.
@cubiq:
- His implementation of the IP Adapter technique allows all of us to do exceptional things with Stable Diffusion.
@ltdrdata:
- The nodes in his Impact Pack power many Image Manipulators functions in the workflow.
- His ComfyUI Manager is critical to manage the myriad of package and model dependencies in the workflow.
@glibsonoran:
- He evolved his Plush custom node suite to support the many needs of AP Workflow and now his nodes power the Prompt Enricher and the Caption Generator functions.
@acly:
- His nodes to support the Fooocus inpaint model power the Inpainting with Mask function of this workflow.
@crystool:
- His Load Image with Metadata node provides the critical feature in the Uploader function which helps us all stay sane when dealing with a large set of images.
@talesofai:
- His XYZ Plot node is the most elegant and powerful implementation of a plot function to date.
@LucianoCirino and @jags111:
- @LucianoCirino’s XY Plot node is the very reason why Alessandro started working on this workflow.
- @jags111’s fork of LucianoCirino’s nodes allowed AP Workflow offer a great XY Plot function for a long time.
Thanks to all of you, and to all other custom node creators for their help in debugging and enhancing their great nodes.
Full Changelog
- AP Workflow now supports Stable Diffusion 3 (Medium).
- The Face Detailer and Object Swapper functions are now reconfigured to use the new SDXL ControlNet Tile model.
- DynamiCrafter replaces Stable Video Diffusion as the default video generator engine.
- AP Workflow now supports the new Perturbed-Attention Guidance (PAG).
- AP Workflow now supports browser and webhook notifications (e.g., to notify your personal Discord server).
- The default ImageLoad nodes in the Uploader function are now replaced by crystian’s Load image with metadata nodes so you can organize your ComfyUI input folder in subfolders rather than waste hours browsing the hundreds of images you have accumulated in that location.
- The Efficient Loader and Efficient KSampler nodes have been replaced by default nodes to better support Stable Diffusion 3. Hence, AP Workflow now features a significant redesign of the L1 pipeline. Plus, you should not have caching issues with LoRAs and ControlNet nodes anymore.
- The Image Generator (Dall-E) function does not require you to manually define the user prompt anymore. It will automatically use the one defined in the Prompt Builder function.
- The XYZ Plot function is now located under the Controller function to reduce configuration effort.
- Both Upscaler (CCSR) and Upscaler (SUPIR) functions are now configured to load their respective models in safetensor format.
- The ControlNet function has been completely redesigned to support the new ControlNets for SD3 alongside ControlNets for SD 1.5 and XL.
- AP Workflow now supports the new MistoLine ControlNet, and the AnyLine and Metric3D ControlNet preprocessors in the ControlNet functions, and in the ControlNet Previews function.
- AP Workflow now features a different Canny preprocessor to assist Canny ControlNet. The new preprocessor gives you more control on how many details from the source image should influence the generation.
- AP Workflow is now configured to use the DWPose preprocessor by default to assist OpenPose ControlNet.
- While not configured by default, AP Workflow supports the new ControlNet Union model.
- The configuration of LoRAs is now done in a dedicated function, powered by @rgthree’s Power LoRA Loader node. You can optionally enable or disable it from the Controller function.
-
AP Workflow now features an always-on Prompt Tagger function, designed to simplify the addition of LoRA and embedding tags at the beginning or end of both positive and negative prompts. You can even insert the tags in the middle of the prompt.
The Prompt Builder and the Prompt Enricher functions have been significantly revamped to accomodate the change. The LoRA Info node has been moved inside the Prompt Tagger function.
- AP Workflow now features an IPAdapter (Aux) function. You can chain it together with the IPAdapter (Main) function, for example, to influence the image generation with two different reference images.
- The IPAdapter (Aux) function features the IP Adapter Mad Scientist node.
- The Uploader function now supports uploading a 2nd Reference Image, used exclusively by the new IPAdapter (Aux) function.
- There’s a simpler switch to activate an attention mask for the IPAdapter (Main) function.
- The Prompt Enricher function now supports the new version of Advanced Prompt Enhancer node, which allows you to use both Anthropic and Groq LLMs on top of ones offered by OpenAI and the open access ones you can serve with a local installation of LM Studio or OogaBooga.
- Florence 2 replaces MoonDream v1 and v2 in the Caption Generator function.
- The Caption Generator function does not require you to manually define LoRA tags anymore. It will automatically use the ones defined in the new Prompt Tagger function.
- The Prompt Enricher function and the Caption Generator function now default to the new OpenAI GPT-4o model.
- The Perp Neg node is not supported anymore due to its new implementation incompatible with the workflow layout.
- The Self-Attention Guidance node is gone. We have more modern and reliable ways to add details to generated images.
- The Lora Info node in the Prompt Tagger function has been removed. The same capabilities (in a better format) are provided by the Power Lora Loader node in the LoRAs function.
- The old XY Plot function is gone, as it depends on the Efficiency nodes. AP Workflow now features an XYZ Plot function, which is significantly more powerful.
9.0
-
AP Workflow now features two next-gen upscalers: CCSR, and the new SUPIR. Since one performs better than the other depending on the type of image you want to upscale, each one has a dedicated Upscaler function.
Additionally, the Upscaler (SUPIR) function can be used to perform Magnific AI-style creative upscaling. -
A new Image Generator (Dall-E) function allows you to generate an image with OpenAI Dall-E 3 instead of Stable Diffusion. This function should be used in conjunction with the Inpainter without Mask function to take advantage of Dall-E 3 superior capability to follow the user prompt and Stable Diffusion superior ecosystem of fine-tunes and LoRAs.
You can also use this function in conjunction with the Image Generator (SD) function to simply compare how each model renders the same prompt.
- A new Advanced XYZ Plot function allows you to study the effect of ANY parameter change in ANY node inside AP Workflow.
- A new Face Cloner function uses the InstantID technique to quickly change the style of any face in a Reference Image you upload via the Uploader function.
- A new Face Analyzer function allows you to evaluate a batch of generated images and automatically choose the ones that present facial landmarks very similar to the ones in a reference image you upload via the Uploader function. This function is especially useful in conjuction with the new Face Cloner function.
-
A new Training Helper for Caption Generator function will allow you to use the Caption Generator function to automatically caption hundreds of images in a batch directory. This is useful for model training purposes.
The Uploader function has been modified to accomodate this new feature.
To use this new capability you must activate both the Caption Generator and the Training Helper for Caption Generator functions in the Controller function.
- AP Workflow now features a number of @rgthree Bookmark nodes to quickly recenter the workflow on the 10 most used functions. You can move the Bookmark nodes where you prefer to customize your hyperjumps.
- AP Workflow now supports new @cubiq’s IPAdapter plus v2 nodes.
- AP Workflow now supports the new PickScore nodes, used in the Aesthetic Score Predictor function.
- The Uploader function now allows you to upload both a source image and a reference image. The latter is used by the Face Cloner, the Face Swapper, and the IPAdapter functions.
- The Caption Generator function now offers the possibility to replace the user prompt with a caption automatically generated by Moondream v1 or v2 (local inference), GPT-4V (remote inference via OpenAI API), or LLaVA (local inference via LM Studio).
-
The three Image Evaluators in AP Workflow are now daisy chained for sophisticated image selection.
First, the Face Analyzer (see below) automatically chooses the image/s with the face that most closely resembles the original. From there, the Aesthetic Score Predictor further ranks the quality of the images and automatically chooses the ones that match your criteria. Finally, the Image Chooser allows you to manually decide which image to further process via the image manipulator functions in the L2 of the pipeline.
You have the choice to use only one of these Image Evaluators, or any combination of them, by enabling each one in the Controller function.
- The Prompt Enricher function has been greatly simplified and now it works again open access models served by LM Studio, Oobabooga, etc. thanks to @glibsonoran’s new Advanced Prompt Enhancer node.
- The Image Chooser function now can be activated from the Controller function with a dedicated switch, so you don’t have to navigate the workflow just to enable it.
- The LoRA Info node is now relocated inside the Prompt Builder function.
- The configuration parameters of various nodes in the Face Detailer function have been modified to (hopefully) produce much better results.
- The entire L2 pipeline layout has been reorganized so that each function can be muted instead of bypassed.
- The ReVision function is gone. Probably, nobody was using it.
- The Image Enhancer function is gone, too. You can obtain a creative upscaling of equal or better quality by reducing the strength of ControlNet in the SUPIR node.
- The StyleAligned function is gone, too. IPAdapter has become so powerful that there’s no need for it anymore.
8.0
- A completely revamped Upscaler function, capable of generating upscaled images of higher fidelity than Magnific AI (at least, in its current incarnation) or Topaz Gigapixel.
See the !work-in-progress! videos below (best watched in 4k).
- A new Image Enhancer function, capable of adding details to uploaded, generated, or upscaled images (similar to what Magnific AI does).
- The old Inpainter function is now split in two different functions: Inpainter without Mask, which is an img2img generation, and Inpainter with Mask function, which uses the exceptional Fooocus inpaint model to generate much better inpainted and outpainted images.
- A new Colorizer function which uses the @kijai’s DDColor node to colorize black & white pictures or recolor colored ones.
- A new Aesthetic Score Predictor function can be used to automatically choose the image of a batch that best align with the submitted prompt. The automatically selected image can then be further enhanced with other AP Workflow functions like the Hand and Face Detailers, the Object and Face Swappers, or the Upscaler.
- A new Comparer function, powered by the new, exceptionally useful Image Comparer node by @rgthree, shows the difference between the source image and the image at the end of AP Workflow pipeline.
- The Hand Detailer function can now be configured to use the Mesh Graphormer method and the new SD1.5 Inpaint Depth Hand ControlNet model. Mesh Graphormer struggles to process hands in non-photographic images, so it’s disabled by default.
- The Caption Generator function now uses the new Moondream model instead of BLIP.
- The AI system of choice (ChatGPT or LM Studio) powering the Prompt Enricher function is now selectable from the Controller function. You can keep both active and compare the prompts generated by OpenAI models via ChatGPT against the prompts generated by open access models served by LM Studio.
- The ControlNet + Control-LoRAs function now includes six preprocessors that can be used to further improve the effect of ControlNet models. For example, you can use the new Depth Anything model to improve the effect of ControlNet Depth model.
- The Face Detailer function now has dedicated diffusion and controlnet model loading, just like the Hand Detailer and the Object Swap functions, for increased flexiblity.
- AP Workflow now supports the new version of @receyuki’s SD Parameter Generator and SD Prompt Saver nodes.
- The LoRA Keywords function is no more. The node is now part of the Caption Generator function (but it can be used at any time, independently, and even if the Caption Generator function is inactive).
7.0
- The name and location of the various functions across AP Workflow changed significantly.
- LoRAs didn’t apply correctly after the 6.0 re-design to support SD 1.5. This is now fixed.
- AP Workflow now supports Stable Diffusion Video via a new, dedicated function.
- A new Self-Attention function allows you to increase the level of detail of a generated or uploaded image.
- A new Inpainter function supports the most basic type of Uploader: partial denoise of a source image.
- HighRes Fix has been reorganized in a dedicated function.
- A new Mask Inpainting function offers support for manual inpainting tasks.
- A new Outpainting function allows you to extend the source image’s canvas in any direction before inpainting.
- A new Caption Generator function automatically captions source images loaded via the Uploader function. This is meant to increase the quality of inpainting and upscaling tasks.
- A new StyleAligned function allows you to generate a batch of images all with the same style.
- A new Watermarker function automatically adds a text of your choice to the generated image.
- A new ControlNet Preview function allows you to automatically preview the effects of 12 ControlNet models on a source image (including the new AnimalPose and DensePose).
- The ControlNet + Control-LoRAs function now influences all KSampler nodes rather than just to one dedicated to image generation.
- The IPAdapter function is now part of the main pipeline and not a branch on its own.
- The IPAdapter function can leverage an attention mask defined via the Uploader function.
- AP Workflow now supports the Kohya Deep Shrink optimization via a dedicated function.
- AP Workflow now supports the Perp-Neg optimization via a dedicated function.
- The Free Lunch optimization has been reorganized in dedicated function.
- The Debug function now includes @jitcoder’s LoRA Info node, which allows you to discover what are the trigger words for the LoRAs you want to use in the Efficient Loader node. For now, the process is still manual, but it’s better than nothing.
- The Upscaler function is completely revamped, following the approach and settings recommended by @thibaudz.
- @chrisgoringe Image Chooser node is now a first class citizen, and it has been moved to gate the access to the Image Enhancement pipeline (the default operating mode is pass through).
- You’ll see fewer route nodes thanks to another brilliant update of @receyuki’s SD Parameter Generator node.
- You’ll see a drastic reduction of the wires thanks to the extraordinary new @rgthree’s Fast Groups Muter/Bypasser nodes and @kijai’s Set and Get nodes.
- The Universal Negative Prompt optimization has been removed for the time being.
6.0
- The Image Generator (SD) function now support image generation with Stable Diffusion 1.5 base and fine-tuned models.
- The Prompt Enricher function now supports local large language models (LLaMA, Mistral, etc.) via LM Studio, Oobabooga WebUI, and other AI systems.
- A new HighRes Fix function has been added.
- A new IPAdapter function has been added.
- A new Object Swapper function has been added. Now, you can automatically recognize objects in generated or uploaded images and change their aspect according to the user prompt.
- A truer image manipulation pipeline has been created. Now, images created with the SDXL/SD1.5 models, or the ones uploaded via the Uploader function, can go through a first level of manipulation, via the Refiner, HighRes Fix, IPAdapter, or the ReVision functions. The resulting images, then, can go through a second level of manipulation, via the following functions, in the specified order: Hand Detailer, Face Detailer, Object Swapper, Face Swapper, and finally Upscaler.
You can activate one or more image manipulation functions, creating a chain. - The Prompt Builder in the Image Generator (SD) function has been revamped to be more visual and flexible.
- Support for @jags111’s fork of @LucianoCirino’s Efficiency Nodes for ComfyUI Version 2.0+ has been added.
- The ControlNet function now leverages the image upload capability of the Uploader function.
- The workflow’s wires have been reorganized to simplify debugging.
5.0
- A new Face Swapper function has been added.
- A new Prompt Enricher function has been added. Now, you can improve your user prompt with the help of GPT-4 or GPT-3.5-Turbo.
- A new Image2Image function has been added. Now, you can upload an existing image, or a batch of images from a folder, and pass it/them through the Hand Detailer, Face Detailer, Upscaler, or Face Swapper functions.
- A new FreeU v2 node to test the updated implementation of the Free Lunch technique.
- Even fewer wires thanks to @receyuki’s much-enhanced SD Prompt Generator node.
- More compatible metadata in generated images thanks to @receyuki’s SD Prompt Saver node.
- Support for the new version of @chrisgoringe’s Preview Chooser node.
- The workflow now features centralized switches to bypass the Prompt Enricher, XY Plot, and the ControlNet XL functions.
4.0.2
- The generation parameters are now almost completely controlled by a single node which also supports checkpoint configurations.
- The worflow features Even fewer wires thanks to the implementation of per-group @rgthree Repeater nodes.
- A better way to choose between the two available FreeU nodes has been added.
- Debug information printed in the console are now better organized.
4.0.1
- Cleaner layout without disordered wires.
- Even more debug information printed in the console.
- Two different Free Lunch nodes with settings recommended by the AI community have been added.
4.0
- The layout has been partially revamped. Now, the Controller switch, the Prompt Builder function, and Configurator selector are closer to each other and more compact. The debug nodes are in their Debug function.
- More debug information is now printed in the terminal (and it could be saved in a log file if you wish so).
- Images are now saved with metadata readable in A1111 WebUI, Vladmandic SD.Next, and SD Prompt Reader.
- A new Hands Refiner function has been added.
- The experimental Free Lunch optimization has been implemented.
- A new Preview Chooser experimental node has been added. Now, you can select the best image of a batch before executing the entire workflow.
- The Universal Negative Prompt is not enabled by default anymore. There are scenarios where it constrains the image generation too much.
3.2
- The Prompt Builder function now offers the possibility to print in the terminal the seed and a note about the queued generation.
- Experimental support for the Universal Negative Prompt theory of /u/AI_Characters, as described here, has been added.
- Context Switch nodes have been rationalized.
- The ReVision model now correctly works with the Face Detailer function.
- If you enable the second upscaler model in the Upscaler function, it now saves the image correctly.
3.1
- Support for Fine-Tuned SDXL 1.0 models that don’t require the Refiner model.
- A second upscaler model has been added to the Upscaler function.
- The Upscaler function now previews what image is being upscaled, to avoid confusion.
- An automatic mechanism to choose which image to upscale based on a priority system has been added.
- A (simple) debug to print in the terminal the positive and negative prompt before any generation has been added.
- Now, the workflow doesn’t generate unnecessary images when you don’t use certain functions.
- The wiring has been partially simplified.
3.0
- Now, you can choose between the SDXL 1.0 Base + Refiner models and the ReVision model to generate an image. Once generated, the image can be used as source for the Face Detailer function, the Upscaler function, or both. You can also bypass entire portions of AP Workflow to speed up the image generation.
2.7
- A very simple Prompt Builder function, inspired by the style selector of A1111 WebUI / Vladmandic SD.Next, has been added. While the XY Plot function is meant for systematic comparisons of different prompts, this Prompt Builder function is meant to quickly switch between prompt templates that you use often.
2.6
- An Upscaler function has been added. Now, you can upscale the images generated by the SDXL Refiner, the FaceDetailer, or the ReVision functions has been added.
2.5
- A ReVision function has been added. Now, you can generate images inspired by a source image or to blend together two source images into a new image.
2.4
- A LoRA Stack node to load up to three LoRAs has been added. If necessary, you can further extend it with additional LoRA Stack nodes chained together.
2.3
- The ControlNet XL function has been expanded to include the new Control-LoRAs released by Stability AI: Canny, Depth, Recolor, and Sketch.
2.2
- The Face Detailer function has been completely revamped. Now, you can detail small faces and big faces in separate ways.
2.1
- The XY Plot function is completely revamped to offer maximum flexibility. It’s a bit harder to use, but you are not limited to four comparison terms only.
2.0
- The workflow is now organized with a much cleaner layout.
1.6
- Some changes in the way the KSampler Efficiency Advanced node displays image previews required a modification of the configuration of that node. If your node has a red border and you don’t know why, re-download the workflow.
1.5
- The workflow has been completely redesigned to use the SDXL models as they were meant to be used.